6.2 INSTALL DRAIN JOINT
Perform the following steps to install the drain joint. Running the unit in heat mode will require
a drain joint. Before bolting the outdoor unit in place, install the drain joint at the bottom of the
unit.
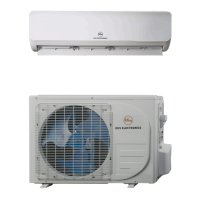
1. Insert the drain joint into the hole in the base pan of the unit.
2. Facing the front of the unit, rotate the drain joint 90° until it locks in place.
3. If needed, connect a drain hose extension (not included) to the drain joint to redirect
water from draining under the unit during heating mode.
NOTE: There are two different types of drain joints depending on the type of outdoor unit.
In cold climates, make sure that the drain hose is sloped properly to ensure swift
water drainage. If water drains too slowly
or is trapped inside the hose, it can freeze in the
6.3 SECURE UNIT
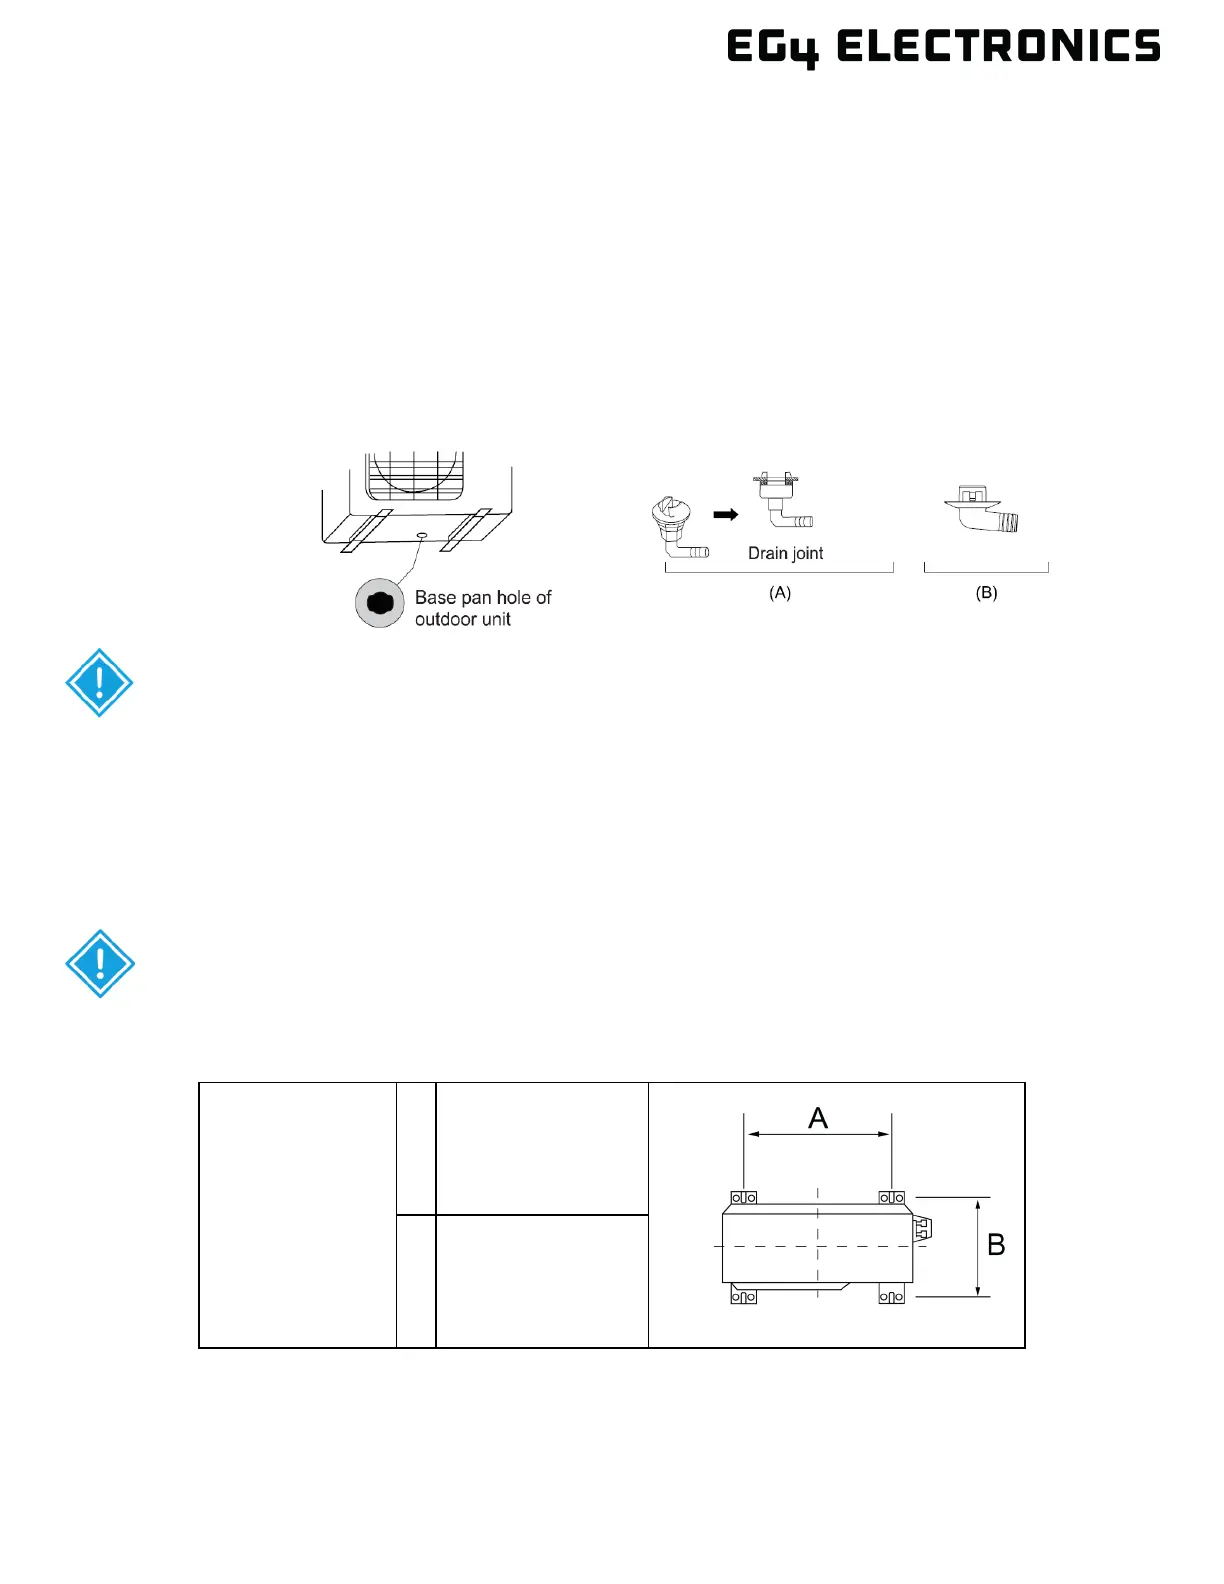
The outdoor unit can be anchored to the ground or on a wall-mounted bracket. The distances
between the mounting feet are listed in the chart below to aid in preparing the outdoor unit for
installation.
IMPORTANT: The outdoor unit must be securely fastened before attaching the refrigerant
line set as well as any required electrical cables. Attaching the line set and electrical cables to
a secure unit will assist in protecting the line set and cables from over-flexing and damage
due to unexpected movement of the unit.
9K & 12K
BTU Units
A 21.2 in. (539mm)
B 12.9 in. (327mm)
Unit Mounting Dimensions