1.1.4 Wiring & Extension Cables:
The extension cables and wiring provide the connections from the probes, modules or direct connections
to the EDC inputs. Once the wiring and extension cables are installed into the aircraft they become semi-
permanent. Everything else (MVP, EDC, Probes and Modules) can be easily disconnected and removed.
1.2 Operational Overview:
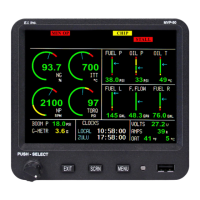
The MVP system measures an engine or aircraft function using a probe or transducer and displays that function on the
MVP screen using the following steps:
A. A probe is mechanically connected to the aircraft and electrically connected to an EDC input. The pre-
wired harness provides most of the electrical connections from the probes to the EDC inputs.
B. The EDC converts the signals from the probes to a digital format (RS422) and sends the data to the MVP.
The EDC has 33 inputs. Many of the inputs can be used for a number of different types of functions.
C. The MVP receives the data from the EDC and the data is processed through the MVP as follows:
1. The data received for each EDC input is assigned a function name and probe. Function names
and probes are set up for each EDC input in System Conguration Screen #1. The probe assigned
provides specic calibration algorithms. Calibration algorithms for any function can be modied in
System Conguration Screen #5. Some functions have special calibration/setup screens (Fuel Tank
Calibration, Tach Time, Engine Hours, Flight Time, Pressure Altitude, Flaps, Trim, etc.).
2. The function is then placed on the Main or System screen of the MVP. System Conguration
Screens #2 or #3 allows the placement location of the function to be selected for either the Main or
System screen.
3. The analog and/or digital display of the function (with redlines, limits, colors, etc) is depicted on
the appropriate screen. Redlines, limits, colors, units, blinking, master warnings and voice les can
be set up for any function in Conguration Screens #4.
Much of the setup for the certified MVP is done at the factory and cannot be changed by the pilot or installer. See the
following Password Protection section for more information.
1.3 Installation Overview:
The installer should start the installation by reviewing the EDC Wiring Work Sheets. There are three work sheets,
one for each of the 37-pin D-Sub connectors on the EDC. The work sheets are packaged with each of the three EDC
wire harnesses. The work sheets provide a list of the functions and probes/transducers included with this kit. The
installation is achieved by performing the following steps:
A. The MVP display is installed. The MVP can be mounted one of two ways; from behind the instrument
panel or on a sub-panel, which is then mounted to the aircraft instrument panel from the front. This method
hides the cutout for the MVP case and makes a clean and good-looking installation. Electronics International
has a MVP sub-panel avaliable (see EI Price List for more information).
B. Probes and Transducers are installed.
C. Control Panels, Pots and Warning Lights are installed.
4
 Loading...