@
@
ESSAI DE
COUTURE
Une
fois
la machine enf il6e,
proc6dez
comme suit:
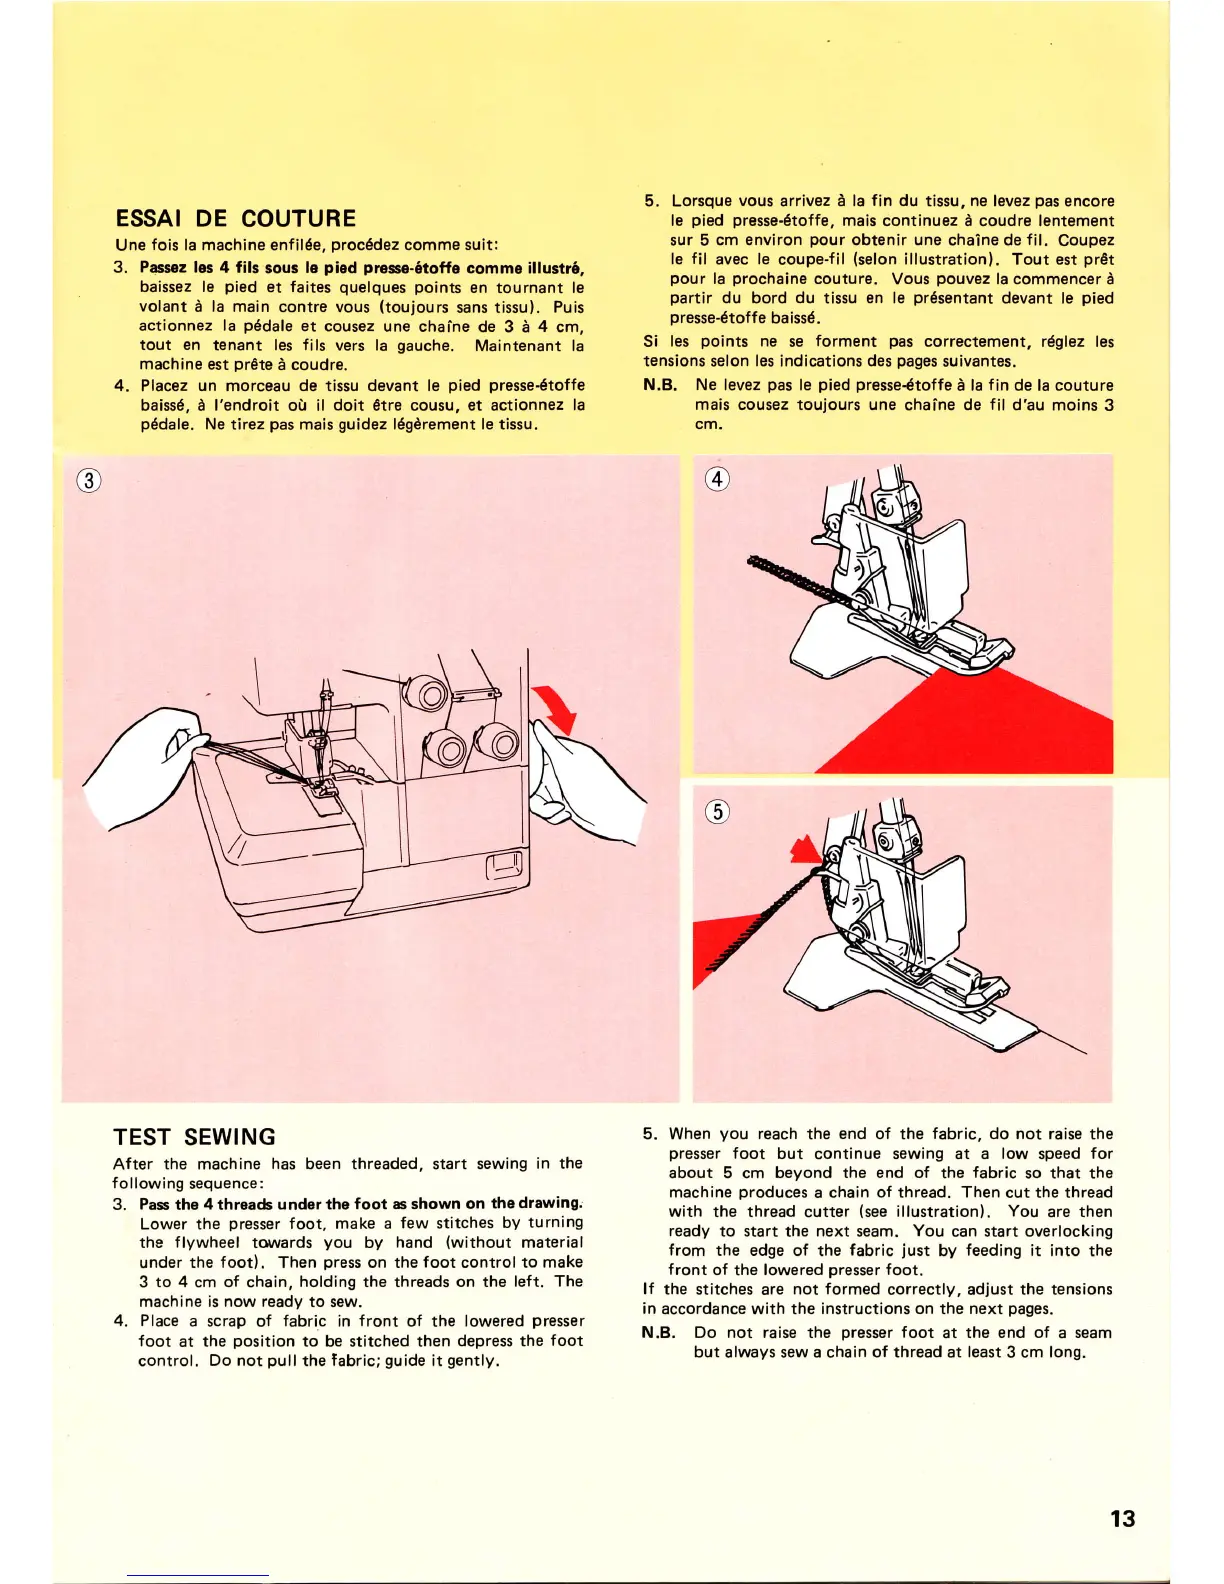
3.
Passez les
4 fils
sous
le
pied
prosse-6toffe
comme illustr6,
baissez le
pied
et faites
quelques points
en
tournant
le
volant
d la main
contre vous
(toujours
sans tissul.
Puis
actionnez la
pddale
et
cousez une chaine
de 3 i
4
cm,
tout en
tenant les fils vers la
gauche.
Maintenant la
machine est
prete
i
coudre.
4.
Placez un morceau
de
tissu devant
le
pied presse-6toffe
baiss6, i
l'endroit
o0 il
doit
€tre cousu. et actionnez
la
pddale.
Ne tirez
pas
mais
guidez
ldgdrement le tissu,
TEST
SEWING
After the machine
has
been threaded, start sewing
in the
following
sequence:
3.
Pass
tho
4threads underthe foot 6
shown on
thedrawingj
Lower the
presser
foot, make a
few stitches
by
turning
the
flywheel
tovrrards
you
by
hand
(without
material
under
the foot). Then
press
on the
foot
control to
make
3 to 4 cm of chain,
holding the threads on the left.
The
machine is now ready to sew.
4. Place
a scrap
of
fabric in front
of the
lowered
presser
foot
at
the
position
to
be stitched then
depress the
foot
control.
Do not
pull
the
fabric;
guide
it
gently.
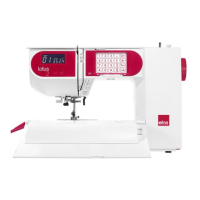
5. Lorsque
vous
arrivez d la
fin du
tissu,
ne
levez
pas
encore
le
pied presse-6toffe,
mais
continuez
d
coudre lentement
sur
5
cm environ
pour
obtenir une chaine de
fil.
Coupez
le
fil
avec le
coupe-fil
(selon
illustration).
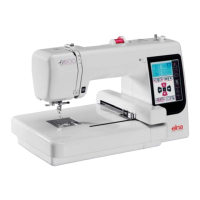
Tout est
prdt
pour
la
prochaine
couture.
Vous
pouvez
la commencer I
partir
du bord du tissu en le
pr6sentant
devant le
pied
presse-6toffe
baiss6.
Si
les
points
ne
se
forment
pas
correctement, rdglez les
tensions selon les indications des
pages
suivantes.
N,B.
Ne levez
pas
le
pied presse4toffe
i la
f
in de la couture
mais cousez toujours
une chaine de
fil
d'au moins
3
cm.
5. When
you
reach
the
end
of the
fabric, do not
raise the
presser
foot but
continue sewing at
a low
speed
for
about 5
cm
beyond the end of the fabric
so that the
machine
produces
a chain
of
thread.
Then
cut the thread
with the thread
cutter
(see
illustration).
You
are
then
ready to start
the
next seam. You
can start overlocking
from the edge of
the
fabric
iust
by
feeding it
into the
front of
the
lowered
presser
foot.
lf the stitches
are
not formed
correctly, adjust the tensions
in
accordance with the
instructions on
the
next
pages.
N,B. Do not raise the
presser
foot
at
the end of
a
seam
but
always sew
a
chain
of thread at least
3
cm long.
13