3.6.1 T-200 transducer capsule assembly removal
This procedure is for removing a transducer capsule assembly from a T-200 transducer
assembly installed in a meter body. The line can be pressurized or at atmospheric pressure.
Procedure
1. Disconnect transducer cabling and chordset from the T-200 transducer assembly by
turning the cable nut counter-clock wise.
2. Disconnect the transducer cable nut. Pull the chordset from the transducer
assembly.
Note
Do not twist the chordset as you disconnect it from the transducer assembly.
3. Remove the transducer retainer from the transducer stalk by turning the retainer
counter-clock wise with a 1 1/8” wrench.
4. Hold the transducer capsule assembly and carefully pull it out of the transducer
stalk.
Note
Do not remove the Kapton tape on the top of the transducer capsule assembly.
5. Use non-fiber paper to remove any residue of acoustic coupling fluid on the surface
of Kapton tape.
6. Record the serial number of the removed transducer capsule assembly and put it in
a safe place.
7. Repeat Step 1 - Step 6 if more transducer capsule assemblies are to be removed.
3.6.2
T-200 transducer capsule assembly installation
This procedure is for installing a transducer capsule assembly into a transducer assembly
while it is installed in a meter body.
Procedure
1. Ensure that the transducer stalk, retainer and capsule assembly are clean and free of
debris.
2. Record the serial number of the transducer capsule assembly to be installed and
make sure it is correct for the intended transducer assembly.
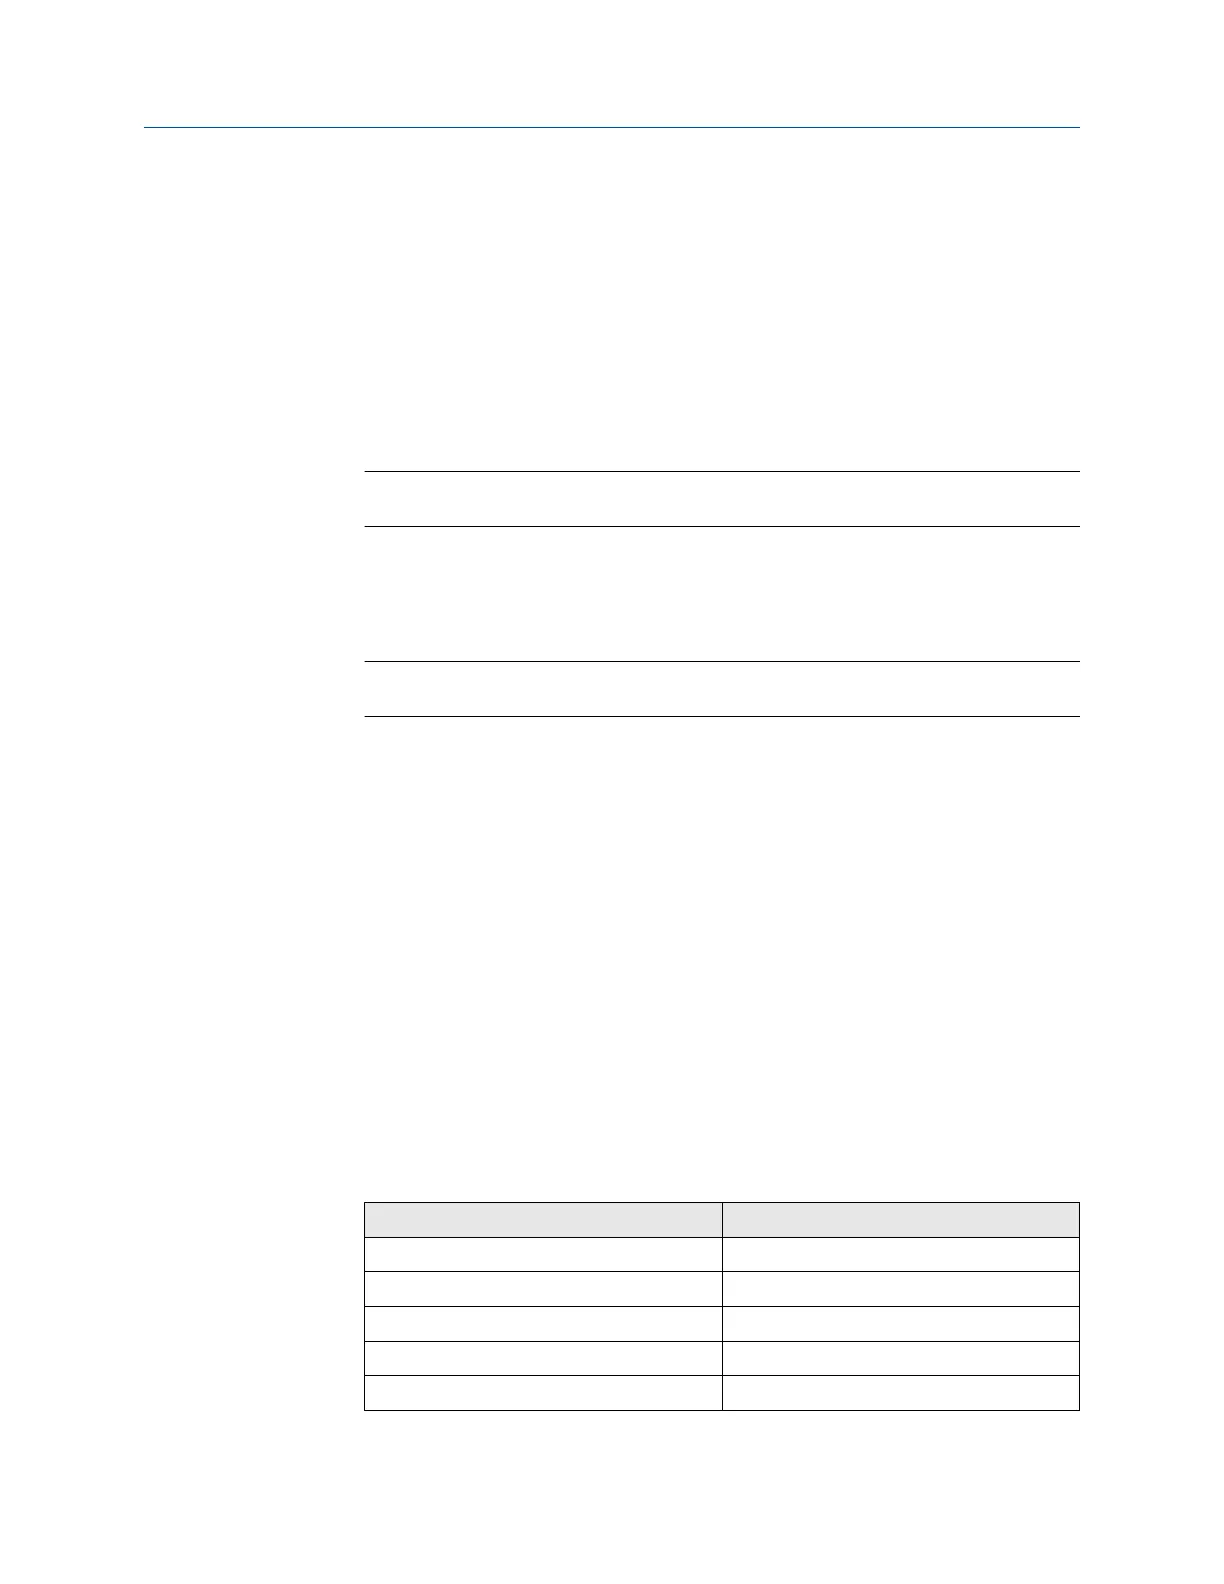
Table 3-3: T-200 transducer stalk assembly configuration and capsule setting
Stalk assembly configuration Smart capsule setting
-01 1
-02 2
-03 3
-04 4
-05 5
Maintenance and Troubleshooting manual Meter repairs
P/N 3-9000-769 June 2019
Maintenance and Troubleshooting manual 75

 Loading...


