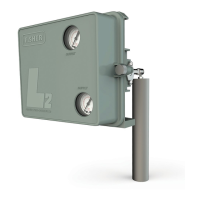
4195KA, KB, KC, and KS Controllers
Instruction Manual
Form 5207
April 2007
4-5
General Calibration Instructions
Note
If the controller has the auto/manual
station (suffix letter E), be sure the
controller is in the automatic mode
before performing calibration.
If the prestartup checks, or startup, reveal faulty
controller operation, perform the calibration
described in this section. These instructions are
valid for either shop or field calibration, provided that
open loop conditions exist. Unless otherwise noted,
key numbers are found in figure 7-1.
Do not use the gauges supplied with the controller
during calibration. Monitor process pressure, supply
pressure, controller output pressure, and if
applicable, remote set point pressure with external
gauges.
Process Indicator Zero and Span
Calibration
Before starting this procedure:
D Provide a regulated process pressure to the
controller and a means of measurement external to
the controller.
D Provide a means of measuring the controller
output pressure by connecting the controller output
to a pressure gauge (open-loop conditions must
exist). Provide a regulated supply pressure to the
controller. Do not exceed the normal operating
pressure in table 1-6.
Refer to figures 4-1 and 4-3 for adjustment
locations.
Note
Any change to the process pointer
span adjustment will require
readjustment of the process pointer
zero adjustment.
1. Remove the two screws (key 6) and lift off the
proportional band indicator cover (key 36).
2. Set the proportional band between DIRECT and
REVERSE.
3. Apply process pressure equal to the process
scale span lower limit.
4. The process pointer should indicate the process
scale lower limit. If not, adjust the process pointer to
the process scale lower limit by loosening the zero
adjustment locking screw and turning the zero
adjustment screw. Tighten the zero adjustment
locking screw.
5. Apply process pressure equal to the process
scale span upper limit.
6. The process pointer should indicate the process
scale upper limit. If not, adjust the process pointer
span screw to correct one-half the error as follows:
clockwise to increase span for a low indication
(below the upper limit); counterclockwise to
decrease span for a high indication (above the upper
limit).
7. Repeat steps 3 through 6 until the error is
eliminated.
8. Apply process pressure equal to the mid-scale
value on the process scale span. The process
pointer should indicate the mid-scale mark, ±2
percent of span. If the error is greater than ±2
percent, refer to the Maintenance section and
perform the appropriate zero and span adjustment
procedure for Bourdon tube or capsular element
controllers.
9. Adjust the process pointer to within ±1 percent of
the mid-scale mark by loosening the zero
adjustment locking screw and turning the zero
adjustment screw. This distributes the error over the
entire scale range and brings all points within ±1
percent of the process scale span.
10. Apply process pressure equal to the process
scale lower limit.
11. The process pointer should indicate the process
scale lower limit ±1 percent of the scale span.
12. Apply process pressure equal to the process
scale upper limit.
13. The process pointer should indicate the process
scale upper limit ±1 percent of the process scale
span.
14. If the error is greater than ±1 percent, repeat
steps 3 through 13.
Remote Set Point (suffix letter M) Zero
and Span Calibration
Refer to figures 4-1 and 4-3 for adjustment
locations. Refer to figure 7-1 for key number
locations.
Note
Any adjustment of the remote set
point span adjustment screw requires
readjustment of the remote set point
zero adjustment screw.
1. Remove the two screws (key 6) and lift off the
proportional band indicator cover (key 36).
 Loading...

