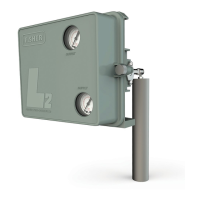
4195KA, KB, KC, and KS Controllers
Instruction Manual
Form 5207
April 2007
2-1
Section 2
Installation
WARNING
To avoid personal injury or property
damage resulting from the sudden
release of pressure:
D Always wear protective clothing,
gloves, and eyewear when performing
any installation operations.
D Personal injury or property
damage may result from fire or
explosion if natural gas is used as the
supply medium and preventative
measures are not taken. Preventative
measures may include: Remote
venting of the unit, re-evaluating the
hazardous area classification,
ensuring adequate ventilation, and the
removal of any ignition sources. For
information on remote venting of this
controller, refer to page 2-5.
D Check with your process or
safety engineer for any additional
measures that must be taken to
protect against process media.
D If installing into an existing
application, also refer to the
WARNING at the beginning of the
Maintenance section of this
instruction manual.
Controller Mounting Orientation
Mount the controller with the housing vertical, as
shown in figure 2-1, so the vent points down.
Pipestand Mounting
Refer to figure 2-2. Pipestand mounting parts are
provided to mount the controller to a 2-inch
(nominal) pipe. Attach a bracket (key 68) to the
controller with cap screws (key 66) and lock washers
(key 67). Attach two clamps (key 69) to the bracket
and fasten the controller to the pipe.
MOUNTING
PLATE
TYPE 657
ACTUATOR
TYPE 4195K
CONTROLLER
TYPE 67CFR
FILTER
REGULATOR
W8462−1
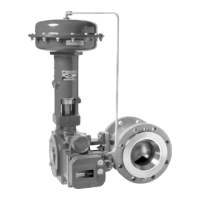
Figure 2-1. Typical Actuator Mounting
Panel Mounting
Using the dimensions shown in figure 2-3, cut a hole
in the panel surface. Slide the controller into the hole
and attach the bracket (key 68) to the rear of the
controller using three cap screws (key 66) and lock
washers (key 67). Tighten the screws (key 70) to
seat the case snugly and evenly against the panel
surface.
Wall Mounting
Using the dimensions in figure 2-4, drill holes in the
wall to align with the four holes in the bracket (key
68). If the tubing is to run through the wall, drill a
hole in the wall large enough to accept the tubing.
Mount the controller to the bracket using three cap
screws (key 66) and lock washers (key 67). Attach
the bracket to the wall, using suitable screws or
bolts.
Actuator Mounting
Refer to figure 2-1. A controller specified for
mounting on a control valve actuator is mounted at
the factory. If the controller is ordered separately for
installation on a control valve actuator, mount the
unit as described in this section. Mounting parts vary
for different actuator types.
 Loading...

