S600+ Field Upgrade Guide
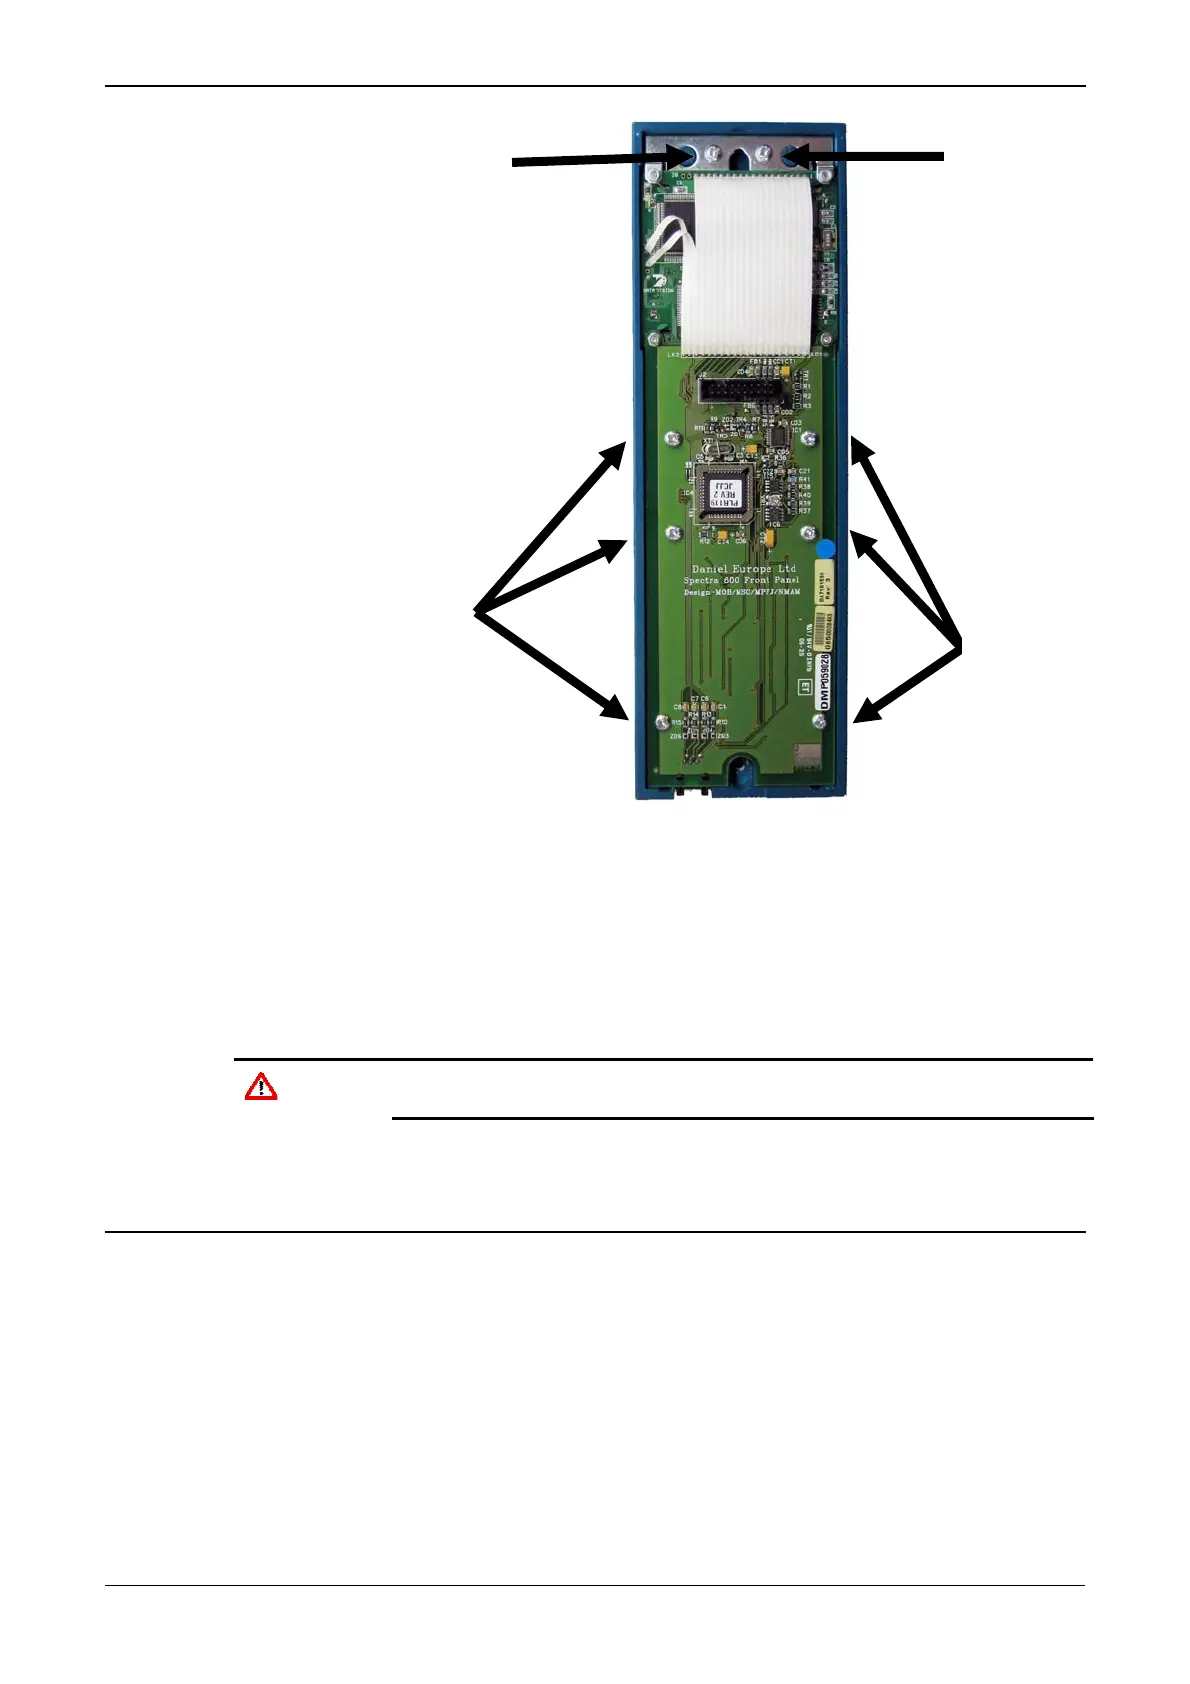
Screw
Screw
Screws
Screws
Figure 4. Securing Screws
3. Lift the PCB from the old faceplate and place the PCB in the new
faceplate.
4. Replace and secure the two top-most screws and the two bottom-
most screws (see Figure 4).
5. Replace and gently tighten the four central screws.
Caution
Do not over-tighten the four central screws. This can cause the rubber
keypad to bind and affect the functioning of the S600+.
Proceed to the next step.
5. Replace the Front Panel Connector Cable
1. Unscrew the two hex screws on the metal panel protecting the
connector cable (see Figure 5) and remove the metal plate.
4 Revised Feb-11

 Loading...