9.3.1 Zero the flowmeter using the display ..........................................................................147
9.3.2 Zero the flowmeter using ProLink II .............................................................................148
9.3.3 Zero the flowmeter using ProLink III ............................................................................149
9.3.4 Zero the flowmeter using the Field Communicator .....................................................151
9.4 Validate the meter .....................................................................................................................152
9.4.1 Alternate method for calculating the meter factor for volume flow .............................153
9.5 Perform a (standard) D1 and D2 density calibration ...................................................................154
9.5.1 Perform a D1 and D2 density calibration using ProLink II .............................................154
9.5.2 Perform a D1 and D2 density calibration using ProLink III ............................................156
9.5.3 Perform a D1 and D2 density calibration using the Field Communicator .....................157
9.6 Perform a D3 and D4 density calibration (T-Series sensors only) ................................................159
9.6.1 Perform a D3 or D3 and D4 density calibration using ProLink II ....................................159
9.6.2 Perform a D3 or D3 and D4 density calibration using ProLink III ...................................160
9.6.3 Perform a D3 or D3 and D4 density calibration using the Field Communicator ............161
9.7 Perform temperature calibration ...............................................................................................163
Chapter 10 Troubleshooting ..........................................................................................................167
10.1 Status LED states .......................................................................................................................168
10.2 Status alarms .............................................................................................................................168
10.3 Flow measurement problems ....................................................................................................180
10.4 Density measurement problems ...............................................................................................182
10.5 Temperature measurement problems .......................................................................................183
10.6 Milliamp output problems .........................................................................................................184
10.7 Frequency output problems ......................................................................................................185
10.8 Use sensor simulation for troubleshooting ................................................................................186
10.9 Check power supply wiring ........................................................................................................187
10.10 Check sensor-to-transmitter wiring ...........................................................................................187
10.11 Check grounding .......................................................................................................................188
10.12 Perform loop tests .....................................................................................................................188
10.12.1 Perform loop tests using the display ...........................................................................188
10.12.2 Perform loop tests using ProLink II ..............................................................................190
10.12.3 Perform loop tests using ProLink III .............................................................................191
10.12.4 Perform loop tests using the Field Communicator ......................................................192
10.13 Check for radio frequency interference (RFI) ..............................................................................194
10.14 Check the HART communication loop .......................................................................................194
10.15 Check HART Address and Loop Current Mode ............................................................................195
10.16 Check HART burst mode ............................................................................................................196
10.17 Check the trimming of the mA output .......................................................................................196
10.18 Check Lower Range Value and Upper Range Value ....................................................................196
10.19 Check mA Output Fault Action ..................................................................................................196
10.20 Check Frequency Output Maximum Pulse Width .......................................................................197
10.21 Check Frequency Output Scaling Method ..................................................................................197
10.22 Check Frequency Output Fault Action .......................................................................................197
10.23 Check Flow Direction .................................................................................................................197
10.24 Check the cutoffs ......................................................................................................................198
10.25 Check for slug flow (two-phase flow) .........................................................................................198
10.26 Check the drive gain ..................................................................................................................198
10.26.1 Collect drive gain data ................................................................................................200
10.27 Check the pickoff voltage ..........................................................................................................200
10.27.1 Collect pickoff voltage data ........................................................................................201
10.28 Check for electrical shorts ..........................................................................................................201
10.28.1 Check the sensor coils .................................................................................................201
Contents
iv Micro Motion
®
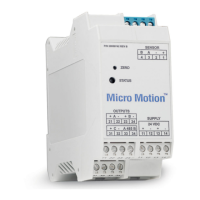
Model 1700 Transmitters with Analog Outputs