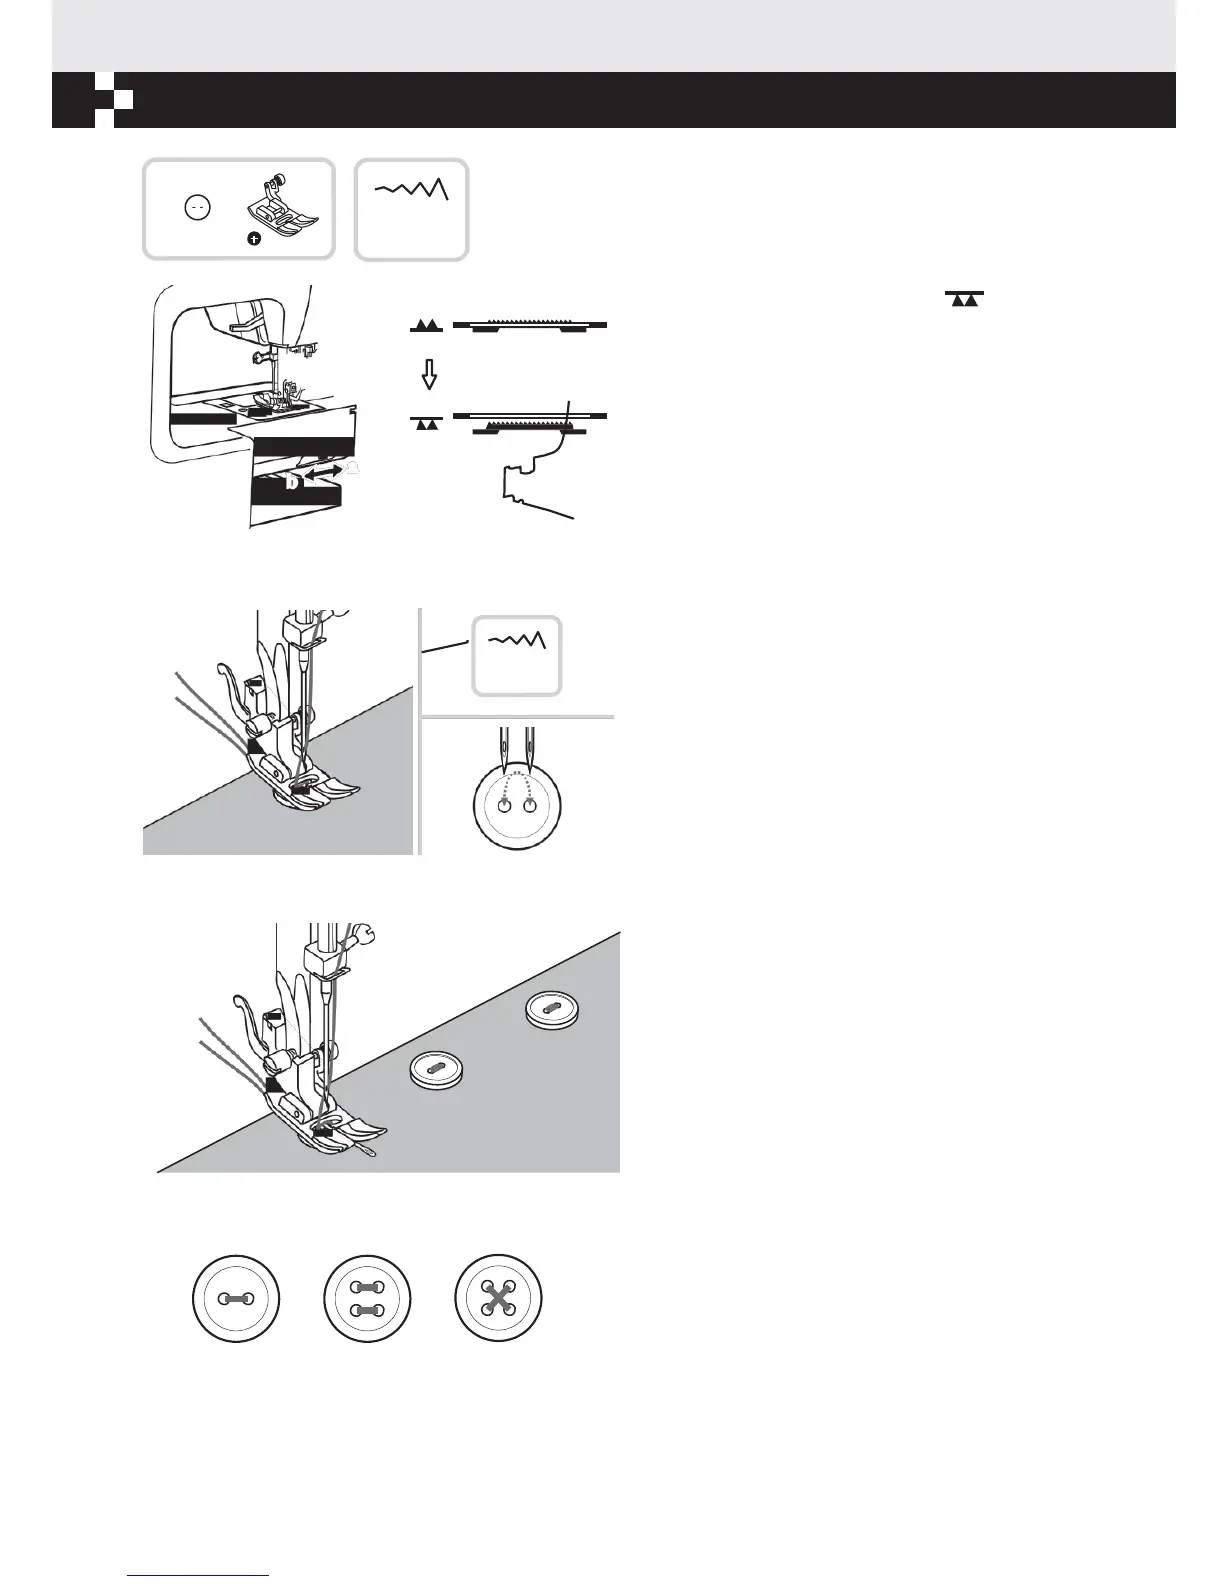
Button sewing
20
2.5~4.5
Move the drop feed control to " " to lower
a
the feed dogs.
Position the work under the foot. Place the button
in the desired position, lower the foot.
b
a
b
2.5~4.5
Select zig zag pattern. Adjust the stitch width to
"2.5-4.5" according to the distance between the
two holes of the button.
Turn the hand wheel to check that the needle goes
cleanly into the left and right holes of the button.
Before sewing, press the Auto-lock button to sew
reinforcement stitches automatically at the
beginning and at the end of the stitch.
If a shank is required, place a darning needle on
top of the button and sew.
For buttons with 4 holes, sew through the front
two holes first, push work forward and then sew
through the back two holes.