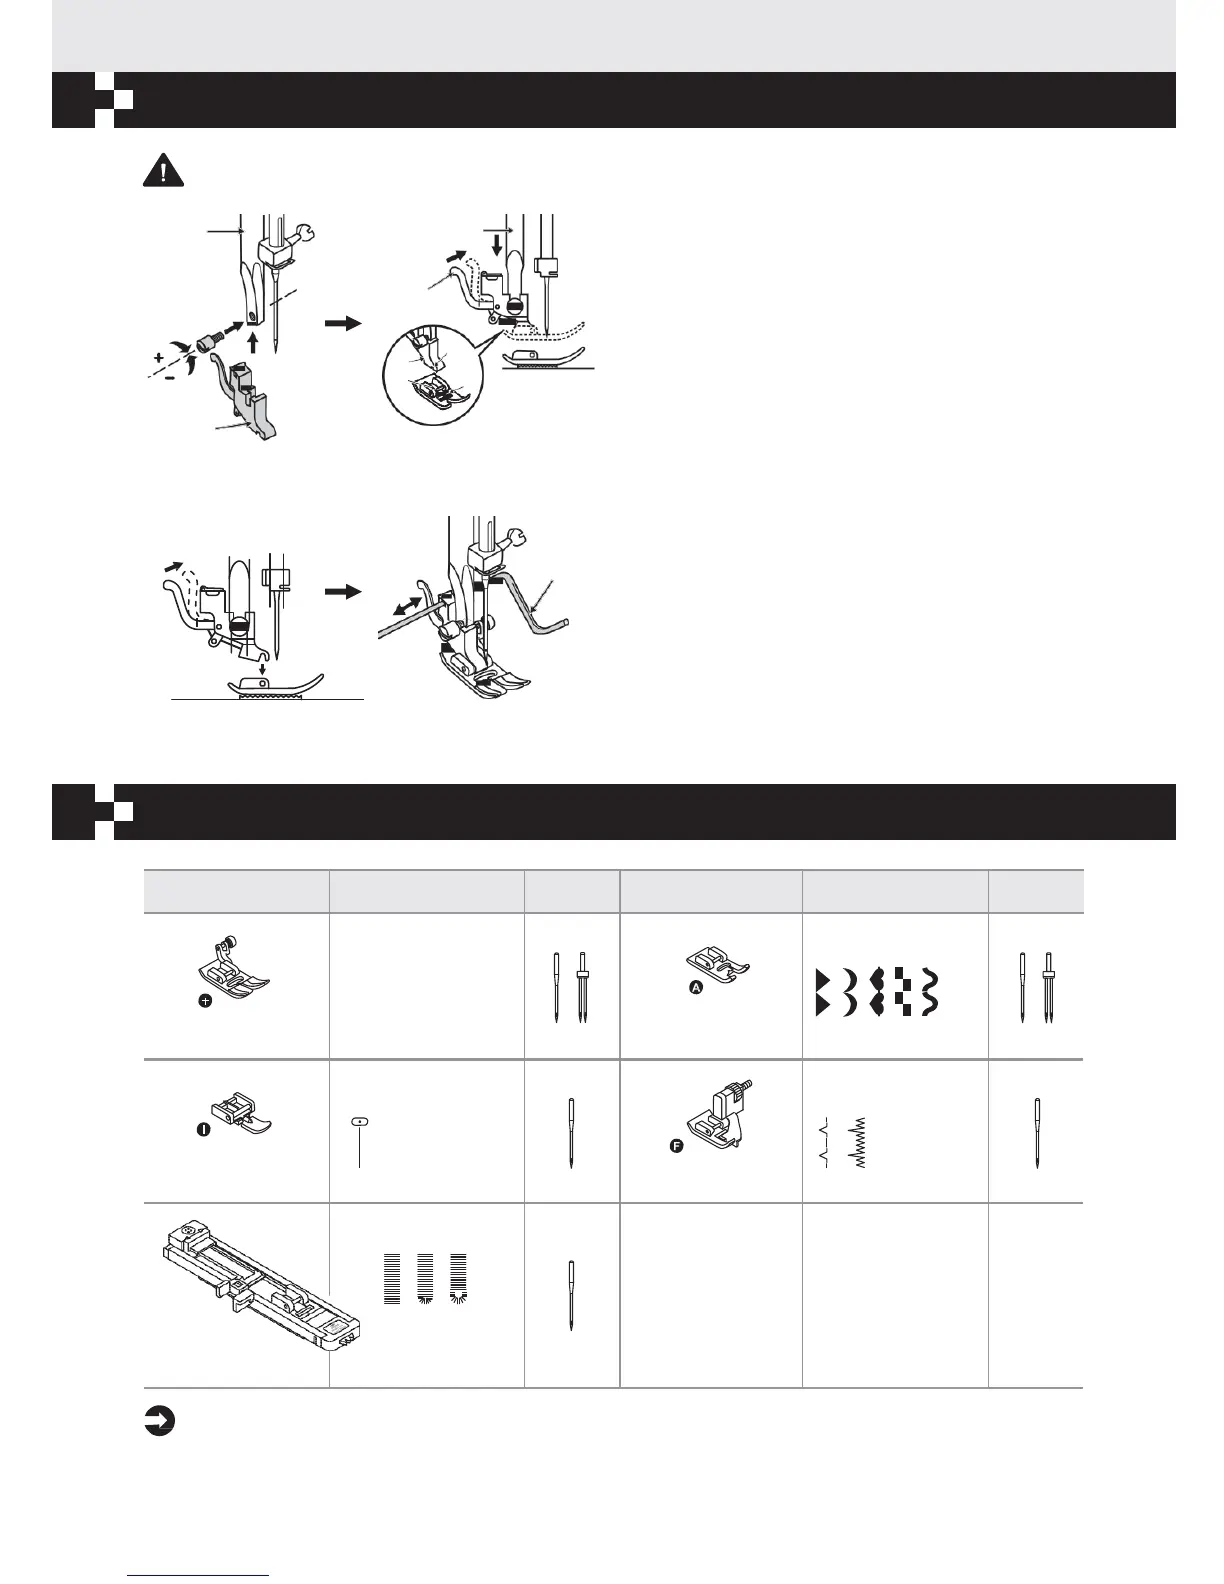
Changing the presser
foot
Attention: Turn power switch to
OFF
("O") when carrying out any of the below operations!
a a
Attaching the presser foot
holder
Raise the presser foot bar (a).
e
Attach the presser foot holder (b) as illustrated.
c
Attaching the presser foot
b
Lower the presser foot holder (b) until the cut-out
d
f
(c) is directly above the pin (d).
Press the black lever (e).
b
Lower the presser foot holder (b) and the presser
foot (f) will engage automatically.
Removing the presser foot
Raise the presser foot.
e
g
Press the black lever (e) and the foot will
disengage.
Attaching the edge/quilting guide
Attach the edge/quilting guide (g) in the slot as
illustrated. Adjust according to need for hems,
pleats, etc.
Type of presser foot
chart
PRESSER FOOT
APPLICATION
NEEDLE PRESSER FOOT
APPLICA
TION
NEEDLE
All purpose foot (T)
General sewing,
Patchwork stitches,
Decorative stitching,
Smocking,
Fagoting, etc.
Satin stitch foot (A)
Satin stitch sewing
Inserting zippers Blind hem stitching
Zipper foot (I)
Blind hem foot (F)
Buttonhole sewing
Buttonhole foot (D)
Note: The twin needle is optional. It is not included with the accessories.
When sewing with a twin needle, the stitch width should be set at less than "5.0".