4.Install the Printer
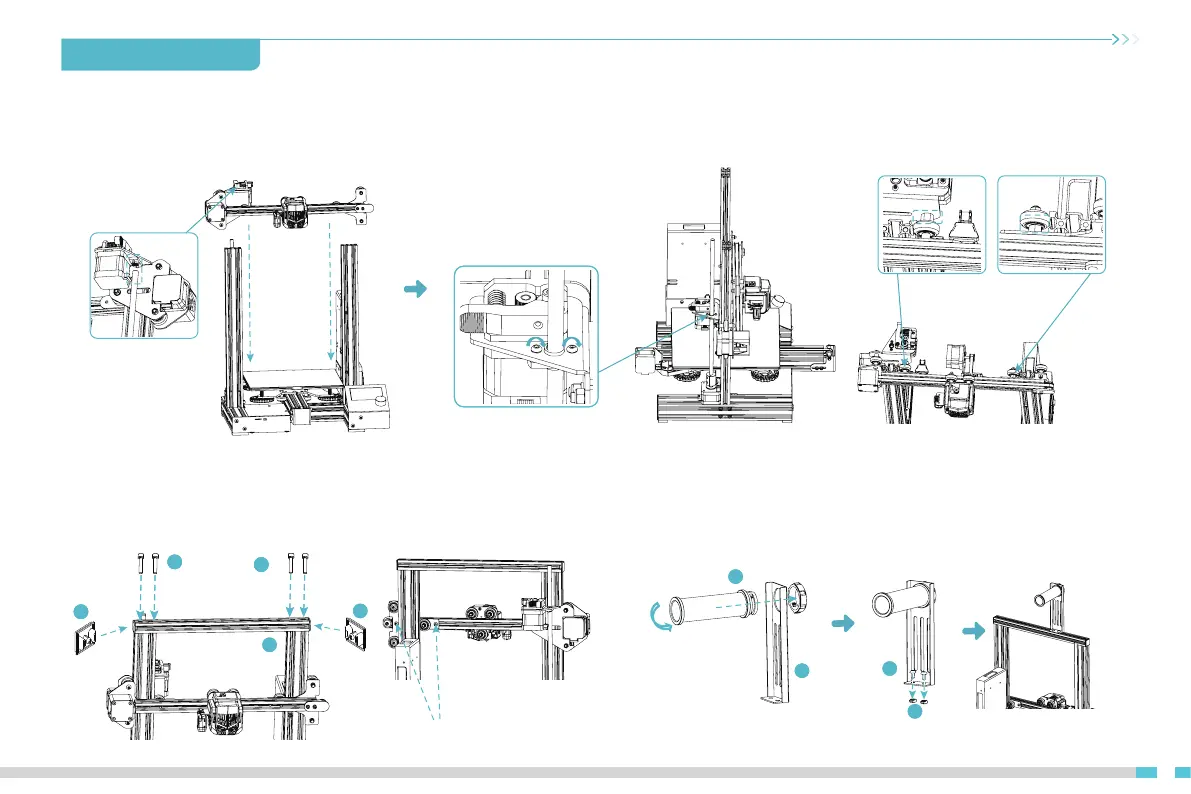
4.9 Install the X-axis kit and adjust tightness
Fit the X-axis kit into the Z-axis profile, with the V-wheels on the left and right sides aligned with the slot in the profile and the T-rod nut aligned with the
T-rod. (Note: The eccentric spacers on the left and right need to be adjusted if the left and right passive blocks cannot get in.)
4.10 Install the top gantry profile and profile cover
A. Secure the top gantry profile to the top end of the gantry with four M5 x 25
B. Attach the profile covers to the ends of the top gantry profile.
4.11 Install the material rack and barrel
09
*Do not tighten the screws
Left
A.Assemble the material rack and barrel.
B.Thread the two M5 x 8 screws through the material rack and then screw
on the M5 T-nuts. (Note that there is no need to screw it down)
C.Finally, fix those components to the top gantry profile.
Hexagonal eccentric
isolation column
C.
Tighten the two retaining screws on the Z axis passive block.
49
110
Back
1
33
1
29
35
211
11
35
35
211
11
35
1
14
*Tighten the two retaining screws
 Loading...