11
11. 11. Liner UnderlaymentLiner Underlayment
If it is possible, finish the rest of the pool area, especially
the ceiling over the pool, before proceeding. This will help
ensure that the liner is not damaged, and also keep the
pool water, skimmer, and filter free of construction debris.
Vacuum the pool floor carefully, and make sure there are no
sharp bumps that may damage the liner. Take special care
to remove any metal chips that may have fallen on the floor
when drilling holes into the pool panels.
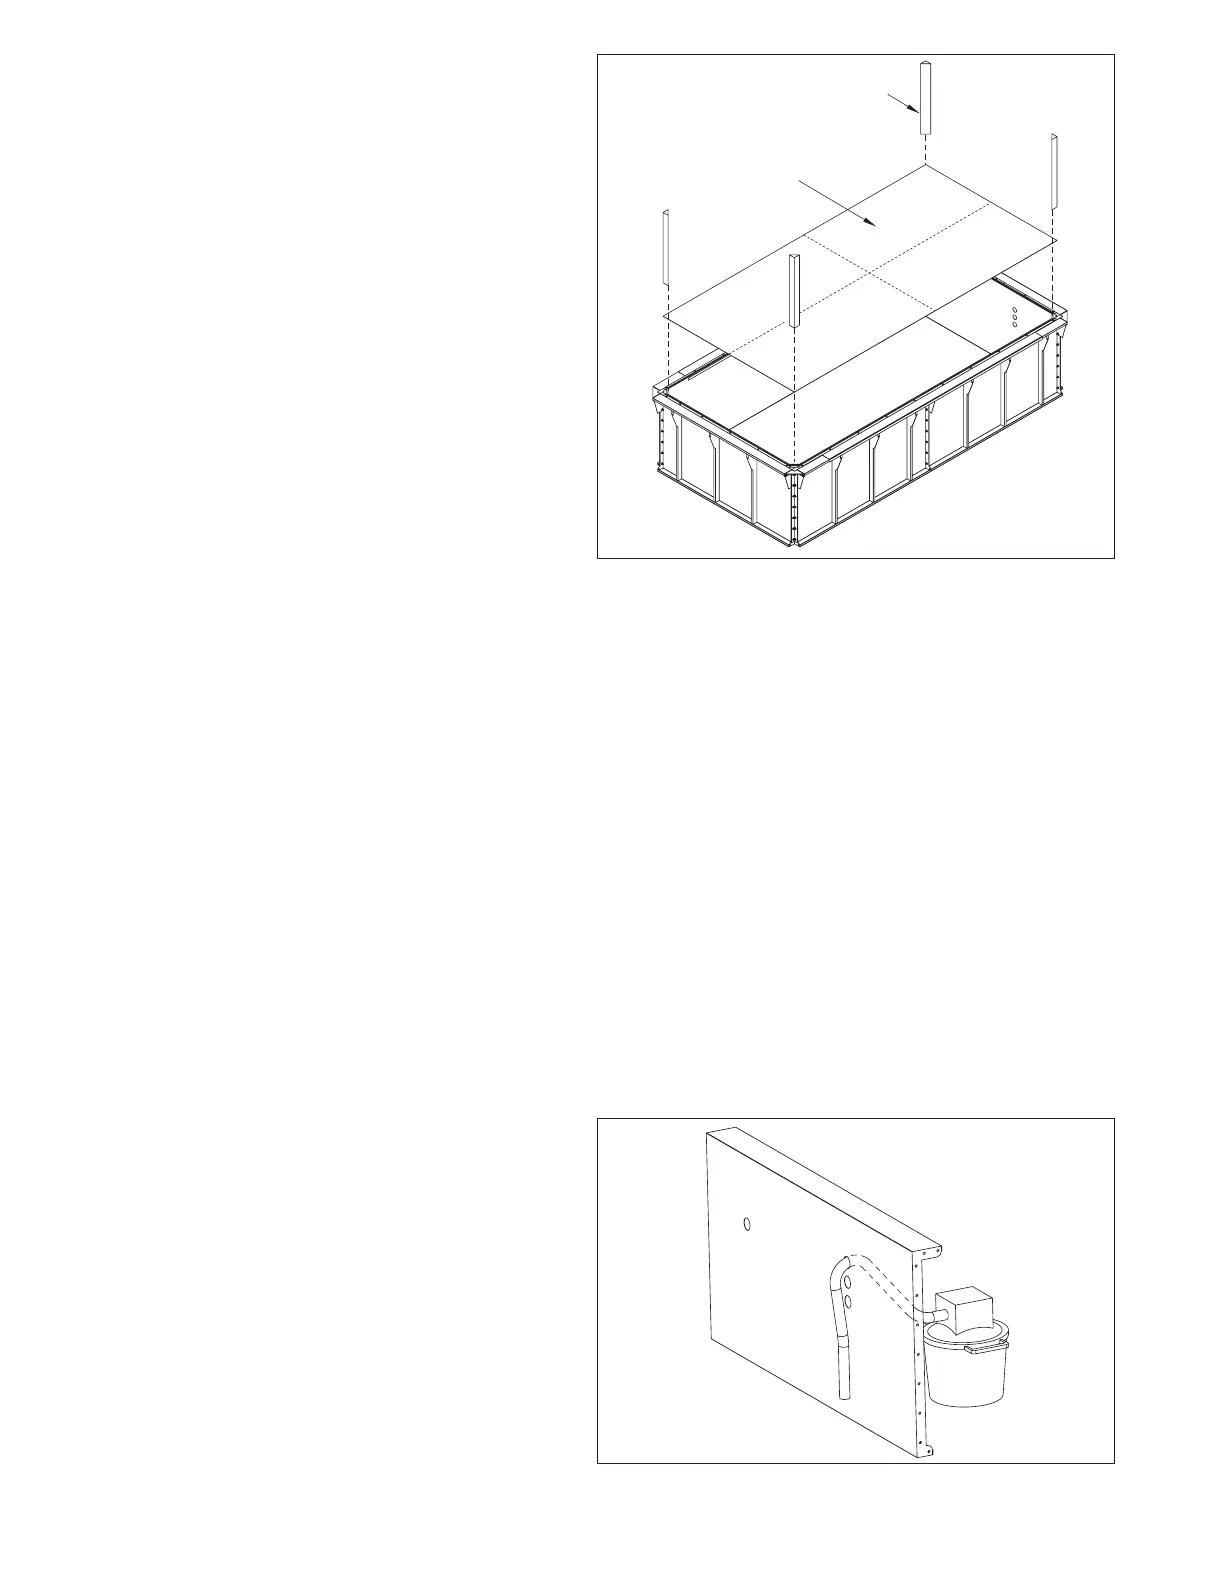
The liner underlayment material depends on the options
ordered.
ANCHOR BOLT KIT W/FOAM UNDERLAYMENT
If the Anchor Bolt Kit was ordered, the kit includes a roll
of closed cell foam that serves as a buffer between the
concrete slab and pool liner. A Foam Kit containing four
Foam Corners, to be installed in the corners of the panel
enclosure, is also included. Use the spray adhesive to
install the protective Foam Underlayment (A), shown in
Fig. 6, on the floor of the pool. The foam is 3’ 6” x 32’ (1m x
9,7m). For wider pools, cut pieces as appropriate to cover
the floor of the pool. Place the seams near the walls of
the pool, so that they will be covered by the internal pool
components. With deeper pool installations and larger
pools, a second or even a third box of foam has been
provided. Secure the foam to the bottom and walls of the
deeper area as well as to the floor of the pool. DO NOT
overlap the underlayment or a ridge will show through the
pool liner.
Secure the Foam Corners (B) in the four corners at the
bottom. Foam corners are not installed in the corners of
the deeper section of a custom deep-end pool (Fig. 6).
TENSION STRAPS W/PLASTIC FLOORING
If the Tension Straps were ordered, the kit includes
loose fill vermiculite and sheets of plastic flooring. The
vermiculite will be used to level the floor, filling in voids or
covering bumps. Cut the Plastic Flooring (A), shown in Fig.
6, to fit the inside dimensions of the pool and place over
the vermiculite. Use the tape included at the seams. In
addition, tape the flooring to the base of the panels.
A Foam Kit containing four Foam Corners, to be installed in
the corners of the panel enclosure, is also included. Secure
the Foam Corners (B) in the four corners at the bottom.
(Fig. 6).
A
B
Fig. 6
12. 12. LinerLiner
Standard flat bottom pool liners are usually packaged in
a cardboard box in the pool crate. Liners for deeper pools
and custom-sized pools are shipped separately. Check
to see if your liner was back ordered at the time of
shipment. If you have any questions contact Customer
Service about the status of your liner.
All work around your pool should be completed before
you install your liner. Prepare for the liner installation.
Be sure that the Liner Hanger, corners, panel joints and
panel to base material are sealed with silicone. Tape off all
holes in the pool wall (water quality system, swim current,
treadmill, lights, jets, etc.) from the outside. Place a vacuum
hose through the highest hole or leave a small section of
liner bead out of the liner hanger and insert the vacuum
hose down from the top. Make sure that the vacuum hose
opening is sealed with duct tape. The hose should be 3”
(7,6cm) off of the bottom of the pool floor (Fig. 7).
Fig. 7