A skirting corner is attached next. Carefully peel back the pro-
tective lm on the sides of the skirting corner and adjoining pan-
el to expose the screw holes. Bend the tabs on each side of the
skirting corner out. e bends at the top of the skirting corner
will follow the prole of the corner of the pool. e pre-drilled
holes in the tabs will align with the pre-drilled holes in the ad-
joining skirting panel. Peel back the protective lm on the tabs
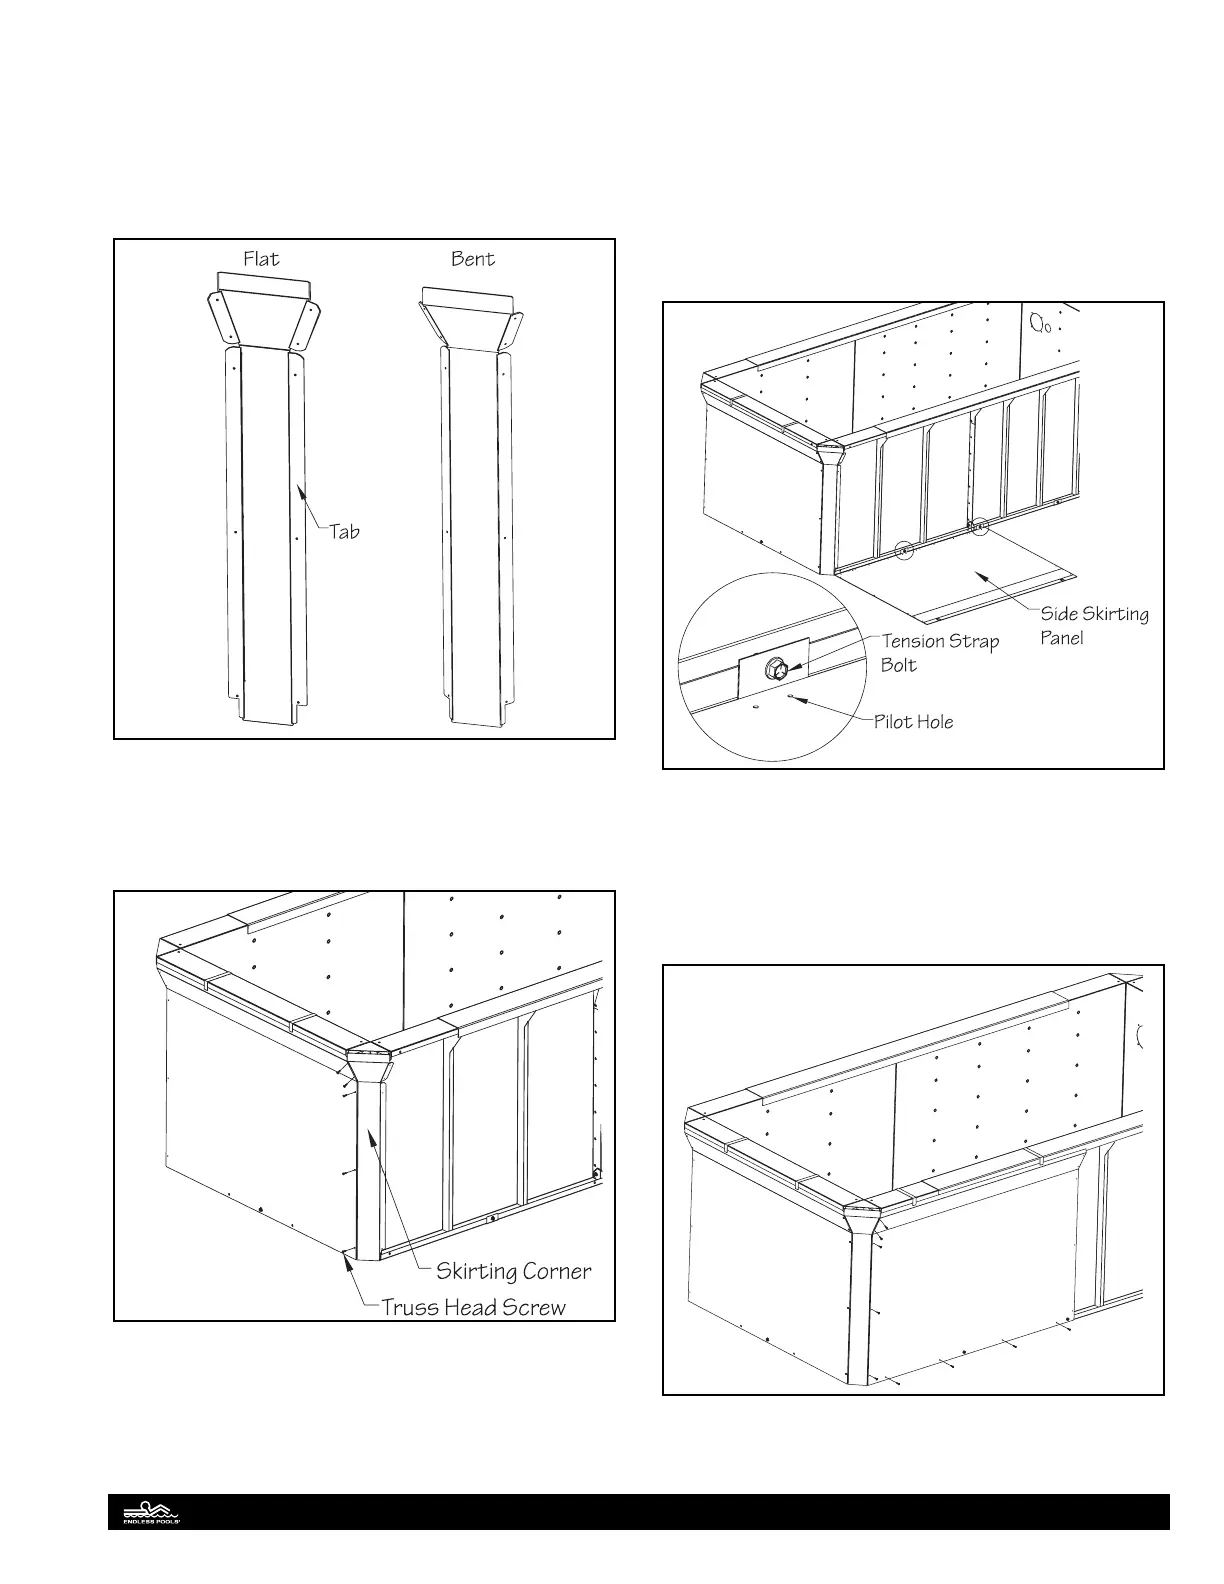
to expose the holes. Fig. 16.
Fig. 16
Tuck the tab behind the rear panel, align the holes, and attach
the skirting corner with the 3/4" (19mm) truss head screws lo-
cated in the skirting trim hardware bag. Note: A scratch awl can
be used to help align the holes. Fig. 17.
Fig. 17
ere are four identical side skirting panels which will be in-
stalled at the front and rear of each side wall. On the backside
of these panels there are pilot holes which correspond with the
tension strap bolts around the perimeter of the pool. ese pilot
holes will be used as templates to cut out holes for each tension
strap bolt. If the space is available, lay out the rear side skirting
panel at on the oor so that the panel aligns with the skirt-
ing corner installed in the previous step. Determine which pilot
holes correspond with the tension strap bolts along the bottom
ange of the pool panels. Use the 7/8" (22mm) hole saw provid-
ed to cut out each hole for the tension strap bolts. Fig.18.
Fig. 18
Position the skirting panel against the rear side pool panel. Align
the holes (cut in the previous step) with the tension strap bolts.
Bend and attach the skirting panel to the skirting corner. Secure
the top of the skirting panel to the top ange of the pool with the
clear packing tape. Attach the bottom of the skirting panel to the
bottom ange of the pool with the self-drilling screws. Fig. 19.
Fig. 19
12