Liner Installation
All work around the pool should be completed before the liner is
to be installed. is will help ensure that the liner is not damaged
and keep the pool water free of construction debris. Shoes should
be removed before the installation of the liner and all future work
in the pool to avoid damaging the liner.
Unfold and spread the liner on top of the plastic ooring in the
pool enclosure. Locate the vertical seam in the liner and center it
at the front of the pool. e vertical seam MUST be centered on
the front panel. Place the four bottom corners of the liner in the
four corners of the pool. Starting at the center of the front panel,
insert the bead of the liner into the slot in the liner hanger. Work
your way around the pool, tting the bead evenly into the hanger.
Periodically check to ensure the vertical seam remains centered
on the front panel. If the vertical seam is o center, the liner can
be shifted. Fig. 33
Once the liner bead is fully seated in the track and you are sat-
ised with the placement, inspect the liner by running a nger
along all of the liner seams making sure there are no imperfec-
tions. Smooth the liner on the oor pushing out any wrinkles
towards the walls. At this time, you can start adding water to
the pool. Adding a few inches of water will help smooth out
the wrinkles. Do not add more than 3" (7.62cm) of water at this
time.
Included in the box with the liner are No Diving signs. Please
post these in prominent locations around the pool. e Stream-
line Pool is shallow and must never be used for diving. Diving
into the pool is a very serious hazard and these stickers are in-
tended to warn children of the risks. Naturally, adult supervision
is also critical whenever children use the pool.
Fig. 33
Liner Bead Lock
Liner bead lock is a exible strip of rubber-like material that is
wedged into a liner track which will help prevent the liner from
pulling out of the track. Insert the bead lock into the slot in the
liner hanger around the whole perimeter of the pool. A hammer
can be used to gently tap the bead lock in place.
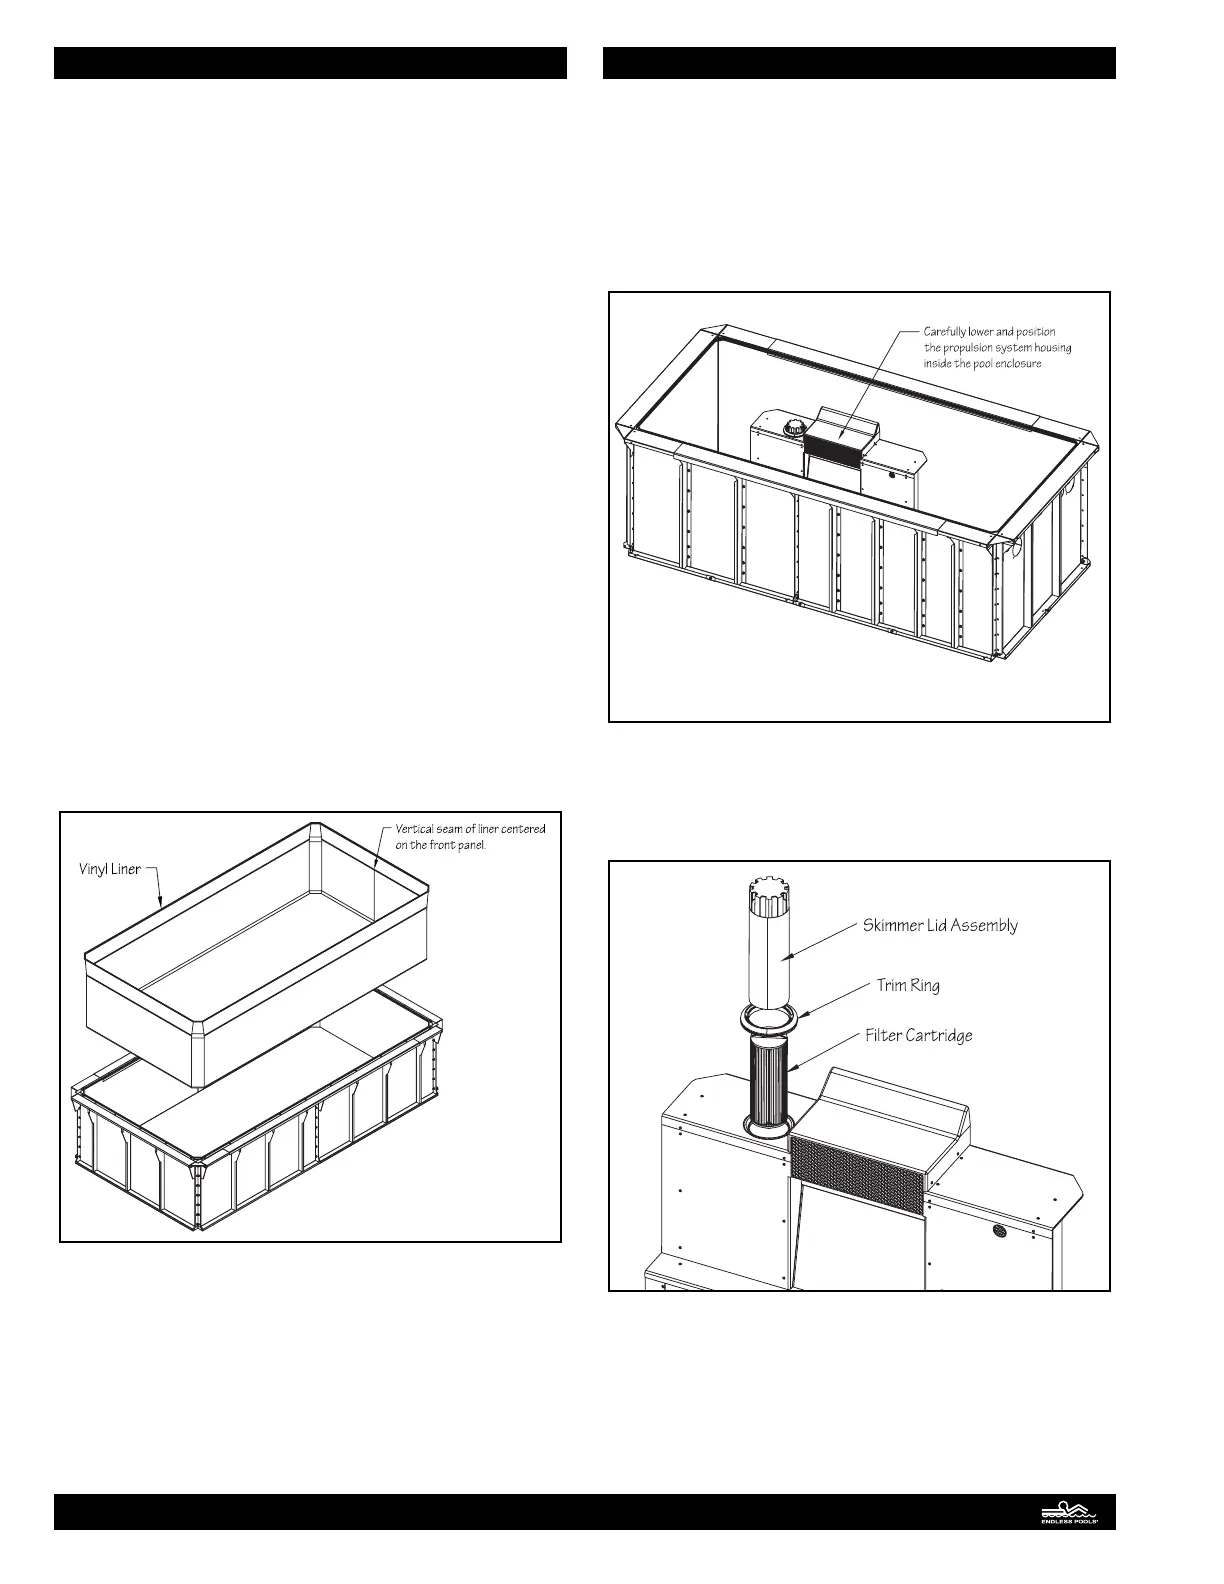
Propulsion System Part 1
e propulsion system housing comes pre-assembled; however,
connections must be made to attach the internal plumbing as-
semblies to the external plumbing assemblies.
Remove the protective lm from the housing. Carefully lift the
housing assembly into the pool. is is best done with two peo-
ple by lifting the assembly and resting it on the top ange rst,
before lowering it down into the pool as shown. Fig. 34.
Fig. 34
Remove the cylindrical skimmer lid assembly, trim ring, and
lter cartridge from the skimmer-lter assembly. Unthread the
lter cartridge counter clockwise to remove. Fig. 35.
Fig. 35
17