Panel Assembly
When assembling the panels that make up the side walls, it is
extremely important to ensure that the opposing panels mirror
each other (the 5 ft (1.52m) panel should face the other 5 ft
(1.52m) panel and the 6 ft (1.21m) panel should face the other 6
ft (1.21m). If the space is available, lay the panels face down on
the oor when bolting together. First, assemble one side wall by
bolting a 6 ft panel to a 5 ft panel. Use the provided 3/8" (9.5mm)
nuts and bolts located in the panel hardware kit to assemble. A
California brace and gusset support are installed at the panel
joint (where the two adjoining panels bolt together). Tighten
the bolts after ensuring that the top anges of the two adjoining
panels are ush. Next, attach a gusset support, outside triangular
corner, and outside corner angle to the ends of the assembled side
wall. On the ends of each side wall, make sure the bolt heads are
facing out. Tighten the bolts after ensuring the outside triangular
corner is ush with the top ange. Fig. 2.
Gusset
Outside
Triangular
Corner
Corner
Angle
Gusset
California
Brace
Fig. 2
e next step is to be done with a minimum of two people. Erect
the assembled side wall. While one person is holding up the side
wall, the second person can erect and position the front panel
(panel with the pre-drilled holes). Loosely bolt the front panel to
the side wall forming an “L” shape. Make sure a gusset support
is installed on the inside of the front panel end ange. Tighten
all the bolts after ensuring the adjacent top anges are ush with
one another. Fig. 3
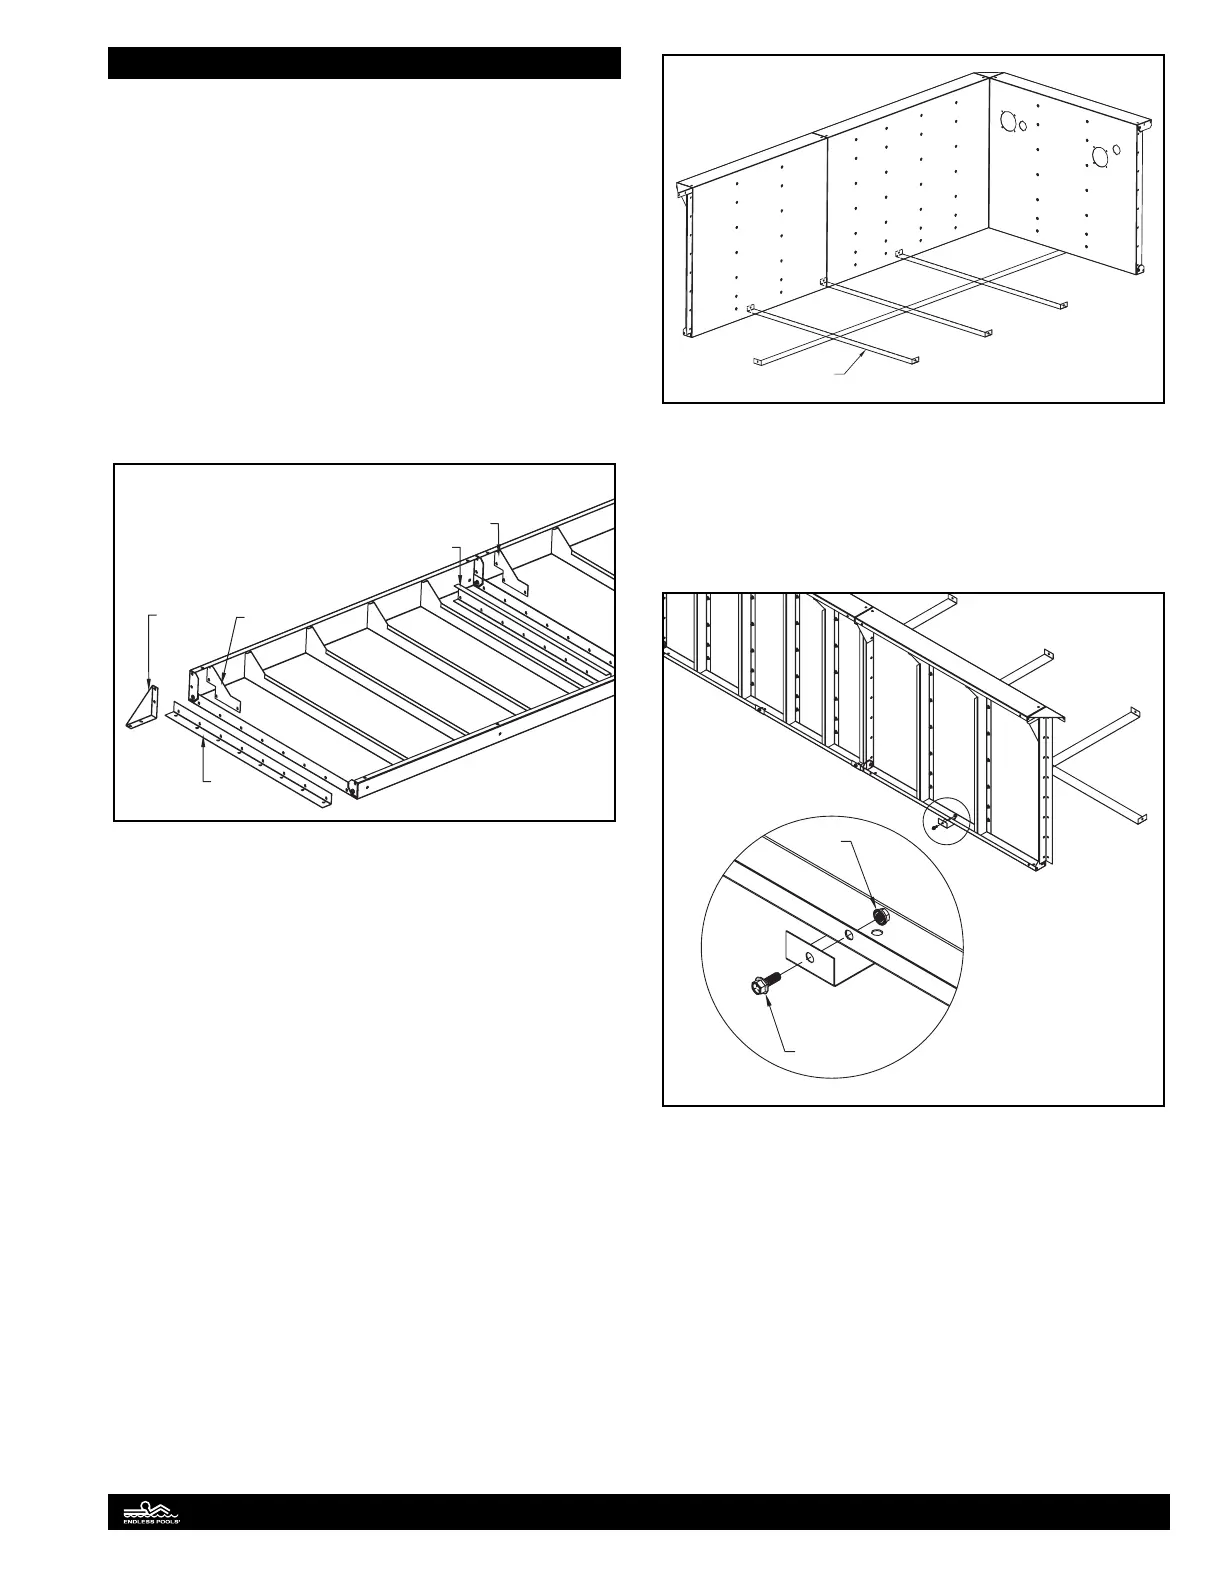
A tension strap is installed at the center of every panel and at the
panel seam on the side walls. Slide the three short tension straps
under the bottom ange of the side wall and position them in the
center of each panel and at the panel seam. Slide the long tension
strap under the bottom ange of the front panel and center it on
top of the short tension straps. Fig.3.
Tension
Strap
Fig. 3
ere are pre-drilled holes around the perimeter of the bottom
ange where the tension straps will be bolted to. Position each
tension strap to line up with the pre-drilled holes and secure
them to the bottom ange with a bolt and nut from the tension
strap hardware bag.
Bolt
Nut
Fig. 4
Assemble the other side wall so that the panels mirror the rst
assembled side wall. Position and attach the side wall to the front
panel. Position and attach the rear panel to the two side walls
forming a rectangular structure. Secure the other ends of the ten-
sion straps along the bottom ange of the side wall and rear panel.
Position the reinforcing channels over the top anges of the two
side walls. e reinforcing channels bridge the joint between the
pool panels that make up each side wall. It’s critical that the re-
inforcing channels are centered on each side wall. If there are
any sharp edges or burrs on the ends of the channels, use a le to
deburr the edges. Fig. 5.
8