Once the notched liner hanger sections are installed in each
corner, secure the unnotched sections along each side wall. e
unnotched sections will transition onto the reinforcing channel
which protrudes 1/8” (3mm) further into the pool. e unno-
tched sections MUST be level with the adjacent notched sec-
tions before attaching. Use (3) self-drilling screws per unnotched
section to secure to the pool wall. It’s important that the gap at
any joint between liner hanger sections is no greater than 1/2”
(13mm). Fig. 23.
Notched Liner
Hanger
MUST be level
with notched
liner hanger
Unnotched Liner
Hanger Sections
Fig. 23
Liner Underlayment
To prepare for the installation of the liner, dry vermiculite and
precut plastic ooring sheets are provided. Vermiculite can be
used to level the oor, lling any voids or covering bumps, if
needed. Plastic ooring sheets have been provided to protect the
liner from the tension straps. Vacuum the pool oor carefully
making sure there are no sharp bumps that may pierce the liner.
Take special care to remove any metal shavings that may have
fallen on the oor.
Vermiculite and Plastic Flooring Sheets
e tension straps make an ideal planar grid on the oor of
the pool. is planar grid can be used to see exactly where your
oor is out of level and requires ll material. Start in one end
of the pool. Pour in a portion of the dry vermiculite. e direc-
tions on the bag call for a mixing of water, concrete, and ver-
miculite. While this can be done if desired, we recommend to
simply use the dry vermiculite. Pour the vermiculite in the areas
where the oor is out of level and use a long straightedge tool
and smooth the vermiculite out so that it is level with the ten-
sion straps. It is critical that the distance between the pool oor
and the top ange of the pool enclosure is 48" (1.22m). is
will be dictated by how the oor is leveled. Make any necessary
adjustments to the oor to ensure this distance is maintained
across the front of the pool. If this distance is greater than or
less than 48" (1.22m) the plumbing of the propulsion system
housing will not align properly and an adjustment will need to
be made. Once you have approximately 4' (1.22m) of your oor
done across that end, place a piece of the plastic oor over the
vermiculite base so that it will not be disturbed. Continue along
the oor of the pool, lling any voids as needed and continue to
place the plastic ooring in place.
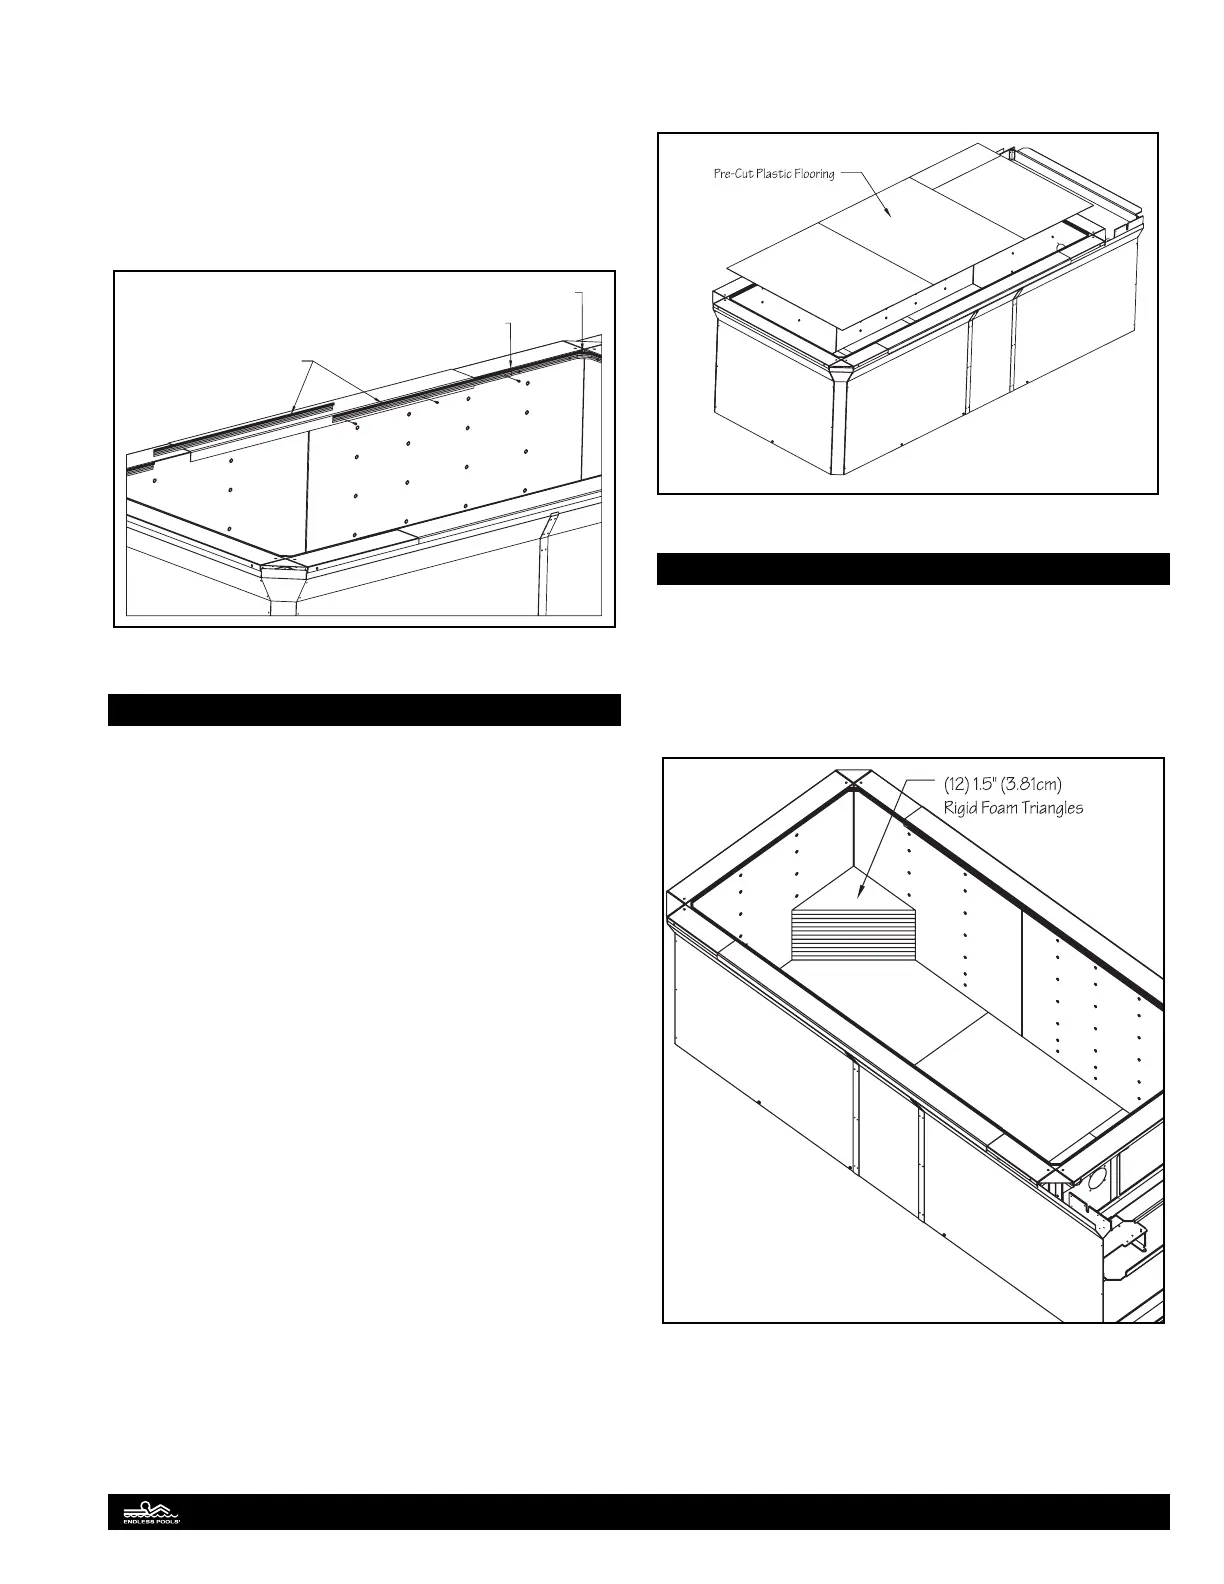
Once all of the plastic ooring pieces are in place, use the clear
packaging tape to tape the plastic oor pieces together and tape
to the galvanized panels. Fig. 24.
Fig. 24
Corner Steps
e corner steps at the rear of the pool can be used to get in and
out of the pool or can be used as seats to relax in between work-
outs. e corner step kit contains pre-cut rigid foam pieces and
PVC side and top covers.
Position the rigid foam triangles, stacked (12) high, in each rear
corner of the pool enclosure. Fig. 25.
Fig. 25
14