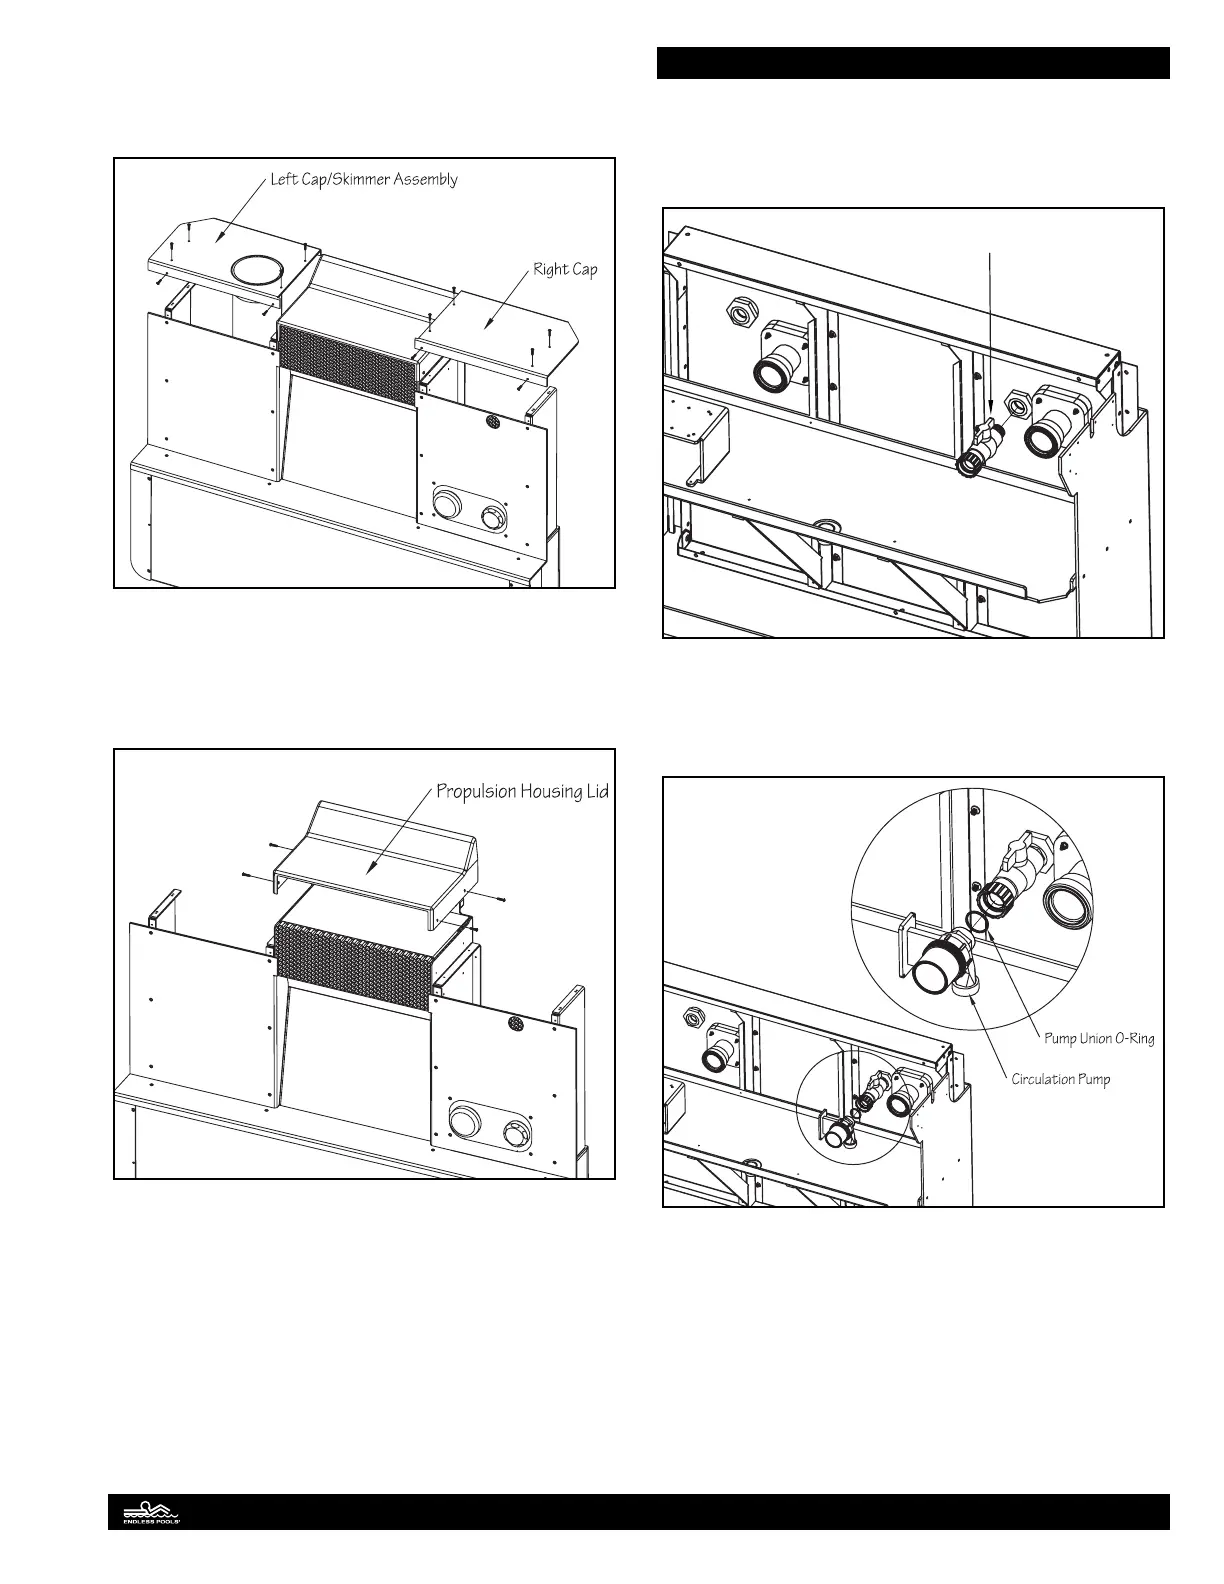
Remove the left cap/skimmer-lter assembly and right cap by
removing the screws of each acrylic component as shown. Fig. 36
Removing these components will allow you to safely rotate the
housing assembly so that it’s parallel with the front wall.
Fig. 36
Remove the housing lid by removing the screws on each side of
the lid. Fig. 37. Continue lling the pool until the water level is
24" (61cm) deep. While the pool is lling, the external plumbing
can be assembled.
Fig. 37
Plumbing Part 1
Water Quality System Plumbing
Attach the pre-plumbed suction assembly to the suction th-
ru-wall tting. Make sure to wrap Teon tape around the threads
of the suction assembly before attaching. Fig. 38.
Pre-plumbed
Suction Assembly
Fig. 38
Attach the circulation pump to the pre-plumbed suction assem-
bly. Make sure that the pump union o-ring is seated properly
prior to installing. Fig. 39.
Fig. 39
18