Propulsion System Part 2
Reinstall the screws to secure the left cap/skimmer assembly and
right cap. Fig. 59.
Fig. 59
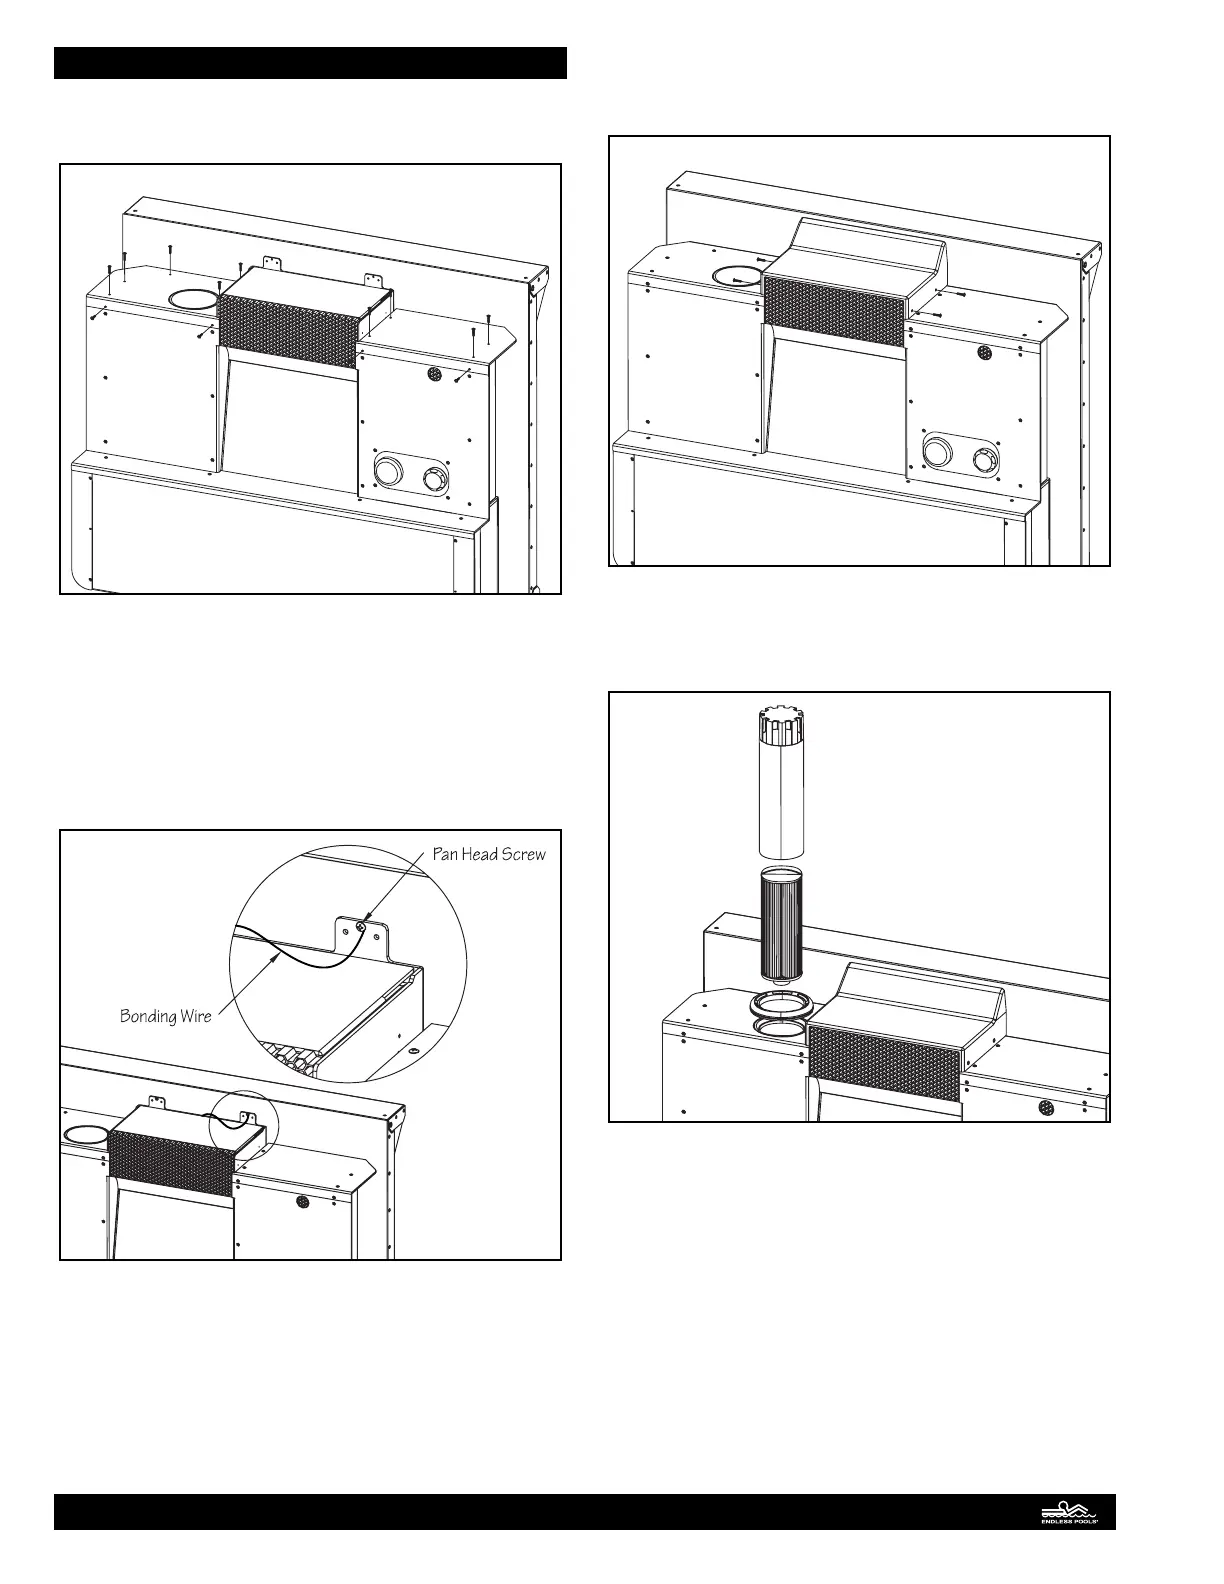
e next step is bonding and attaching the propulsion housing
to the front wall. Using the 11/64" (4mm) drill bit provided, drill
through each housing tab into the front wall of the pool. Secure
the bonding wire to one of the 2" (51mm) pan head screws lo-
cated in the housing attachment hardware bag. Apply silicone to
the threads of the screws before securing the housing to the front
wall of the pool. Fig. 60.
Fig. 60
Once the propulsion housing has been attached to the front
wall, the housing lid can be reattached by reinstalling the screws.
Fig. 61.
Fig. 61
Reinstall the trim ring, lter cartridge, and skimmer lid assembly.
Fig. 62.
Fig. 62
Continue lling the pool until the water level is at the top
of the honeycomb shaped grill (just under the housing
lid). e water level MUST remain at this level for
optimal performance.
25