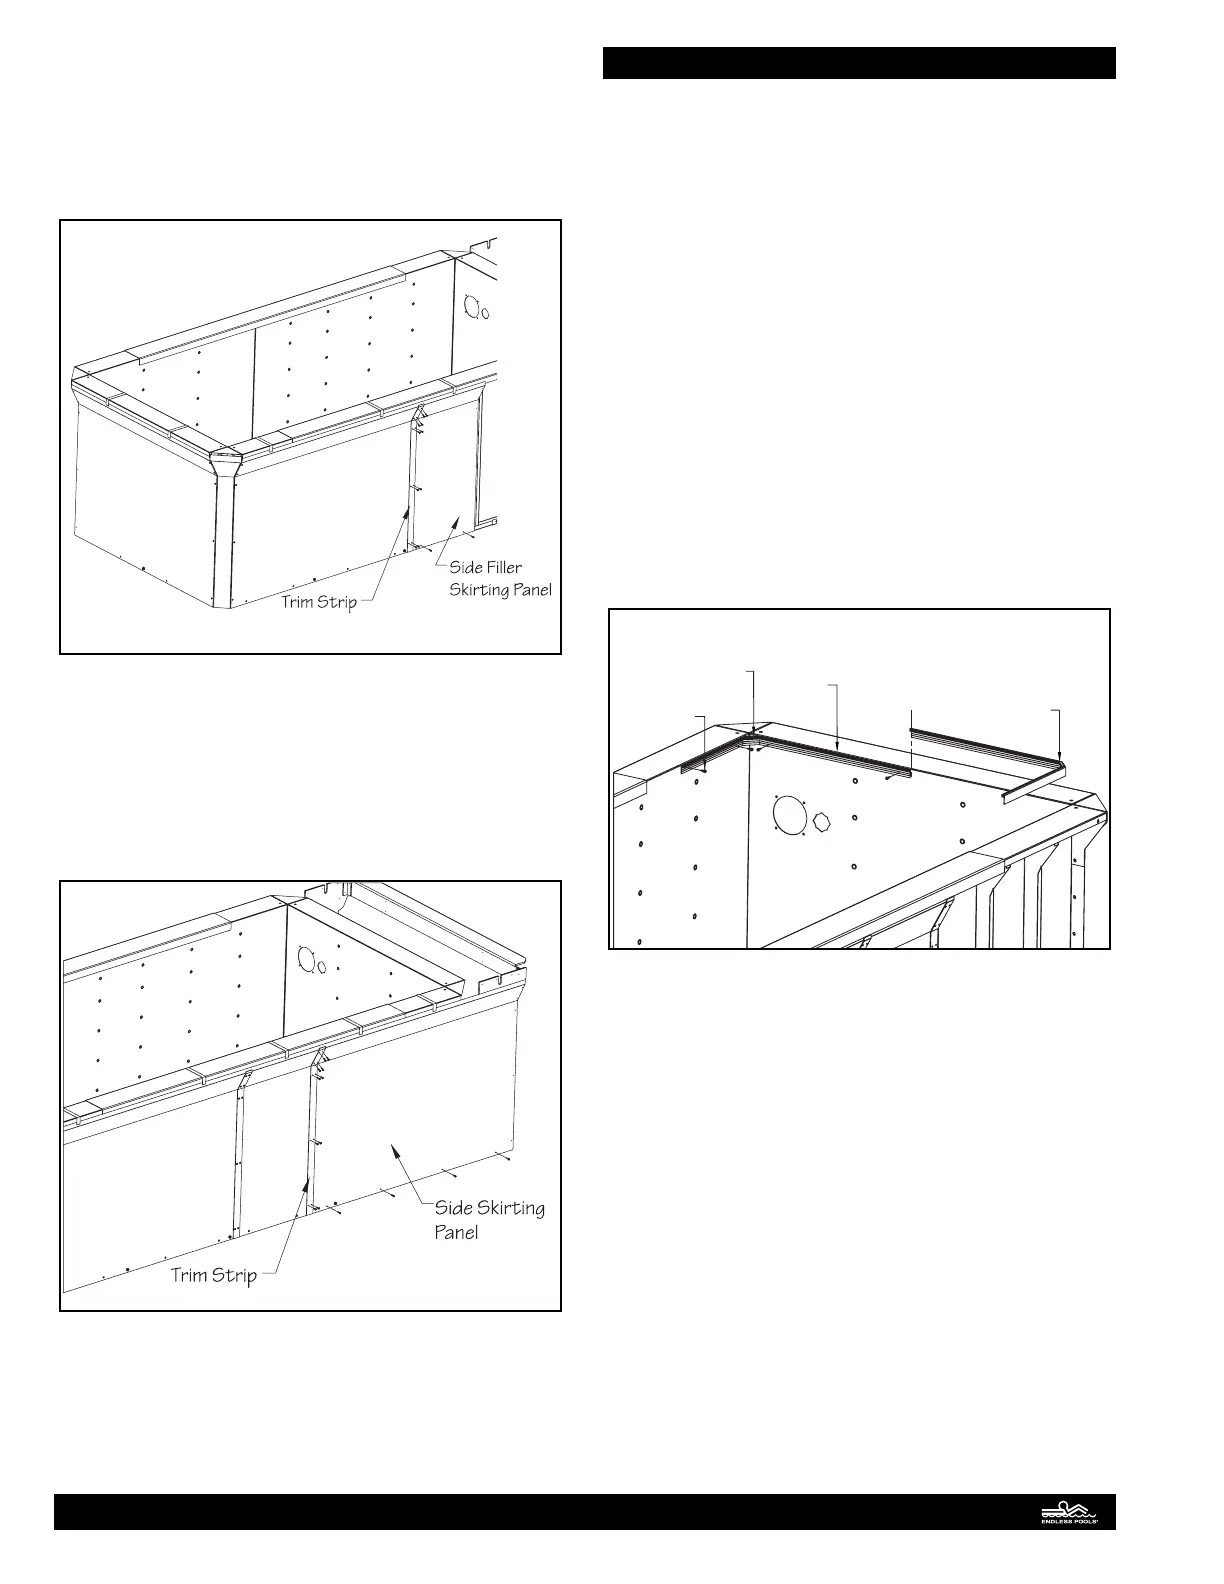
Bend and attach a trim strip to the rear side skirting panel. e
holes on each side of the trim strip will align with the holes in the
adjoining skirting panel. Bend and attach the side ller skirting
panel to the other side of the trim strip. Again, the holes in the
trim strip will align with the holes in the adjoining skirting pan-
el. Secure and attach the side ller panel with the clear packing
tape and self-drilling screws. Fig. 20.
Fig. 20
Attach a second trim strip to the side ller panel. Once again, a
hole will need to be cut into the side panel towards the front of
the pool for the tension strap bolt. Determine which pilot hole
corresponds with the bolt and use the 7/8" (22mm) hole saw to
cut out the hole. Once positioned, bend and attach the skirting
panel to the trim strip. Secure and attach the skirting panel with
the clear packing tape and self-drilling screws. Fig. 21.
Fig. 21
Repeat for the other side of the pool. DO NOT install the cor-
ners or skirting panel at the front of the pool at this time.
Liner Hanger
e aluminum liner hanger is installed around the top perimeter
of the pool panel enclosure. e pool liner hangs from this extru-
sion using a bead that is heat welded into the top edge of the lin-
er. e liner hanger kit contains four notched sections which are
bent to shape and installed in each corner of the pool enclosure
and four unnotched (straight) sections which are installed along
each side wall. Self-drilling screws and a nut driver attachment
are provided in the liner hanger hardware bag.
e notched liner hanger sections that are installed in each cor-
ner should be installed rst. Measure and mark the center points
of the front and rear pool panels. For each notched section, bend
the liner hanger at the precut notches inwards, so that it ts into
the corner of the pool enclosure. e notched sections are side
specic (left and right). Align the longer leg of each notched
section with the center mark made on the panel (so the left and
right sections meet at the center point of the panel). e top of
the liner hanger MUST be level with the top ange of the pool
panel before attaching with the self-drilling screws. To ensure
the liner hanger remains level, hold a straight edge on the top
ange of the pool panel. Attach the notched liner hanger section
using the self-drilling screws as shown, Fig 22.
2
Center Mark
Position into
corner
Self-Drilling
Screw
1
MUST be
level with
top flange
Bend at
pre-cut
notches
Fig. 22
13