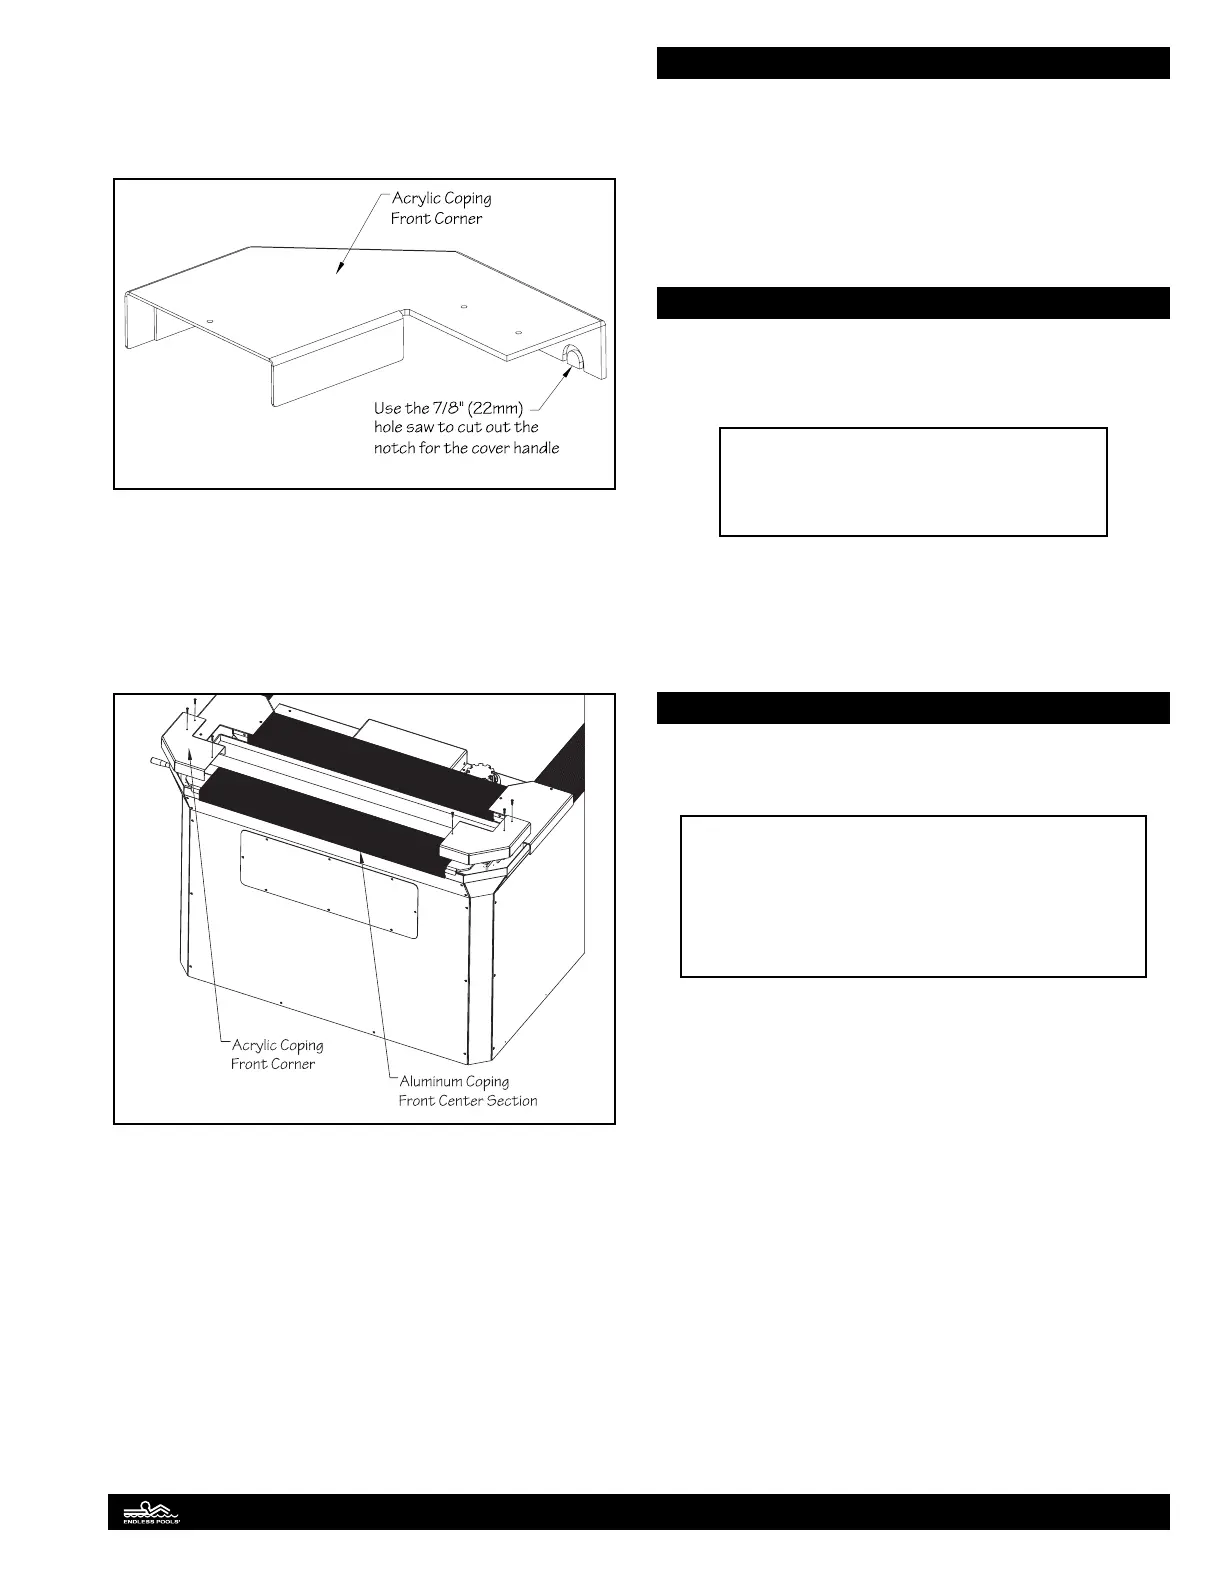
A notch will need to be cut in the acrylic coping front corner on
the side that the cover roller handle will be. ere is a “U” shaped
relief on the back of the front corner to use as a template. Use the
7/8" (22mm) hole saw to cut out the notch. Fig. 103.
Fig. 103
Position and center the nal aluminum coping center section
on the upper support beam. Position each acrylic coping front
corner. Use the 11/64" (4mm) drill bit to drill out the holes using
the pre-drilled holes in each acrylic front corner as a template.
Secure the front coping corners with the 3/4" (19mm) truss head
screws. Fig. 104.
Fig. 104
An additional Streamline Users Guide has been provided with
this pool. is guide provides a full overview on the pools func-
tions and maintenance. It is critical that these guides are refer-
enced on a regular basis.
Product Information Label
Included with the pool documentation is a product information
label (sticker) that MUST be lled out by the installer and ad-
hered to the product.
1. Fill out the Month/Year of Installation.
2. Adhere the label to the skirting access panel at the front of
the pool.
Product Installation Information
e product installation information MUST be completed by
the installer prior to using the product.
1. Fill out the installation information below
MONTH/YEAR INSTALLED_______
2. Hand the installation manual containing the above informa-
tion to the customer to be stored with other important pool
related documentation.
Suction Outlet Fitting Service Instructions
SUCTION OUTLET FITTING INFORMATION:
MODEL: STREAMLINE POOL
SUCTION OUTLET FITTING # 125020
SUCTION OUTLET FITTING FASTENER # 711330
Service Access. e use of adhesives or other attachment meth-
ods that prevent access to suction piping or suction outlet tting
components requiring periodic servicing is prohibited.
e suction outlet tting shall be replaced at or before the end
of the 25 year service life. e suction outlet tting and fasteners
securing the suction outlet tting should be inspected before each
use throughout its service life. e suction outlet tting MUST
be repaired or replaced if it’s missing, loose, dented, cracked, or
broken. e fasteners and corresponding receptacles MUST be
replaced or repaired if damaged.
When service is required to replace the suction outlet tting,
it shall be done so with replacement fasteners provided by the
manufacturer. e fasteners securing the suction outlet tting
are #10 x 3/4” (19mm) 316 Stainless Steel Phillips Truss Head
Screws. e fasteners MUST be installed using a #2 Phillips
head screwdriver. e recommended torque for the fasteners
is 25 inch-pounds. DO NOT USE POWER TOOLS TO
INSTALL FASTENERS. Start installation of the fastener
by hand to ensure proper thread engagement and to prevent
cross threading.
40