Reinforcing
Channel
Fig. 5
When the pool panels are assembled, the reinforcing channels
are on, and the pool is in the desired position, make sure that
the pool is square. is can be accomplished by measuring the
diagonals. e dierence in the diagonal measurement must be
less than 1/8"(3mm).
Floor Leveling
Leveling tools are provided in the panel leveling hardware bag to
level the pool panels if necessary. ere are holes in the horizon-
tal face of the bottom ange of the panel. Slide the leveling tool
under the bottom ange so that the hole in the tool aligns with
the pre-drilled hole in the bottom ange. read the leveling tool
bolt into the leveling tool through the hole in the bottom ange.
Tighten the bolt until the panel is level. Repeat this process on
all (4) sides if necessary. Fig. 6.
Galvanized
Pool Panel
Unlevel Floor
Floor Leveling Tool
Tighten floor leveling
bolt to raise the panel
until it is level
Fig. 6
Expandable Foam
Use the expandable spray foam at any point where there is a gap
under the panel. e spray foam does expand considerably. e
foam becomes tack free within 15 minutes and takes up to 8
hours to fully cure. e amount of foam required would dictate
the length of time it takes to cure. Once cured, trim away any
excess foam with a utility knife. e objective is to make the tran-
sition between the pool wall and pool oor as even as possible, so
that the liner will not push into any gaps.
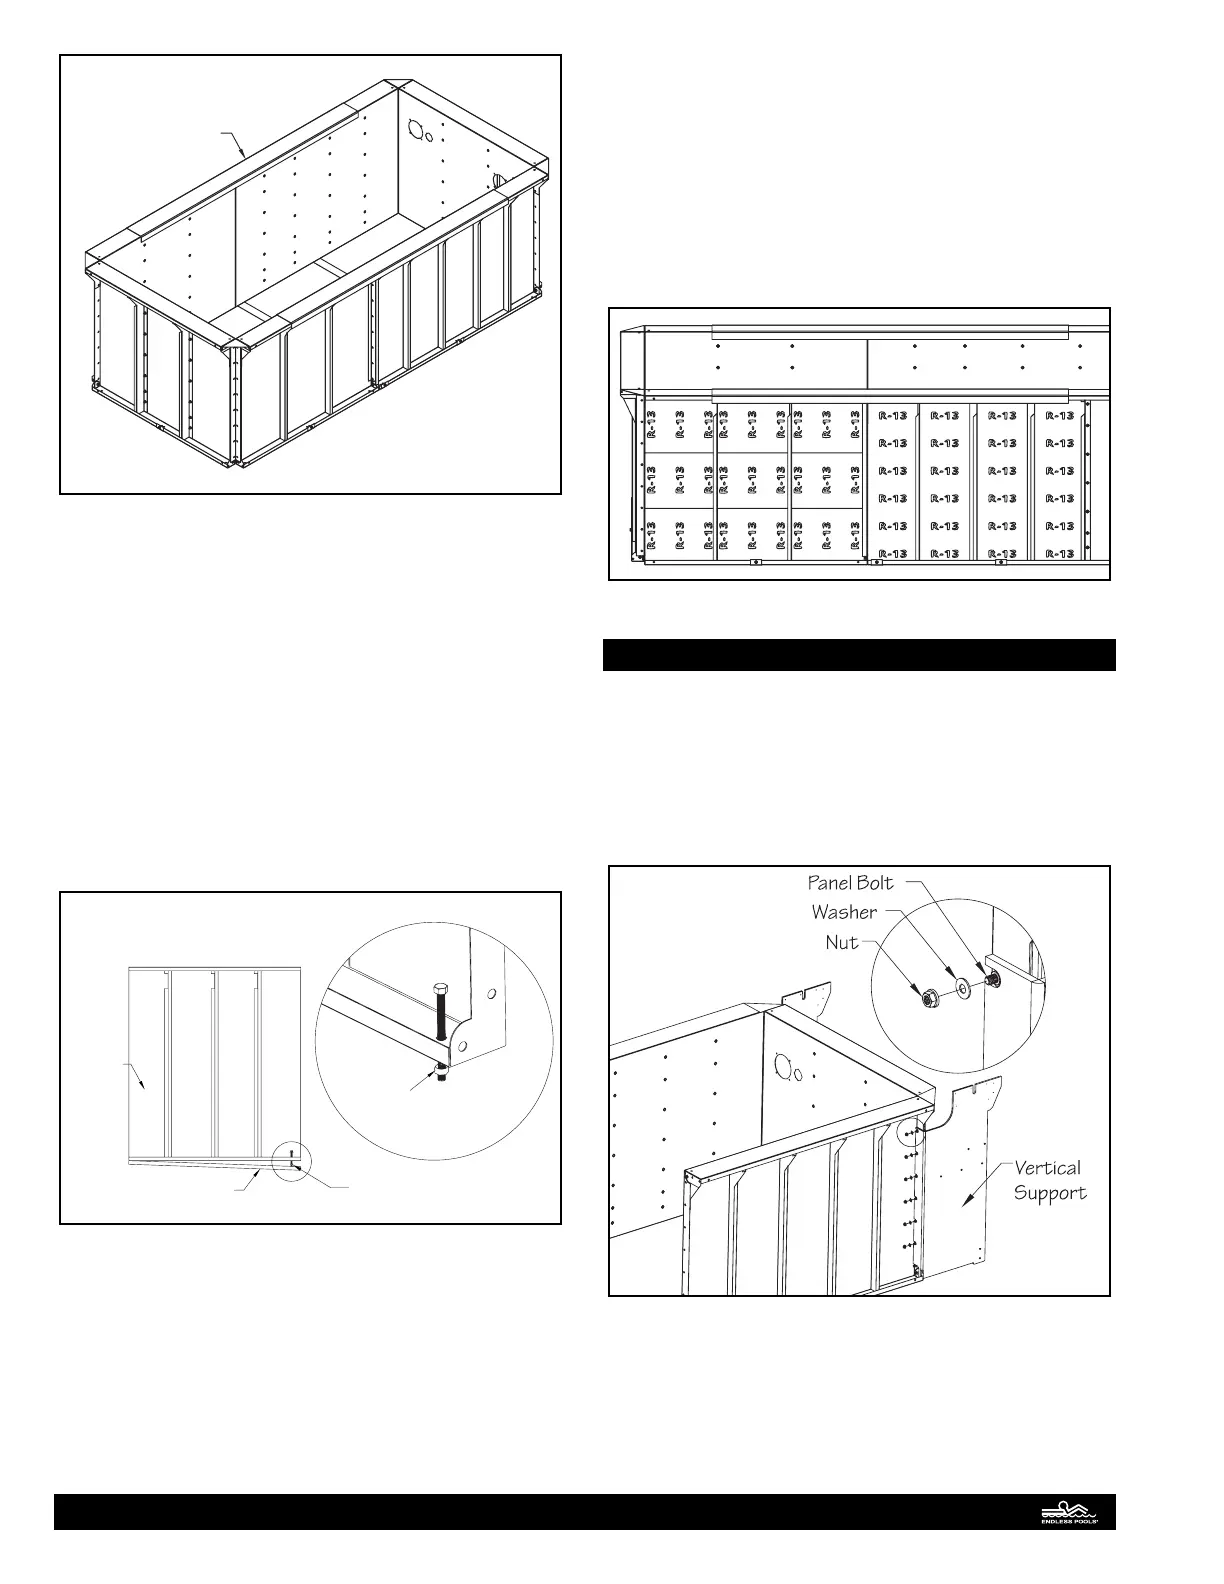
Insulation
To conserve heat and reduce operating costs, an R-13 berglass
insulation kit is provided. e sheets of insulation are to be cut
to size and adhered to the backside of the panels with the spray
adhesive provided. For 6 foot panels, cut the insulation to length
and install the sheets in a vertical orientation. Since the 5 foot
panels have wider bays, it’s recommended to cut the insulation
into 3 short sections (the width of the panel bay) and install the
sheets in a horizontal orientation as shown. Fig. 7. Do not install
insulation in the panel bay closest to the front of the pool at this
time.
Fig. 7
Equipment Cabinet
Position the left and right vertical supports at the front of the
pool. Align the notches in the vertical supports with the ends
of the panel bolts on the front side walls. Secure the supports
with the 3/8" (9.5mm) washers and nuts provided in the vertical
support hardware bag. Fig. 8. After the left and right vertical
supports are attached, insulation can be installed in the panel
bays closest to the front panel.
Fig. 8
Position the equipment tray between the left and right verti-
cal supports and align the pre-drilled holes on each side of the
equipment tray with the pre-drilled holes in the vertical sup-
ports. Attach the equipment tray to the left and right vertical
supports using the (6) 1" (25mm) at head screws located in the
equipment tray hardware bag. Fig. 9.
9