35
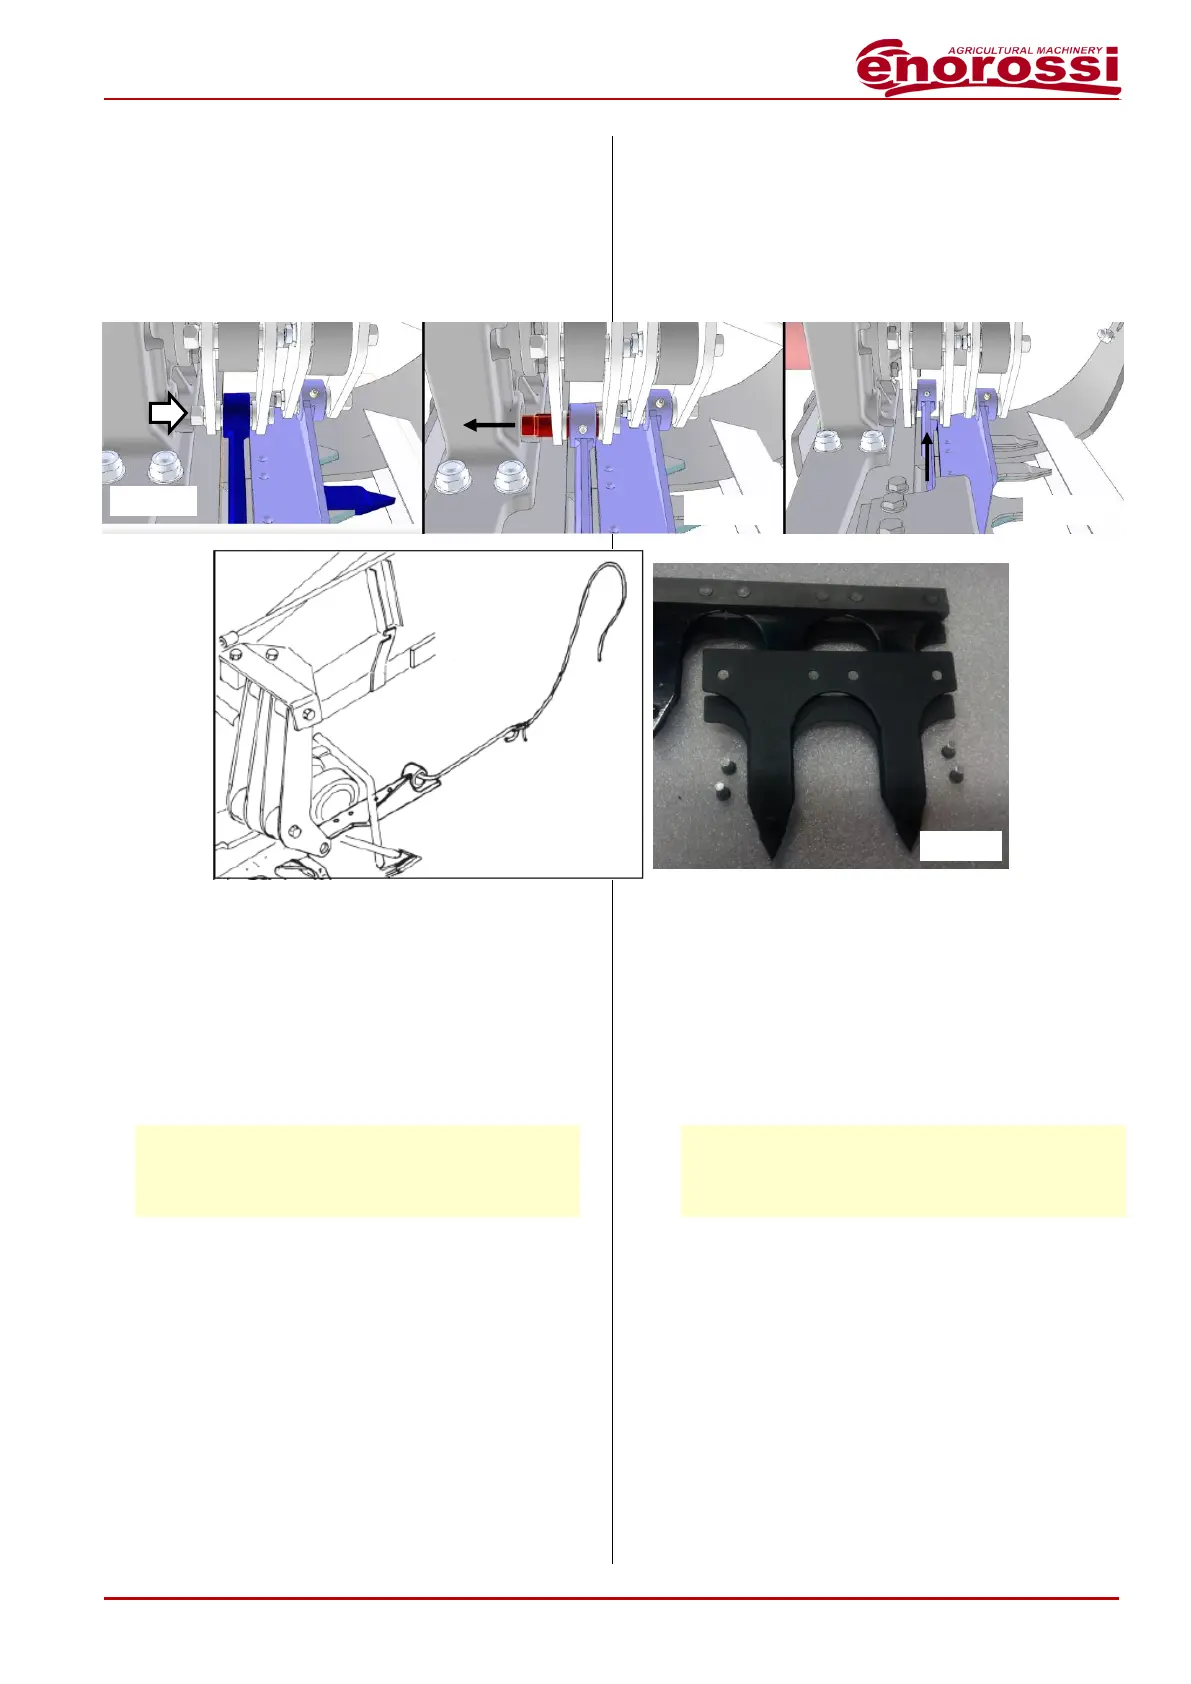
- Allentare il dado del perno ad espansione
(fig.E6a) e con l’aiuto di un puntone (o cac-
ciavite) provvedere a spingere fuori il perno
ad espansione (fig.E6b);
- Utilizzando un utensile appropriato, spingere
la barra porta lame di poco fuori dalla sua
sede (fig.E6c);
- Agganciare la barra porta denti con un gan-
cio appropriato e sfilarla dall’attrezzatura con
l’aiuto di una corda (fig.E6d);
- Rimuovere il dente danneggiato dopo aver
rimosso i due ribattini;
- Posizionare un nuovo dente e fissarlo con
due nuovi ribattini (fig.E6e);
- Inserire la barra porta denti e bloccarla con il
perno ad espansione.
IMPORTANTE
Verificare il corretto accoppiamento asta porta
denti e guidalama. All’occorrenza ripristinare gli
spessori per evitare striature o danneggiamenti.
Sostituzione cinghie
- Allentare completamente il tendicinghia (fig.
E7a);
- Rimuovere il carter di protezione cinghie
(fig.E7b) dopo avere svitato i relativi dadi di
fissaggio;
- Rimuovere le cinghie usurate o rotte e
sostituirle con altre nuove (fig.E7c). Nota: è
consigliabile sostituire tutte le cinghie non
solo quelle usurate o rotte.
- Loosen nut of expansion pin (fig.E6a) and
with the help of a strut (or screwdriver)
provide to push out the expansion pin (fig.
E6b);
- By using an appropriate tool, push the blade-
holding bar just outside its seat (fig.E6c);
- Hook tooth-holding bar by using a special
hook and pull out it from the equipment by
using a rope (fig. E6d);
- Remove the damaged tooth after removing
two rivets;
- Place a new tooth and fix it by two new rivets
(fig.E6e);
- Insert the tooth-holding bar and lock it by
using the expansion pin.
IMPORTANT
Verify the correct connection between the tooth-
holding bar and the blade guide. When required,
put back the shims to avoid striation or damage.
Replacement of belts
- Loose completely the belt tensioner (fig.-
E7a);
- Remove the protective cover of belts (fig.
E7b) after unscrewing fixing nuts;
- Remove worn or broken belts and replace
with new ones (fig.E7c). Note: it is advisable
to replace all belts not only worn or broken
ones.