Section 11 — Sequencer Parameters TS-12 Musician’s Manual
8
• Press DELETE BARS — the display shows the following:
• Use the data entry controls to determine at which bar you want to begin removing bars. This
can be any Bar within the Sequence. Bars will be deleted from the beginning of the Bar you
select here.
• Press the soft button above DELETE ## BARS.
• Use the data entry controls to select how many bars you want to delete.
• Press *YES* to complete the command, or press *NO* to cancel.
Sequence Bank Utilities
A new way to select sequences has been added to certain sequencer edit pages. When a sequence
name parameter is selected on the Song Edit, Append Sequence, Copy Track or Merge Track
pages, an LED above one of the bank buttons will flash to show where the indicated sequence is
located. Pressing a Bank button will temporarily show the corresponding sequence bank page,
and sequences may be selected using soft buttons. If the selection is valid, the page will then
revert to the previous edit page with the new sequence name installed. In addition, you may
select the destination Location for Copy Song or Copy Sequence by indicating a -BLANK-
location on one of the bank pages. This will automatically install the corresponding location
number and return to the copy command page.
Edit Track Page Parameters
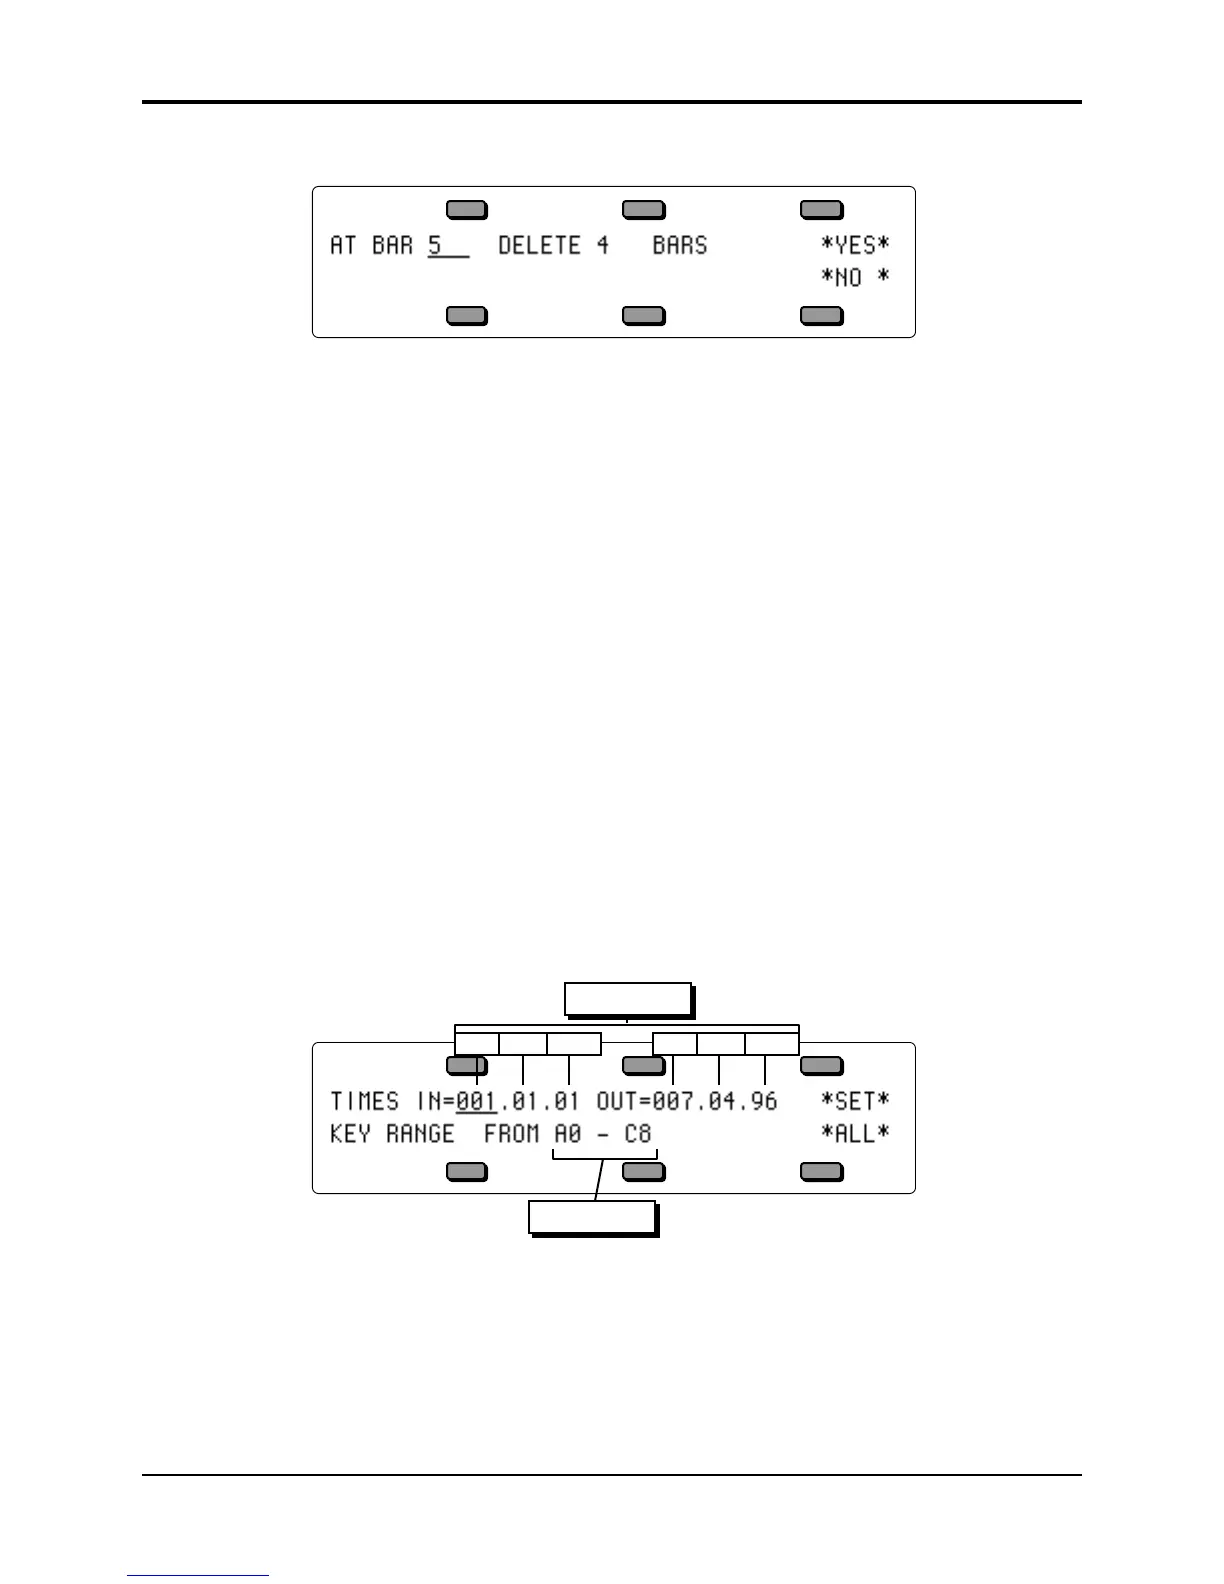
Range Sub-Page — Setting the Time and Key Range
Within almost all track editing functions, you will find a parameter labeled RANGE. Pressing the
soft button below RANGE takes you to a special sub-page where you can define the time and key
range over which the track edit command will work. Data outside the defined range will be left
alone. When you select RANGE from within a track edit function, the display shows:
Bar Beat ClockBar Beat Clock
Time Range
Key Range
• On the upper line of the display you can select and modify the Time range which will be
affected by the edit function; on the lower line you select and modify the Key range.
• To set the time range, first press the soft button above IN to choose the beginning edit time,
shown in Bars, Beats and Clocks. Adjust to the desired bar with the data entry controls. Press
the same soft button again to advance the underline from Bar to Beat to Clock, etc. adjusting
each as needed. Then press the soft button above OUT and repeat these steps to set the ending
edit time.
 Loading...