TS-12 Musician’s Manual Section 14 — Understanding Sampled Sounds
15
Assigning a Surrogate Program to a Track
A Surrogate Program can be assigned to each Sequencer and Presets Track that contains a
Sampled Sound. To assign a Surrogate Program to a Sequence track:
• Load the Sampled Sound into the TS-12, and select it (underlined on the Sampled Sound Bank
page).
• Press the Seqs/Songs button, select a -BLANK- location, and create a new sequence. Because
the Sampled Sound was selected, it becomes the default sound assigned to Track 1.
• Record sequence Track data using the Sampled Sound. By having recorded data on the track,
you will be able to hear the difference as you select an appropriate Surrogate Program.
• Make sure the Track on which the Sampled Sound resides is selected by pressing its soft
button on the TRAX page (found by pressing the Seq/Song Tracks 1-6 or 7-12 buttons).
• Press Replace Track Sound once (its LED is solidly lit), and the Sounds LED will be flashing.
• At this point, you can shop around using the BankSet, Bank and soft buttons to find an
appropriate Program to use as the Surrogate Program for your Sampled Sound.
• When you’ve found the Program that you want to assign as the Surrogate Program, press
Replace Track Sound again. This sends you back to the TRAX page showing that the
Sampled Sound Track has been “replaced” by the Surrogate Program. You have just defined
the Surrogate Program.
To reassign the Sampled Sound back to the Track:
• Press Replace Track Sound once. Its LED should be solidly lit, and the Sounds LED will be
flashing.
• Use the BankSet, Bank and soft buttons to find and select the original Sampled Sound.
• After you’ve selected the original Sampled Sound, press Replace Track Sound again. The
TRAX page will be displayed, and you can see that the Sampled Sound now resides on the
Track. You have just assigned a Sampled Sound to a Track and defined its Surrogate Program.
Tip: There is a quick way to audition the Surrogate Program in a sequence or song:
• Press the Sounds button and go to the Sampled Sound Bank page.
• Press OPTIONS, then the *MUTE* button on the bottom of the options sub-page. Notice that
the Sampled Sound name is now in brackets (parentheses).
• Press the Play button. The Track Sound you will hear is the Surrogate Program.
Erasing All Sampled Sound Data From Memory
If you want to clear the Sampled Sound memory, and start out with a “blank canvas”, you can
easily delete all of the loaded Sampled Sound and Sample-Edits from the TS-12 all at one time.
This function will also delete the information about which Sampled Sounds had previously been
loaded into Sampled Sound Banks.
Note: This can also be used to prevent the Auto-Load prompt from being displayed on power-on.
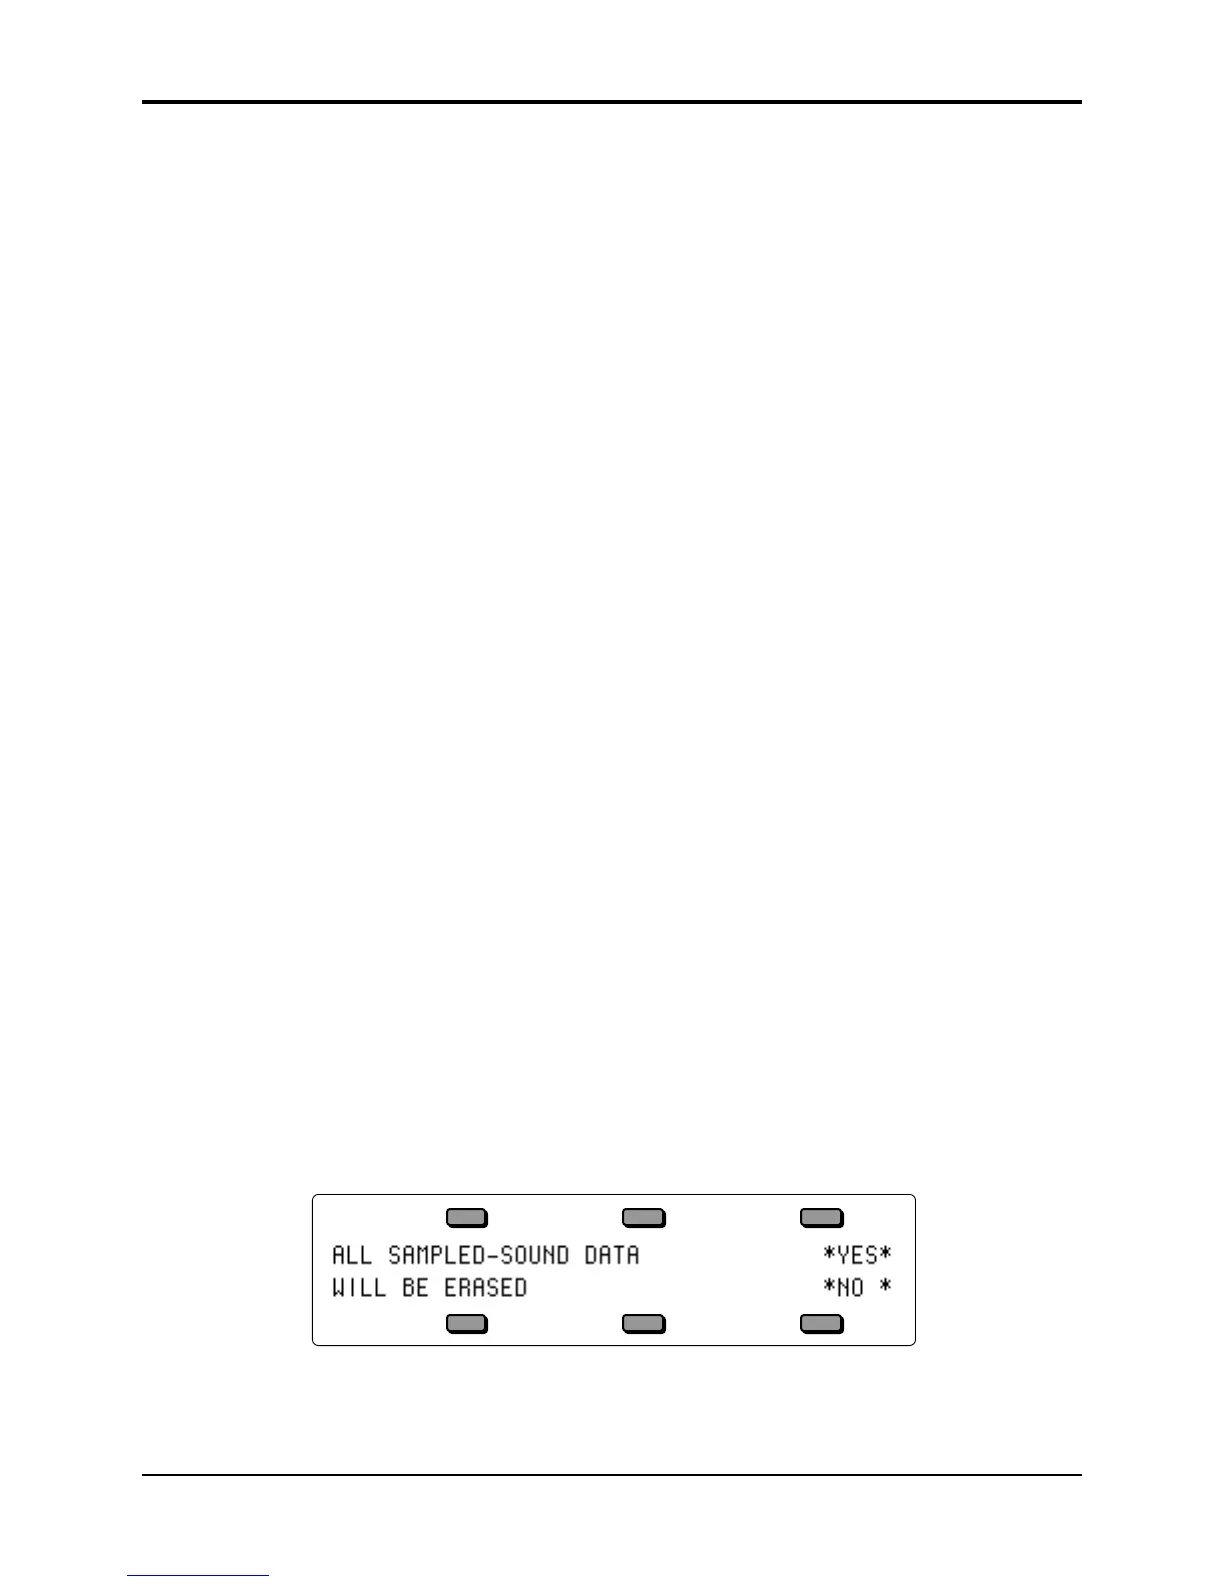
Here’s how:
• While holding down the Presets button, press the bottom center soft button in the display.
The display will show:
• Pressing the soft button above *YES* will erase all Sampled Sound data. Pressing the soft
button beneath *NO* will abort the procedure, and any loaded Sampled Sound and Sample-
Edits will remain in the TS-12.
 Loading...