Operating Instructions
8
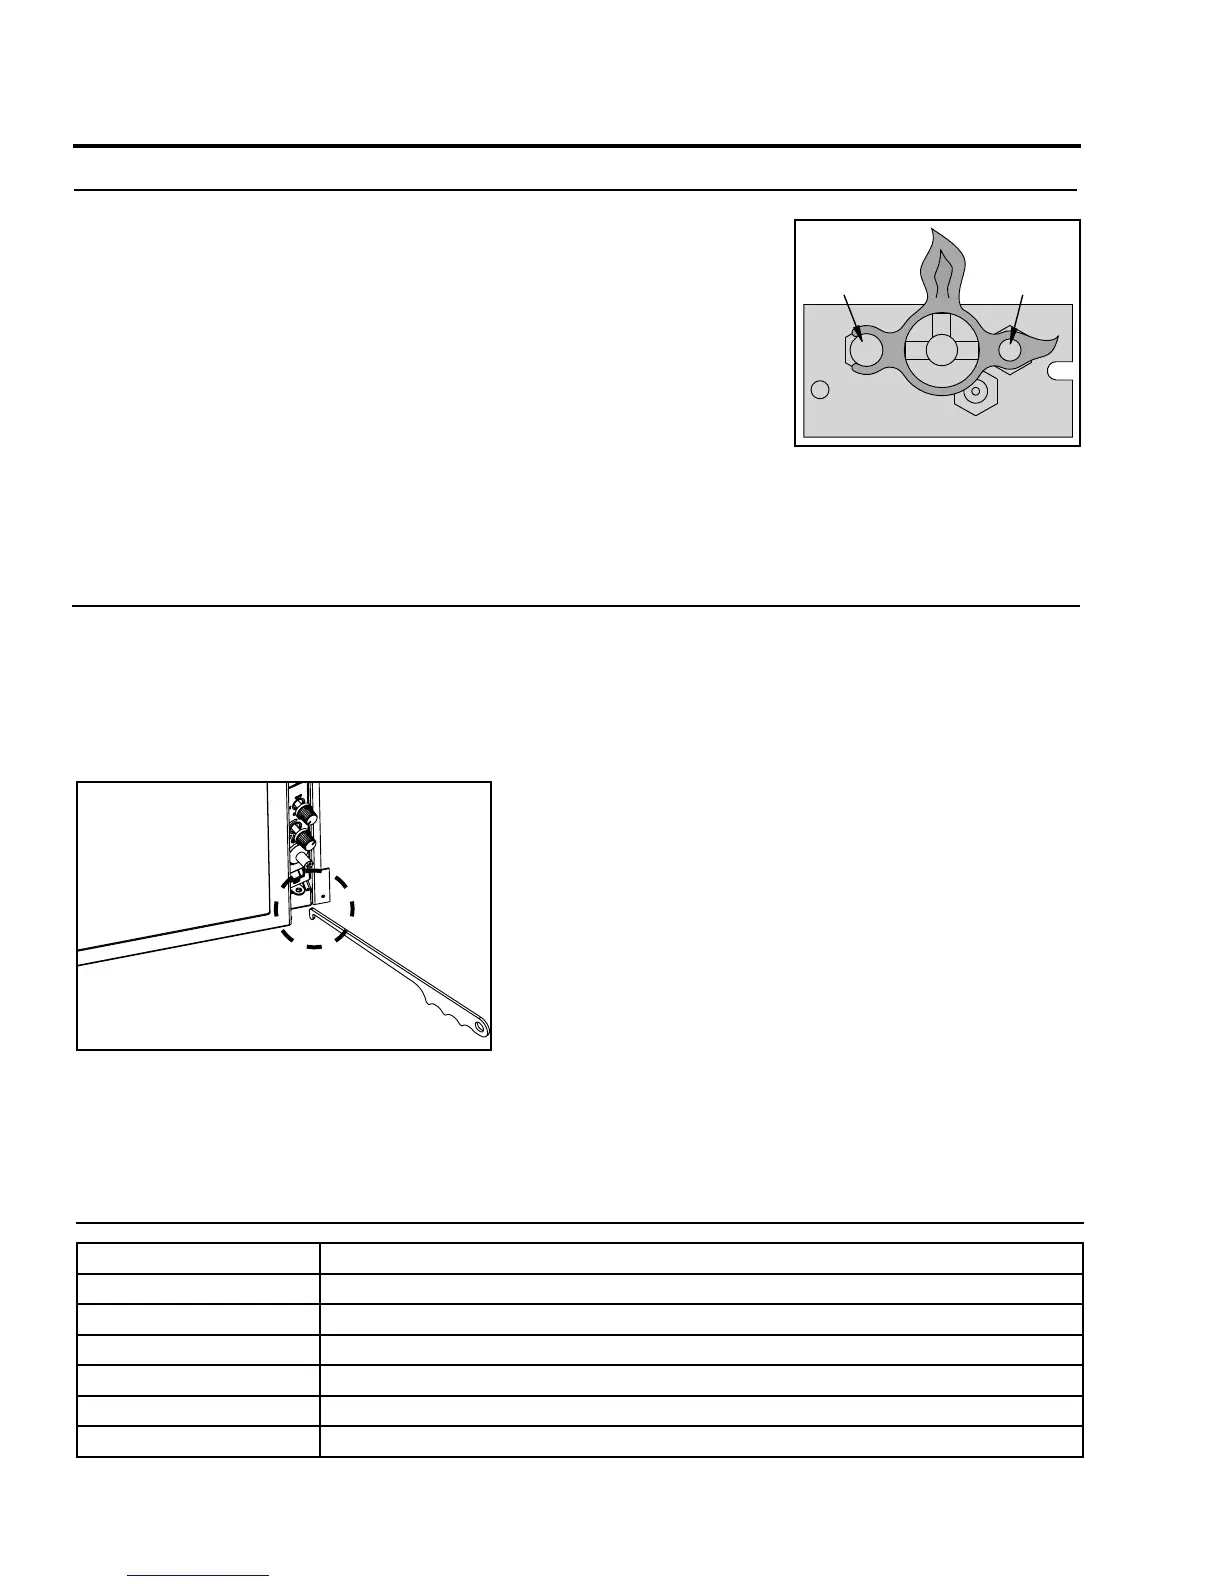
Figure 4. Pilot Flame
PiLot Light:
1. Turn off the gas to the replace. If not recently done, remove the
glass and let the unit air out for at least ve (5) minutes to
clear out any gas. Turn on gas to the heater. Leak test all joints with
soapy water. NEVER USE OPEN FLAME FOR LEAK TESTING.
2. Start the pilot by pressing the gas control knob and turning it to PILOT.
While holding the gas control knob in, press the piezo ignitor several
times until the pilot light starts. Hold the gas control knob in for 30
seconds. Check that the pilot has fully engulfed the thermocouple
assembly (see Figure 4).
3. Start the main burner by turning the gas control knob to ON and then
turn the rocker switch to ON. Check that all burner ports have ame.
4. Leak test all gas joints again.
noRmaL sounDs DuRing oPeRation:
Component Sound & Reason
Fire Box Creaking when heating up or cooling down.
Burner Light pop or poof when turned off; this is more common with LP units.
Temperature Sensor Clinking when it senses to turn the blower on or off.
Pilot Flame Quiet whisper while the pilot ame in on.
Blower / Fan Air movement that increases and decreases with the speed of the blower.
Gas Control Valve Dull click when turning on or off, this is the valve opening and closing.
Table 2: Normal Sound
VentuRi aDjustment:
Thermopile
Thermocouple
Warning: Incorrect venturi adjustment may lead to improper combustion, which is a safety hazard.
Contact the dealer if there is any concern about the venturi adjustment.
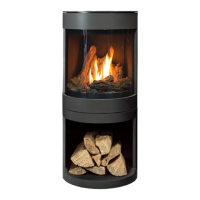
Figure 5: Adjusting the venturi air setting.
The venturi adjustment lever is located on the right side of the unit, behind the surround panel (see
Figure 5). To avoid touching hot surfaces under the unit, use the Door Tool to adjust the venturi.
The venturi allows the amount of air coming into the replace to be adjusted in order to accommodate
different climates and venting arrangements. Start the pilot and then the burner. Make sure the pilot
ame is burning normally and none of the burner ports are plugged. Let the replace burn for roughly
fteen (15) minutes and then examine the ames. The
ideal ame will be blue at the base and light orange
above. The ames should be of medium height. If the
ames look like this, no venturi adjustment is needed. If
the ames are fairly short and mostly blue, the replace
is getting too much air. Therefore, the air shutter should
be closed (push in) slightly until the correct ames are
achieved. Flames that are very orange, with tall dark
stringy tips are not getting enough air. Open (pull out)
the venturi until the ames clean up. If the venturi is
opened, then closed all the way, and the correct ames
cannot be attained, turn off the gas and contact the
dealer.