15
trap a quantity of air inside the hammer when the air supply is
switched off. In most conditions, this prevents the ingress of water
and dirt into the hammer during jointing operations.
Checklist
To prevent dirt from entering the hammer, follow these rules:
• Always keep drill pipes clean. Always store or stack drill pipes
in such a way that the risk of dirt ingress is minimized. Do not let
the thread ends rest on grit or mud. Use thread covers wherever
practicable.
• Always keep the open thread end of the drill pipe covered during
jointing, and remove the cover just before the pipe is coupled up.
• Before coupling up, check that the drill pipe is clean around the
threads and on the inside. If in doubt, blow clean the pipe. Re
-
member to cover the pipe end that is already in the hole.
• If threads are dirty, they should be cleaned using a strong bristle
brush or a cloth.
• Take extra care during jointing operations when drilling in abra
-
sive rock formations, since the ingress of quartz particles into the
hammer will cause heavy wear.
• When drilling holes in water-bearing rock, never leave the ham
-
mer at the hole bottom with the air supply switched off. If drilling
is to be suspended temporarily, always pull up the hammer by at
least two pipe lengths.
• Clean around the driver chuck before changing the drill bit. Make
sure the shank of the new drill bit is clean.
• Keep the hammer clean and plug both ends when not in use.
Change worn or damaged parts in good time.
• Make sure to clean the feed boom if you initially drill through
soil. If the device is poorly cleaned before further drilling, dirt may
fall off and end up in the hammer.
• The combination of oil and old rubber hoses for compressed air
could be very unfortunate. If the rubber gets old and dries out,
parts of the hose could be scooped out and carried down the
hammer.
• Check the air hoses for cracks, twists and other forms of wear
that could cause rubber from the hose to loosen and enter the
hammer. This is specially important in underground application
where the tower of the rig knocks into the roof from time to time.
N�B� Always clean away from the hole in the pipe. Do NOT let
grit fall into the hole in the pipe. After cleaning, always coat the
threads with Epiroc thread grease before jointing.
Extend the life of your hammer
– a maintenance checklist
The service life and performance of DTH hammers depends to
a large extent on good operating practice and regular mainte-
nance. A general overhaul of the hammer should be carried out
at suitable intervals, depending on the operating conditions and
empirical statistics. The following recommendations should be
observed:
• Check regularly that the dosage of lubricating oil into the operat
-
ing air is sufficient. Check that the lubricating oil tank on the rig
is filled with oil of the correct type and quality. Please read the
section “Recommended lubricants”.
• Check the wear on the driver chuck and hammer casing regular
-
ly. The diameter of the driver chuck must never be less than that of
the hammer casing. The service life of the hammer casing can be
prolonged by always fitting a driver chuck with a greater outside
diameter than that of the hammer casing. When the components
are approaching their minimum permissible diameters, frequent
inspection is necessary. Alternatively, change the components in
good time – it makes good economic sense.
• Make sure that the compressed air is always clean and dry.
• Always blow clean the air hoses before connecting them to the
rig.
• Make sure that the drill pipes are stored properly in the pipe
rack, or stacked on trestles in such a way that dirt cannot enter the
pipes.
• Fit thread guards to the ends of the drill pipes whenever practi
-
cable. Keep the threads and the insides of the pipes clean.
• Always cover the “open” thread end of the drill pipe during pipe-
jointing operations. The ingress of dirt into the drill string will
cause blockages and/or seizure in the hammer, which can result in
breakdown.
Economy kits
In hard and abrasive drilling conditions the external parts of DTH
hammer is wearing out before the internal parts reaches their
fatigue limits. With the E-kit, the hammer can be rebuilt and the
internal part re-used for another run. The cost saving can be sub-
stantial as the cost for an E-kit is only 50 % of a new hammer. An
E-kit contains a casing, a backhead, a chuck and a kit of o-rings.
Please read the spare parts list if you would like to know the prod-
uct number for the E-kit.
Rock formation Hammer life Action
Highly abrasive < 5 000 m Use E-kit to rebuild the
hammer 1–2 times
Medium abrasive 5 000–10 000 m Consider E-kit to
rebuild the hammer
1 time
None abrasive > 10 000 m Rebuilding not
recommended.
Always inspect internal parts before assembling the hammer
with an E-kit�
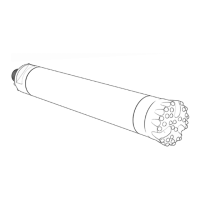
Grinding the drill bit
The rate of bit wear depends on the rock formation, and is highest
in rocks with a high quartz content. A suitable grinding interval
should be determined according to the rate of bit wear. It is more
economical to regrind too early rather than to suffer poor penetra-
tion rates and risk damaging the drill bit through overdrilling.
When to regrind
Button bits should be reground
when the penetration rate drops,
or if any of the cemented carbide
buttons are damaged (fractured
buttons should be ground flat). It
is both practical and economical
to redress the buttons when the
wear flat reaches about ½ of the
diameter of the button.
Note: This is a general recommendation.
Look out for “snake skin”
If microscopic fatigue cracks –
so-called “snake skin” – begin
to appear on the cemented
carbide buttons, they must be
ground away. In any event,
bits should be reground after
300 metres of drilling at the
most. This should be done
even if there are no visible
signs of wear and the penetration rate continues to be good. If
snakeskin is not removed, the cracks will deepen and ultimately
result in button fracture.