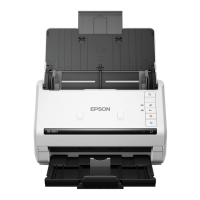
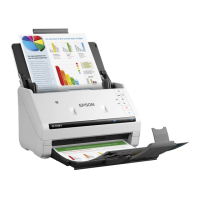
Scanning Using a Scanner Button
You can scan using the button on your scanner.
Note:
❏ Make sure that Epson Scan 2 is installed on your computer and the scanner is connected to your computer correctly.
❏ When Document Capture Pro (Windows) or Document Capture (Mac OS) is installed on your computer, you can assign
the job to a button on the scanner and run the job by pressing it.
1.
Place the original.
2.
Press the
x
button.
Note:
See the Document Capture Pro (Windows) or Document Capture (Mac OS) help for details on button assignments.
Related Information
& “Buttons” on page 20
& “Application for Scanning Documents (Document Capture Pro / Document Capture)” on page 22
& “Placing Originals” on page 33
& “Setting a Job” on page 83
Scanning from a Computer
Scanning Using Document Capture Pro (Windows)
Document Capture Pro allows you to easily and
eciently
digitize originals and forms to suit your needs.
e following functions are available with Document Capture Pro.
❏ You can manage and perform a set of operations, such as scanning and saving, as a "job".
❏ You c a n
congure
a "job" to save scanned images in various formats (PDF/BMP/JPEG/JPEG2000/TIFF/Multi-
TIFF/PNG/DOCX/XLSX/PPTX).
❏ You can sort jobs automatically by inserting dividing paper between the originals or by using barcode
information on the originals.
❏ You can output scanning information or items necessary for the scanned content as index data.
❏ You can set multiple destinations.
❏ You can scan using simple operations without having to create a job.
By using these functions, you can digitize paper documents more
eciently,
such as scanning a large number of
documents or using them over a network.
Note:
❏ For detailed information on how to use Document Capture Pro, refer to the following URL:
https://support.epson.net/dcp/
❏ Document Capture Pro does not support Windows Server.
Basic Scanning
>
Scanning from a Computer
>
Scanning Using Document Capture Pro (Windows)
63
 Loading...