Maintenance 7. Arm #3
108 LS20 Rev.4
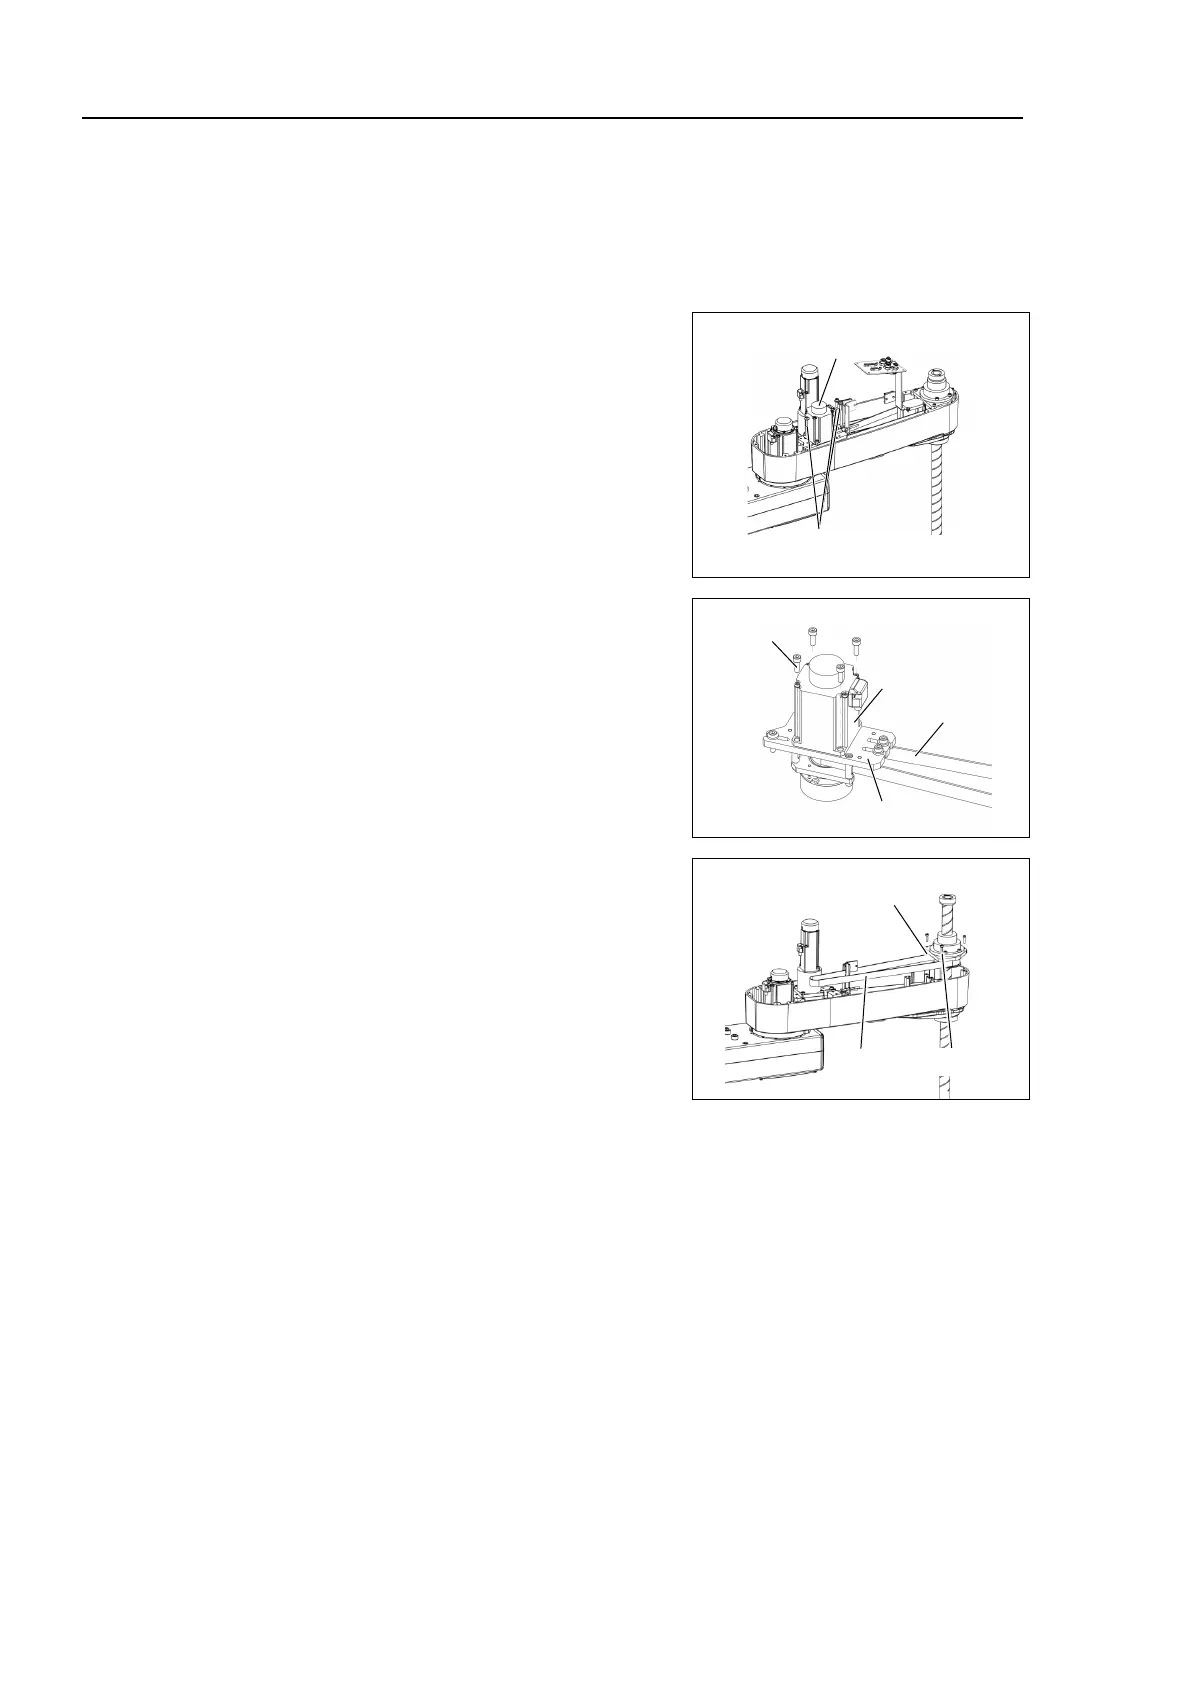
6)
Disconnect the following connectors.
Connectors: X31, X231 (Hold the claw to remove.)
7)
Maintenance: 3.6 User Plate.
Remove the screws for the Joint #3 motor
unit and pull out the Joint #3 motor unit.
The washers for slotted holes will be used
again
when installing the Z belt. Be careful
3-M5×20
+ washer for
slotted hole
Remove the Joint #3 motor from the motor
plate and pull out the Z belt
.
The belt is placed around the pulley. To
remove the Joint #3 motor, tilt the
motor
slightly and pull it upward while avoiding the
belt.
10)
Remove the screws for the spline plate.
Holding the spline plate upward, pull out the
Z belt.

 Loading...


