EasyManuals Logo
Home>Epson>Robotics>LS20 Series

Epson LS20 Series User Manual

Epson LS20 Series
176 pages
To Next Page IconTo Next Page
To Previous Page IconTo Previous Page
Page #139 background imageLoading...
Page #139 background image
Maintenance 8. Arm #4
LS20 Rev.4 127
Joint #4
Reduction Gear
Unit
Installation
(1)
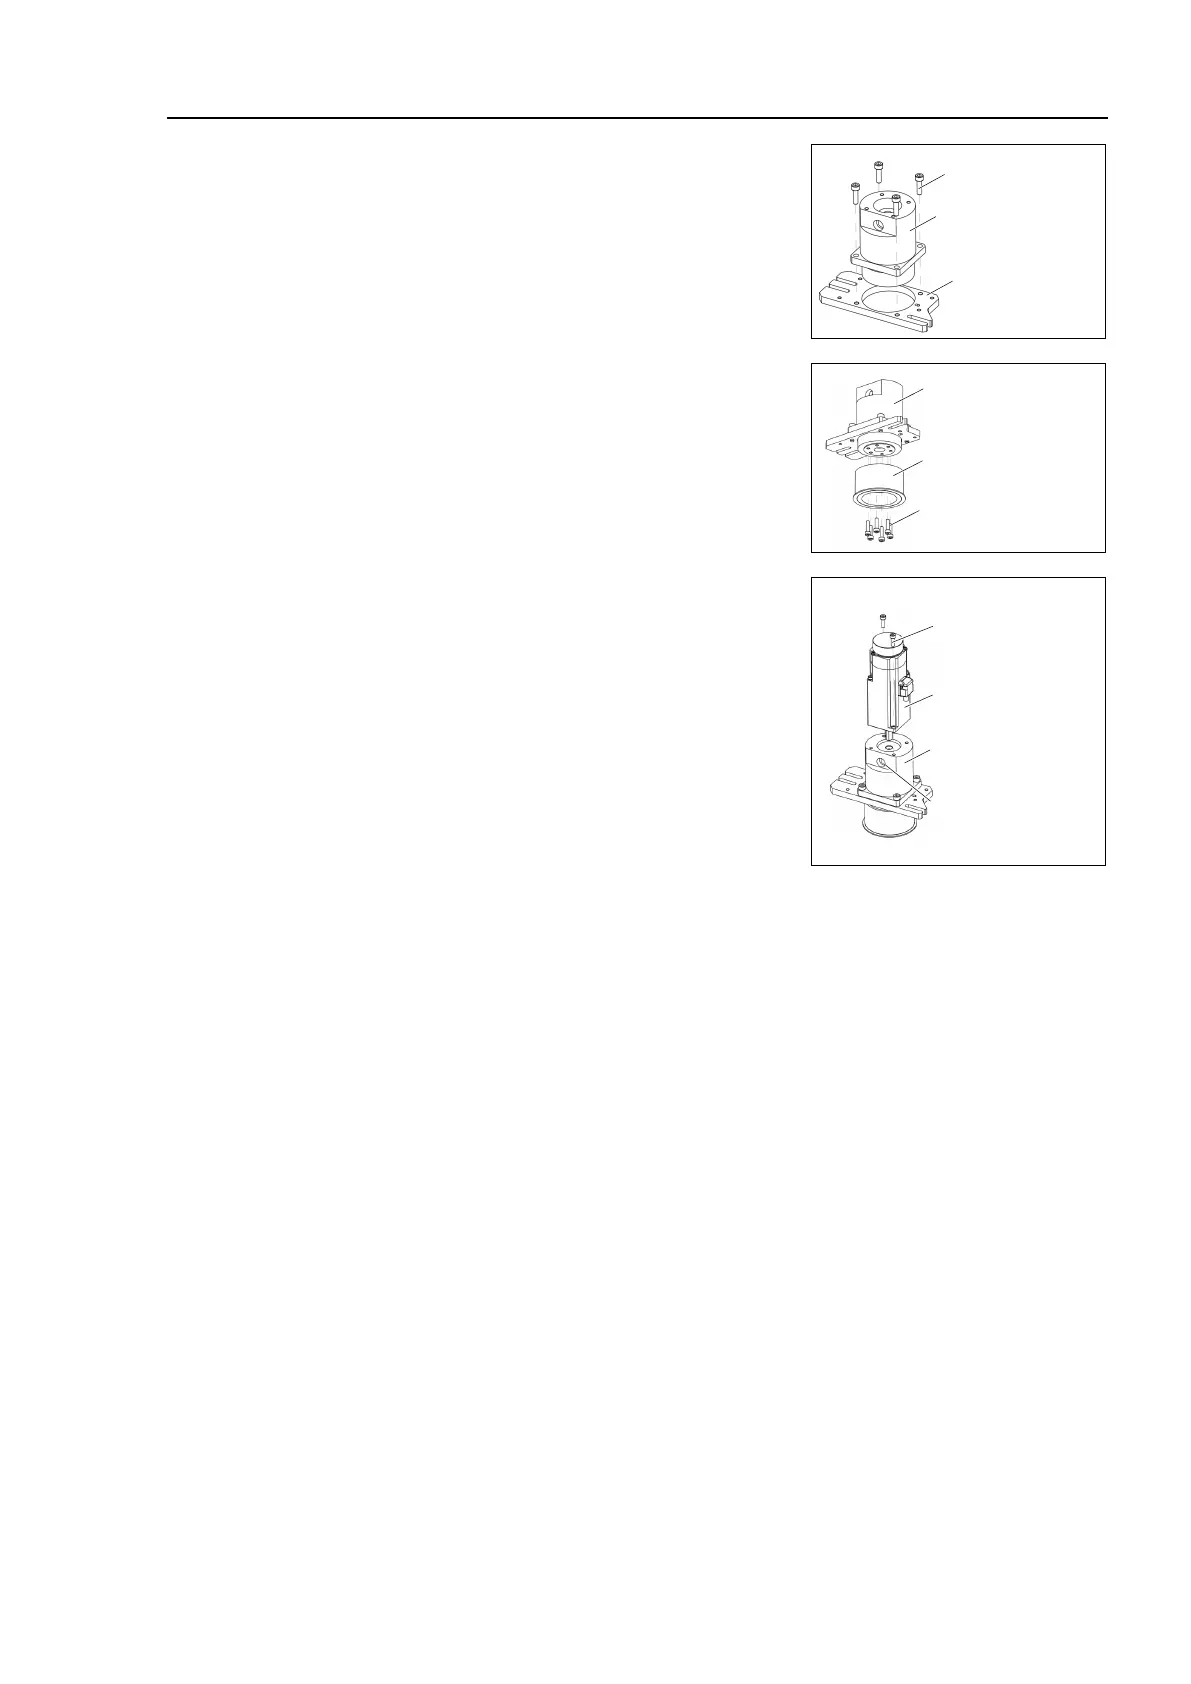
Mount the plate to the new
reduction gear unit.
Joint #4
Reduction Gear Unit
Plate
4-M5×18
(2)
Install the U pulley.
Joint #4
Reduction Gear Unit
6-M4×15
Pulley
(3)
Mount the Joint #4 motor
to the reduction gear
unit.
Fix the motor shaft to the reduction gear unit
.
Remove
cover of the hole for fixing the motor
shaft,
and loosen the screw to fix the motor shaft
to the reduction gear unit
.
After fixing the shaft, mount the cover
to the
hole.
2-M4×12
Joint #4 Motor
Joint #4
Reduction Gear Unit
Screw hole for fixing
the motor shaft
(
4)
Mount the Joint #4 motor unit to the Arm #2.
For details, refer to Maintenance 8.2 Replacing the Timing Belt.

Table of Contents

Questions and Answers:

Question and Answer IconNeed help?

Do you have a question about the Epson LS20 Series and is the answer not in the manual?

Epson LS20 Series Specifications

General IconGeneral
BrandEpson
ModelLS20 Series
CategoryRobotics
LanguageEnglish

Related product manuals