Paper Handling 13
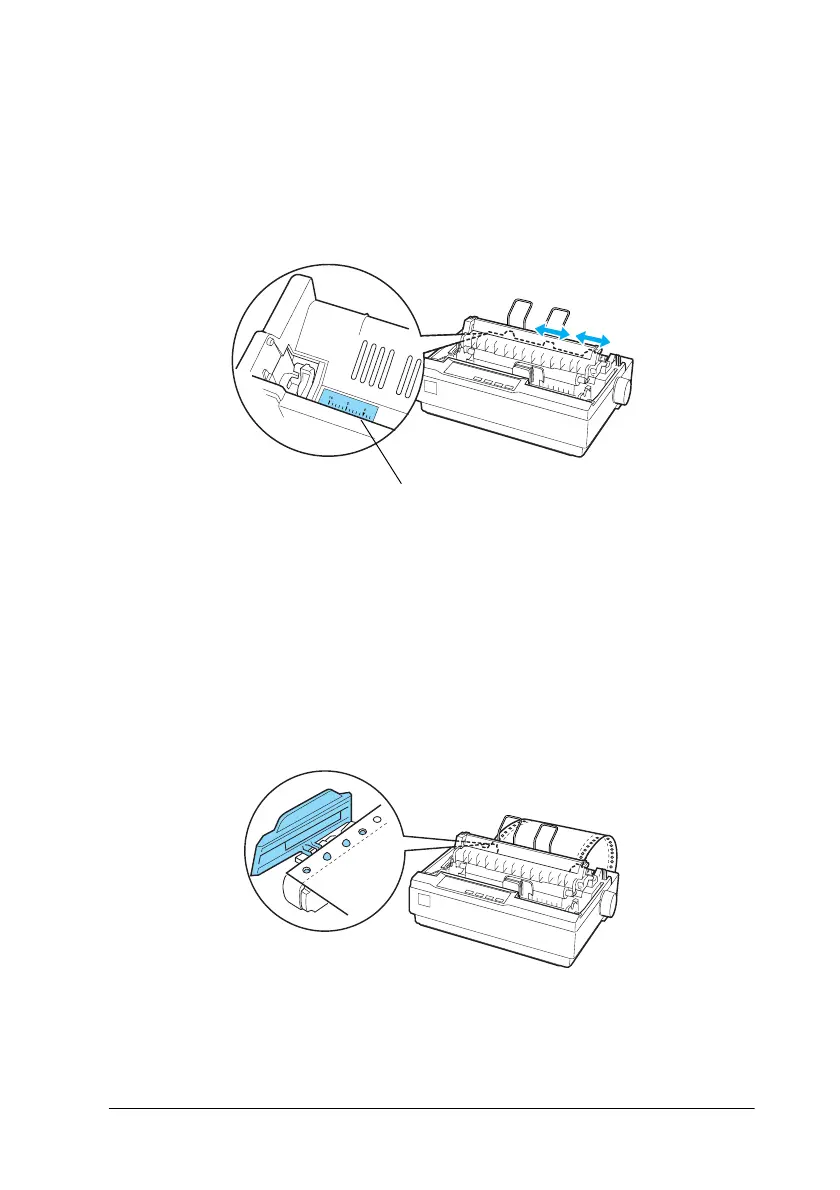
4. Slide the left sprocket so the pins are aligned with the 0 mark
on the printer scale (which is beneath the tractor). Push the
lock lever back to lock it in place. Then slide the right
sprocket to match the width of your paper, but do not lock it.
Move the paper support so it is midway between the
sprockets.
5. Stack your continuous paper behind the printer. Make sure
there are no obstructions between the paper and the printer
and that the paper is aligned squarely with the printer so it
will feed in straight.
6. Make sure your paper has a clean, straight, leading edge.
Then open the sprocket covers and fit the first holes of the
paper over the sprocket pins.
7. Close the covers. Slide the right sprocket to remove any
slack in the paper and lock it in place.
0 mark

 Loading...


