c
Important:
❏ The printer can be moved across bumps of less
than 5 mm and gaps of less than 30 mm. Before
you start, check the bumps and gaps of the route
to move the printer.
❏ Be sure to move the printer under the following
conditions.
❏ Do not separate ink supply unit from the
printer.
❏ Leave fixing wire attached.
❏ Leave ink cartridges installed.
Getting Ready
A
Confirm that the printer is off.
B
Remove the Waste Ink Bottle.
U “Replacing the Waste Ink Bottle” on
page 125
C
Disconnect the power cords and all other cables.
D
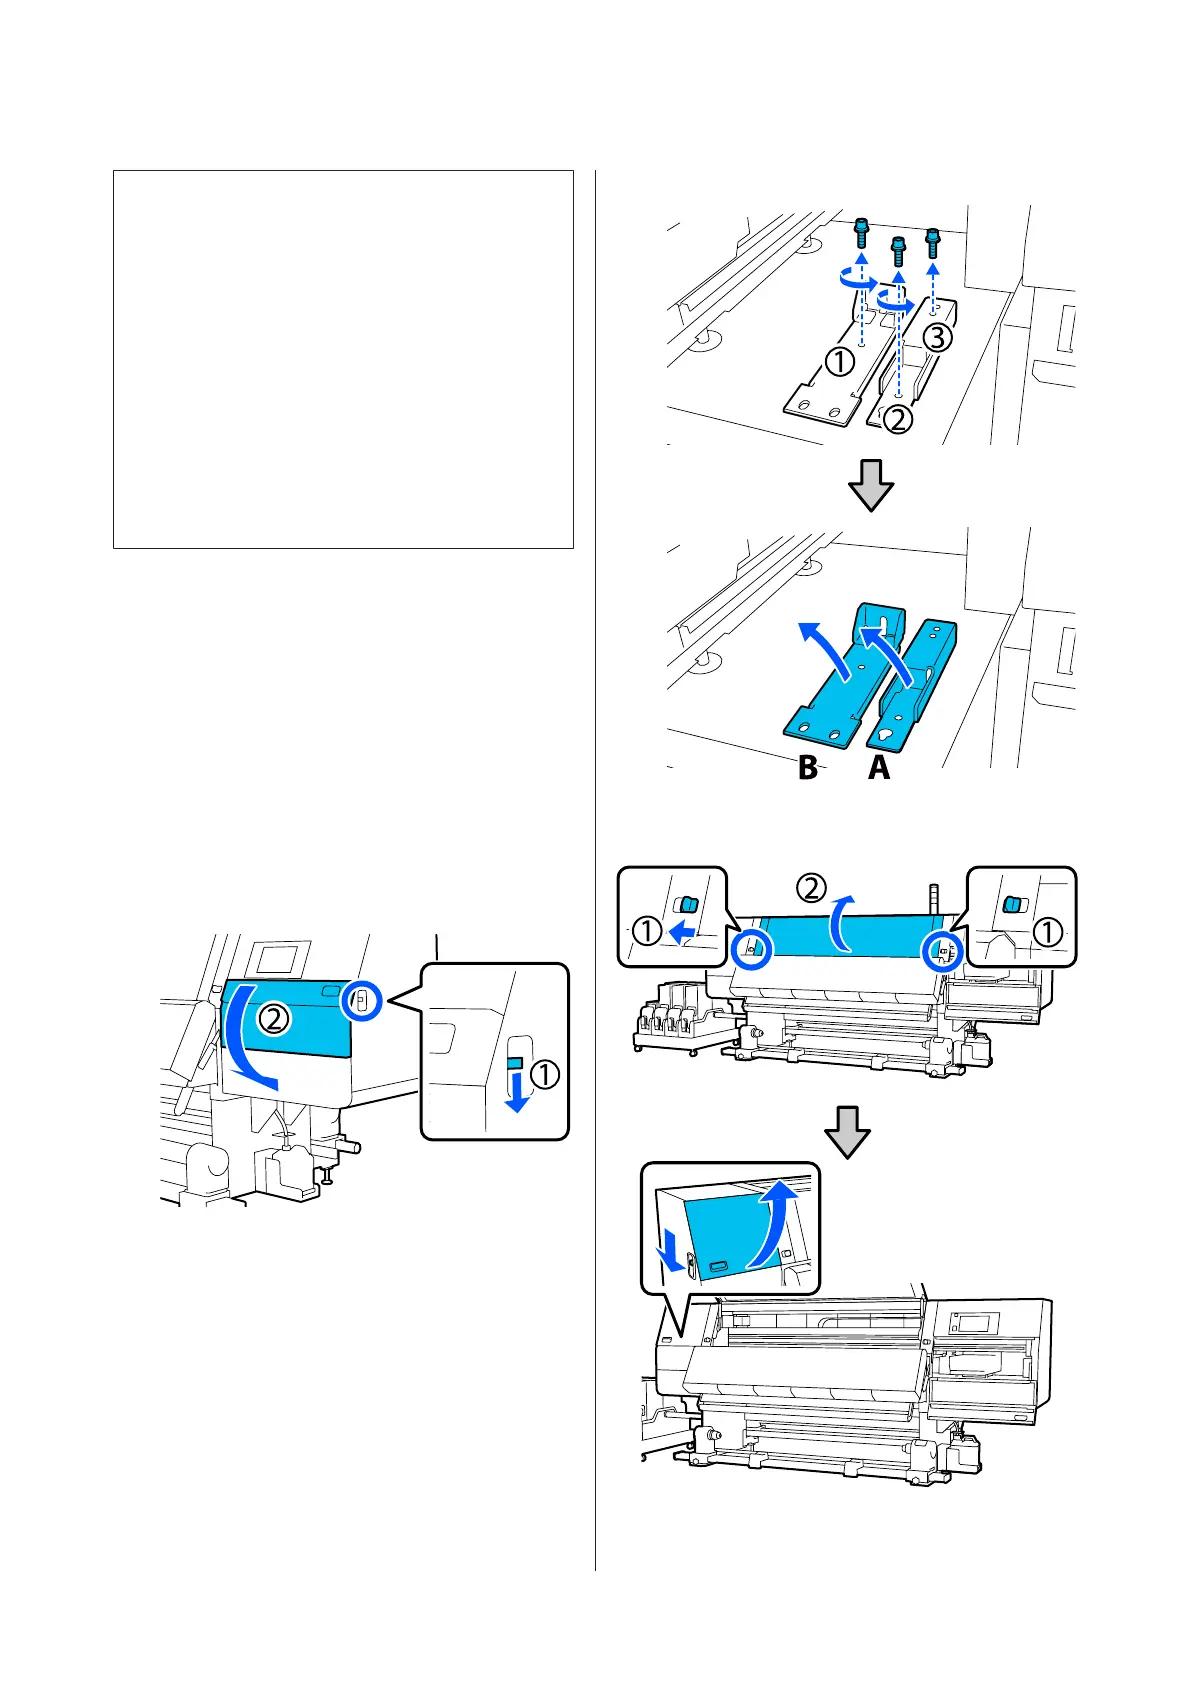
Open the right-side maintenance cover.
E
Loosen the 3 screws and remove the screws and
print head anchors A and B, as shown in the
illustrations.
If screws (1) and (2) are difficult to loosen by
hand, use a hex wrench.
Pull screw (3) out as is.
F
Open the front cover and left-side maintenance
cover.
SC-F10000 Series User's Guide
Appendix
180
 Loading...