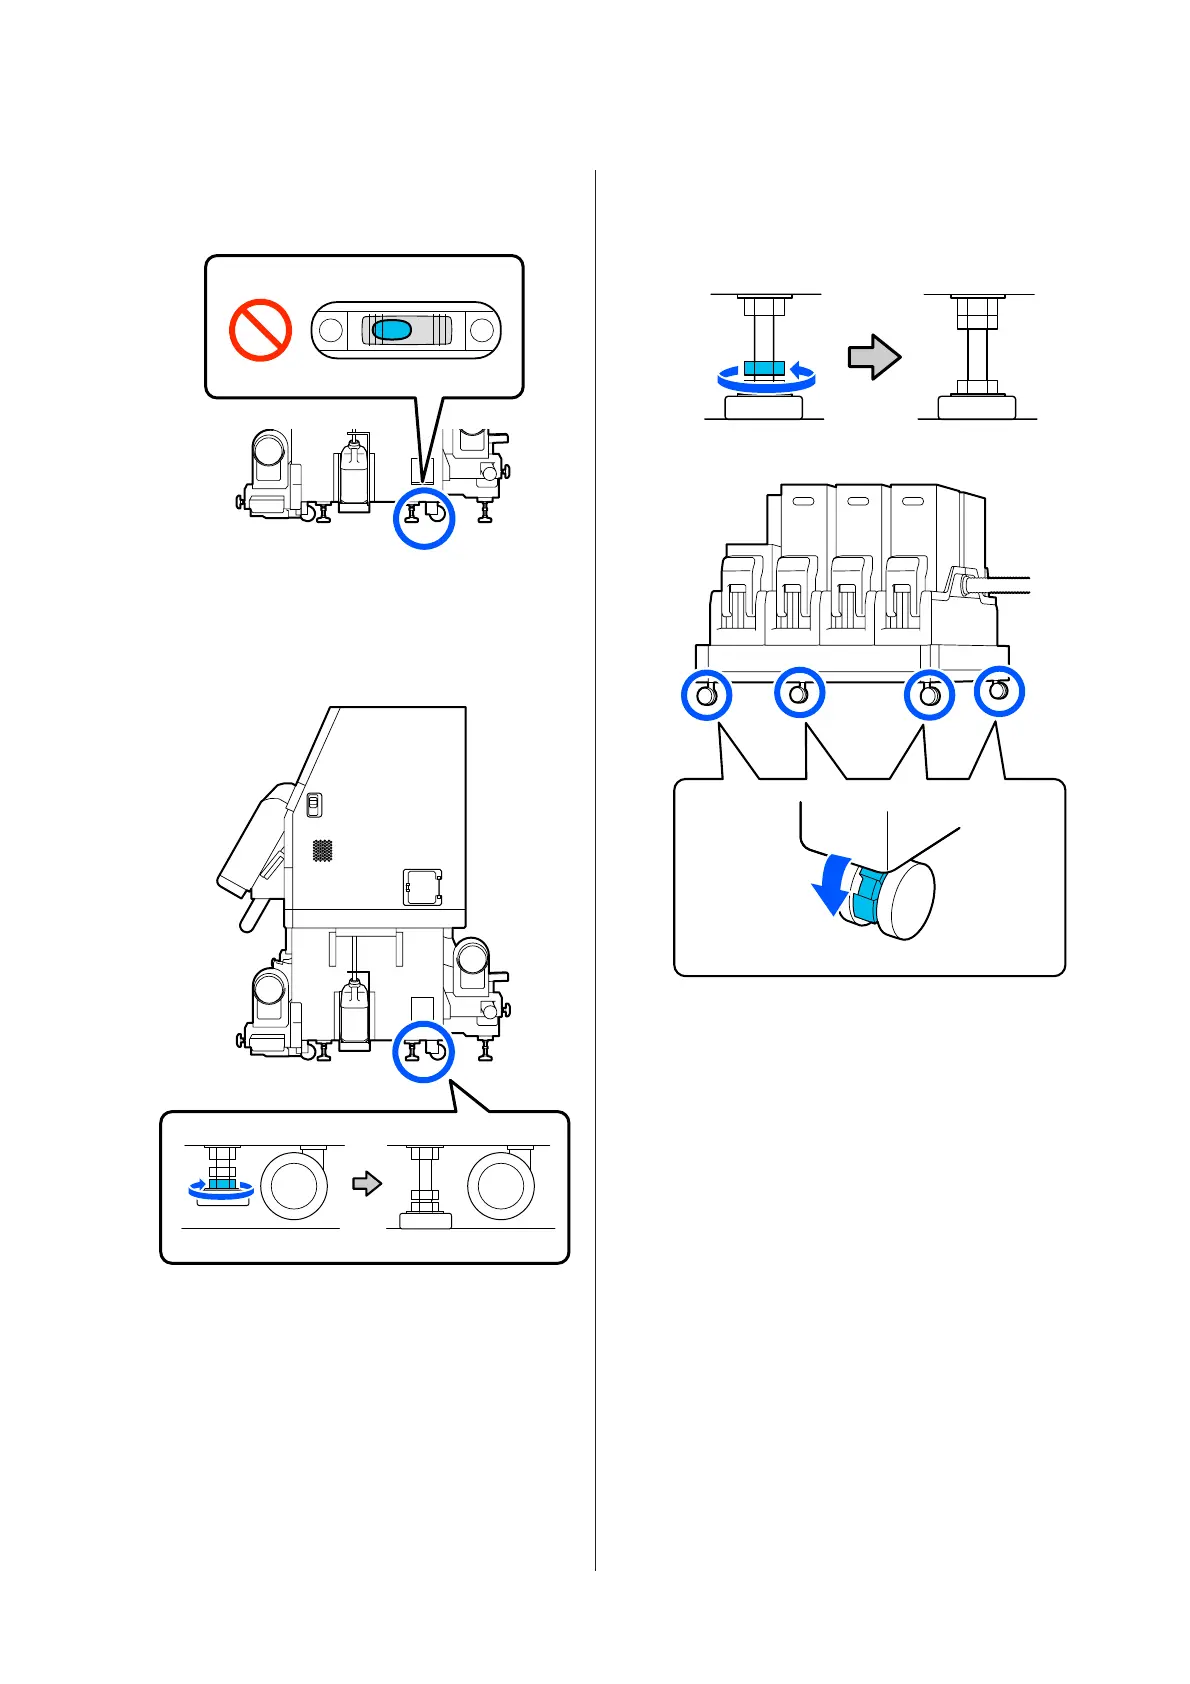
When the air bubble is toward the front side
Turn the nut on the back adjuster clockwise.
P
On the right side, lower the center adjuster until
it touches the floor.
Turn the bottom nut clockwise until the adjuster
touches the floor.
Q
Repeat Step 14 to suspend the left side casters.
R
Repeat Step 16 to suspend the center adjuster on
the left side.
S
On all 6 adjusters, turn the top nut clockwise
until it reaches the top part and stops.
After it reaches the top part, tighten it securely to
fix it.
T
Lock the 4 casters on the ink supply unit.
U
Do parallel adjustments to the Auto Take-up
Reel Unit.
U “Parallel Adjustments for the Auto Take-up
Reel Unit” on page 191
V
Connect all the cables, plug the power plug into
an electric outlet, and turn on the power.
W
Perform a nozzle check to check for clogged
nozzles.
U “Printing nozzle check patterns” on
page 135
X
Perform Print Adjustments in the setup menu,
and check the print quality.
U “Print Adjustments” on page 90
SC-F10000 Series User's Guide
Appendix
188
 Loading...