This menu provides two modes: Auto and Manual.
Auto
The printer reads adjustment patterns using the sensor
while printing the patterns, and makes adjustment
automatically.
Manual
Visually check the printed adjustment patterns, and
specify the optimal adjustment values. Use this if
graininess or misalignment occurs when using Auto.
The approximate maximum length of the media
required to print the test pattern is given below. The
amount of media used varies with the printer model and
the media system used.
SC-S70600 series, SC-S50600 series
Auto Manual
Standard roll media system Approx.
987 mm
Approx.
1170 mm
Heavy Roll Media System Approx.
1116 mm
Approx.
1170 mm
SC-S30600 series
Auto Manual
Standard roll media system Approx.
1061 mm
Approx.
1170 mm
Heavy Roll Media System Approx.
1190 mm
Approx.
1170 mm
When making adjustment, note the following points.
U “Precautions regarding settings” on page 84
Setting procedure
A
Check that the printer is ready, and load the
media according to the actual usage conditions.
When using the Auto Take-up Reel Unit, attach
the media to the Auto Take-up Reel Unit.
U “Loading and Exchanging Media” on
page 33
U “Using the Auto Take-up Reel Unit” on
page 67
B
Press the Menu button to display the setup menu.
C
Use the d/u buttons to select Media Setup, and
press the Z button.
D
Use the d/u buttons to select Customize
Settings and press the Z button.
E
Use the d/u buttons to select the media number
targeted for adjustment, and press the Z
button.
If a number with the saved settings is selected, the
existing settings are overwritten.
F
Use the d/u buttons to select Media Adjust, and
press the Z button.
G
Use the d/u buttons to select Feed Adjustment,
and press the Z button.
H
Use the d/u buttons to select either one of the
following modes, and press the Z button.
Auto
This mode automatically performs pattern
printing and adjustment.
When Ready is displayed on the screen of the
control panel, adjustment is completed.
Manual
The adjustment pattern selection screen is
displayed. Select the adjustment pattern to be
printed, and press the Z button twice to
proceed to Step 9. The longer the pattern is, the
more accurate the adjustment becomes.
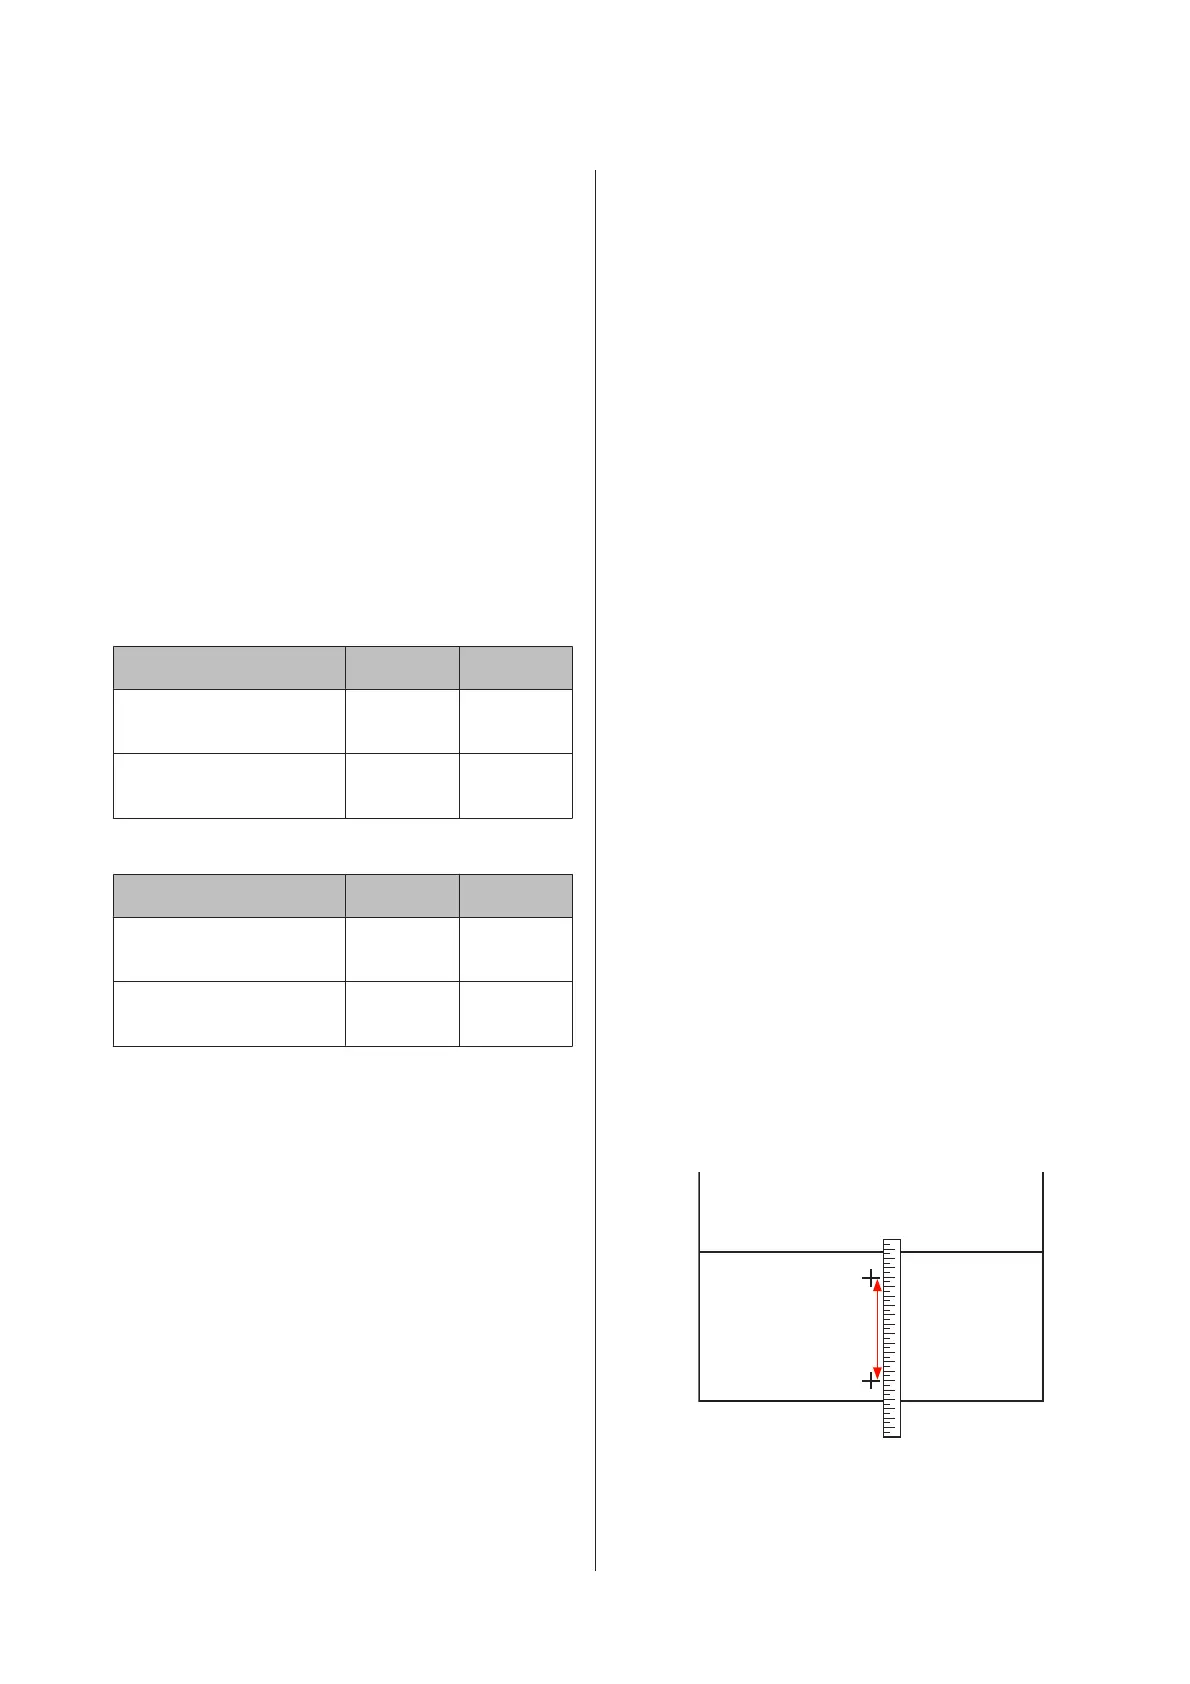
I
Measure the distance between the symbols "+" on
the printed adjustment pattern using a ruler.
EPSON SC-S70600 series/SC-S50600 series/SC-S30600 series User's Guide
Basic Operations
87

 Loading...