EPSON Stylus C50/C60/C61/C62 Revision C
Adjustment Overview 127
5.1 Overview
This section describes the procedure for adjustments required when the printer is
disassembled and assembled for repair or service.
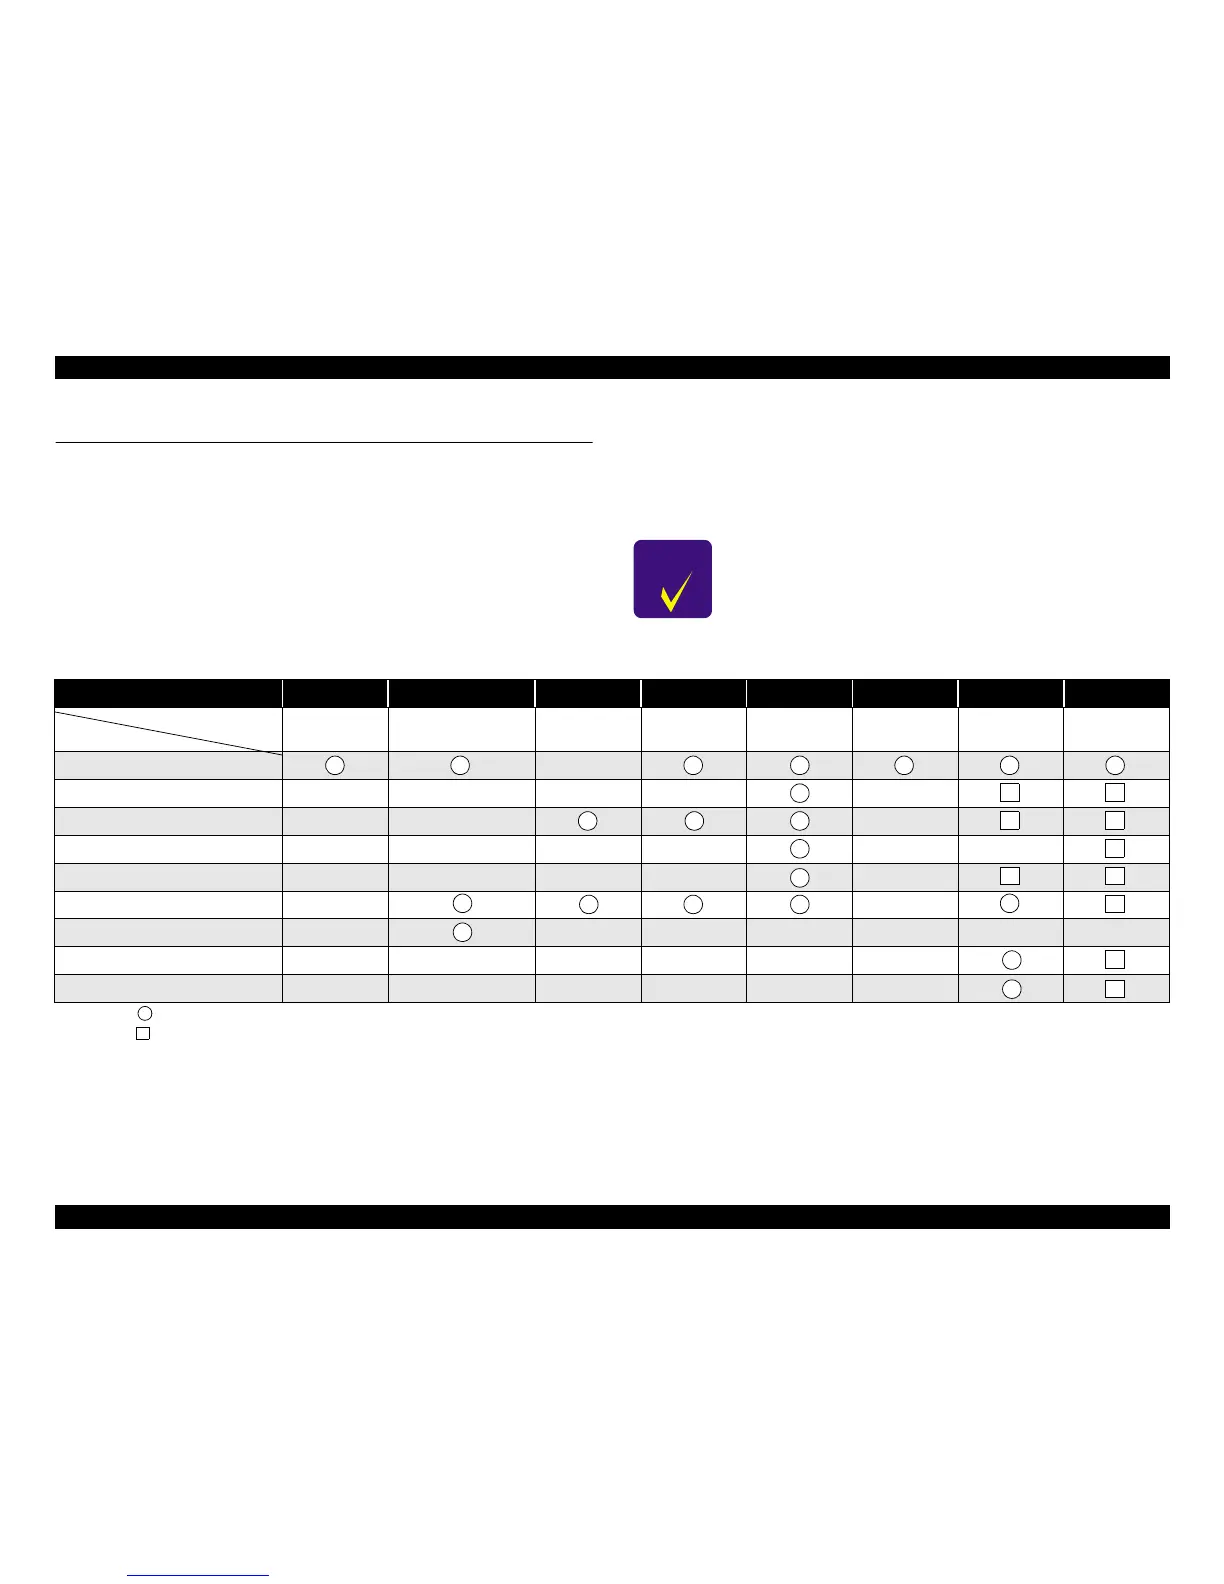
5.1.1 Required Adjustment
If you remove or replace the specific part in your service/repair, you have to perform
the appropriate adjustment as listed Table 5-1 below.
In this printer, it is necessary to perform appropriate adjustment in order to maintain
consistent printing function and quality, eliminate differences of each printer
mechanism’s characteristics.Therefore, in case that the combination between the
printer mechanism and the main board changes or the Printhead is replaced during the
repair service, you must input the correct adjustment value into the EEPROM on the
Main board by using the Adjustment program.
Table 5-1. Required Adjustment
In case that any parts are removed and assembled on the repair
product while running the Adjustment program, make sure to
turn off the printer.
Performance Priority 1 2 3 4 5 6 7 8
EEPROM initial
setting
Ink pad replacement or
ink Counter reset
Initial ink
charge
Head ID input Bi-D adjustment USB ID input
Top margin
adjustment
1st dot
adjustment
Main board replacement NA
Printhead removal NA NA NA NA NA
Printhead replacement NA NA NA
CR motor replacement NA NA NA NA NA NA
CR unit removal/replacement NA NA NA NA NA
Printer mechanism replacement NA NA
Waste drain ink pad replacement NA NA NA NA NA NA NA
ASF unit removal/replacement NA NA NA NA NA NA
Holder shaft unit removal/replacement NA NA NA NA NA NA
NOTE:
“ ”: Required necessary adjustment
“ ”: Required Adjustment for confirmation
The numbers in the circle/square shows the required adjustment order.
“NA”: Not applicable.
• Following adjustments are not required on this product.
-Platen Gap adjustment
-Head Angular adjustment.
NOTE:
• When the Main board is replaced with new one, you may have to
replace Waste drain ink pad with new one also in case the
EEPROM parameter back up function is not available on the
defective main board.
• After completing the adjustment, check the printing result with A4
check pattern by using the Adjustment program.
If the result is not good, perform appropriate adjustment.
Adjustment
item
Replaced part
1 2 3 4 5 6 7
123
1 2 3 4 5
1 2
1
2 3
1
6
1
1
1
2
2
2 3 4
5
 Loading...