Epson Stylus C58/C59/ME 2/C79/D78/C90/C91/C92/D92/T20/T20E/T23/T26/S20/T10/T11/ME 30/T21/T24/T27/S21 Revision E
DISASSEMBLY/ASSEMBLY Removing Housing 39
Confidential
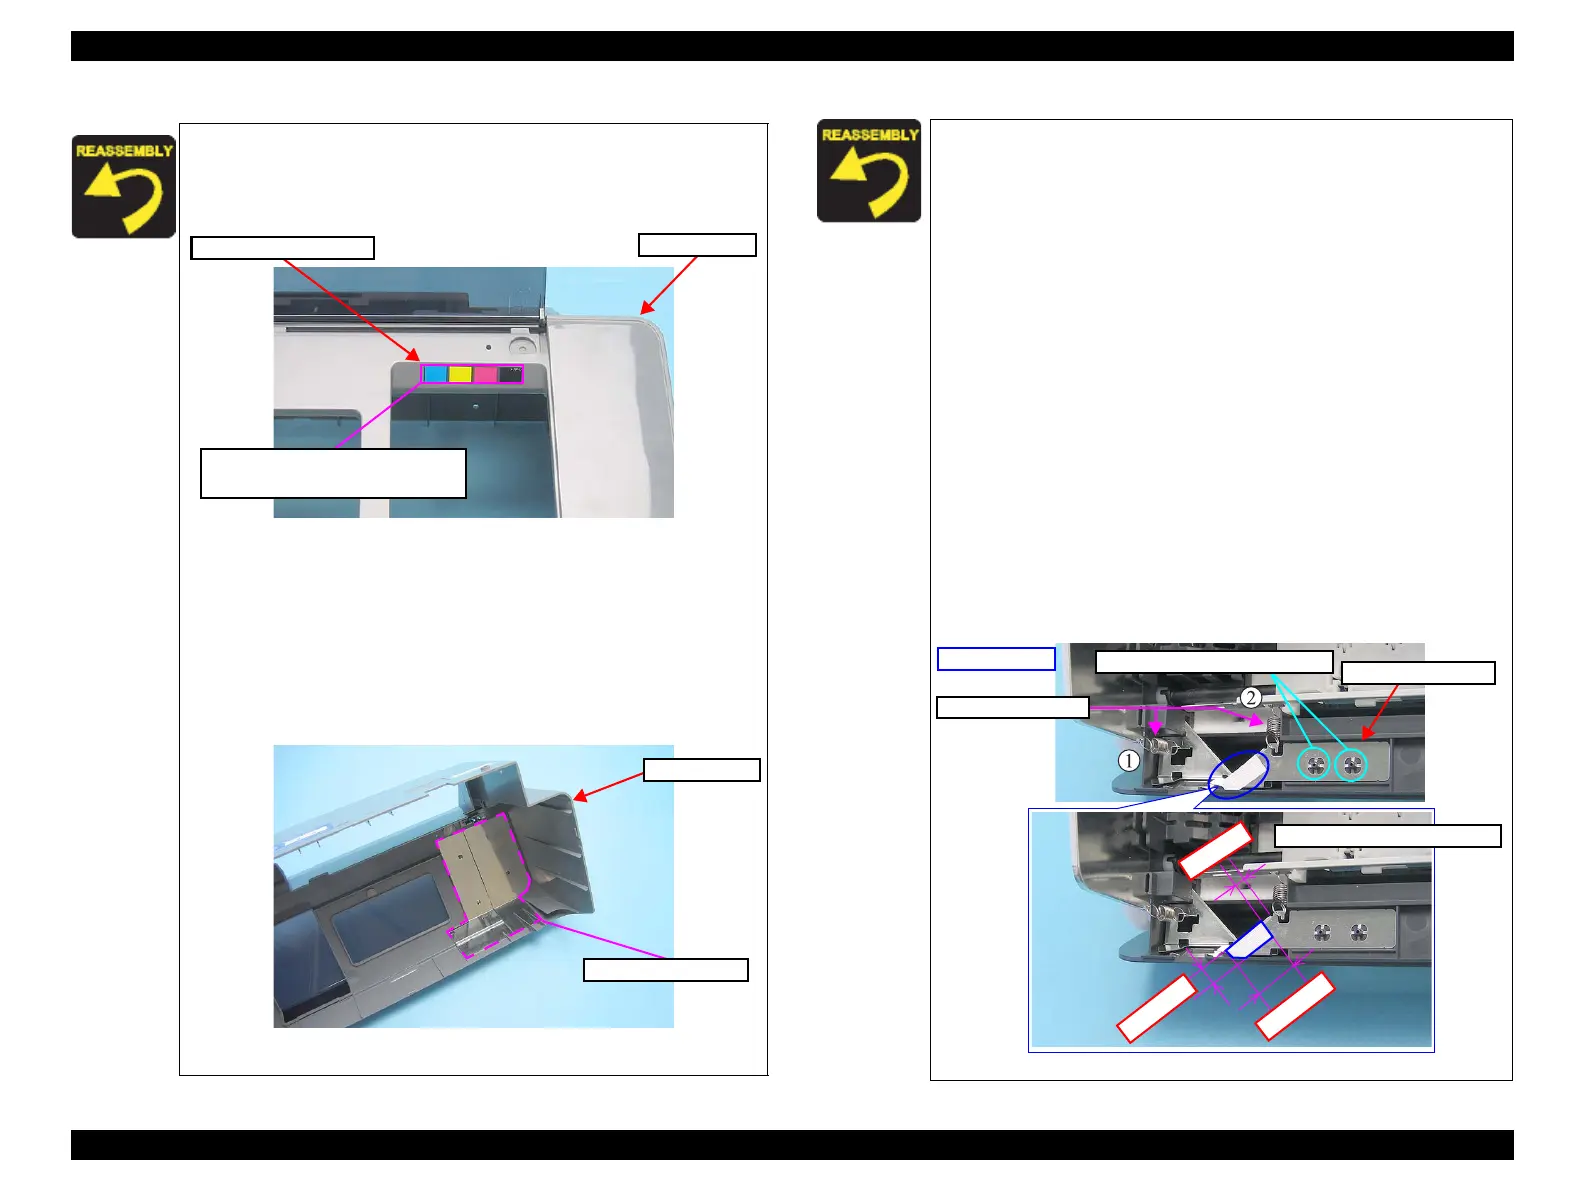
The Ink Position Label is not included in the Upper Housing.
When installing the Upper Housing, order the label separately
and attach the Ink Position Label to the place shown below.
Figure 4-6. Installing Ink Position Label
In Epson Stylus C79/D78/C90/C91/C92/D92’s case:
• When reassembling the Upper Housing, be sure to check there
is no ink on the Shield Plate Upper. If there is some ink stein on
it, be sure to wipe it out before reassembling.
• When installing the Upper Housing, be sure to check the GND
Plate M/B comes in contact with the Shield Plate Upper.
Figure 4-7. Shield Plate Upper
Upper Housing
Ink Position Label
Install the label in this position with
Black to the right.
Upper Housing
Shield Plate Upper
If removing and reassembling the Shield Plate Front for some
reasons, be sure to follow the steps below.
Removing Shield Plate Front
1. Peel off the acetate tape and remove the grounding spring 1,2.
2. Bend the four protrusions of each of the two holes outwardly with a
flat-head precision driver or the like and remove the Shield Plate Front.
NOTE. After removing, be sure to straighten the protrusions of
the holes to restore their original state.
Reassembling Shield Plate Front
1. Insert the two holes of the plate over the dowels on the base
frame as far as they will go.
2. Install the grounding spring 1, 2 and attach a 20 x 18 mm piece of
acetate tape positioning it as described/shown below.
• Leaving a space of 5mm from the edge (A), attach the right 6-
7mm-width portion of the tape to the Shield Plate Front. Fold
the tape along the edge (B), and wrap the acute edge of the
plate. Be careful not to let the tape run over the frame edge.
NOTE 1. After reassembling, make sure the plate is kept in
absolute contact with the frame.
NOTE 2. When replacing the Base Frame, remove the Shield Plate
Front from the current Base Frame and reinstall it to a
new one as the Base Frame supplied as an ASP does not
include the part.
Figure 4-8. Removing and reassembling Shield Plate Front
Holes with protrusions & Dowel
Acetate Tape: 20mm x 18mm
Shield Plate Front
Front Left