Epson Stylus C58/C59/ME 2/C79/D78/C90/C91/C92/D92/T20/T20E/T23/T26/S20/T10/T11/ME 30/T21/T24/T27/S21 Revision E
DISASSEMBLY/ASSEMBLY Disassembling Printer Mechanism 59
Confidential
4.5.10 LD Roller/ASF Unit
Part/Unit that should be removed before removing LD Roller/ASF Unit
Upper Housing /Hopper /Main Board /Main Frame /EJ Frame Assy. /
Print Head /CR Scale/CR Motor/CR Unit/Timing Belt/Ink System
Removal procedure
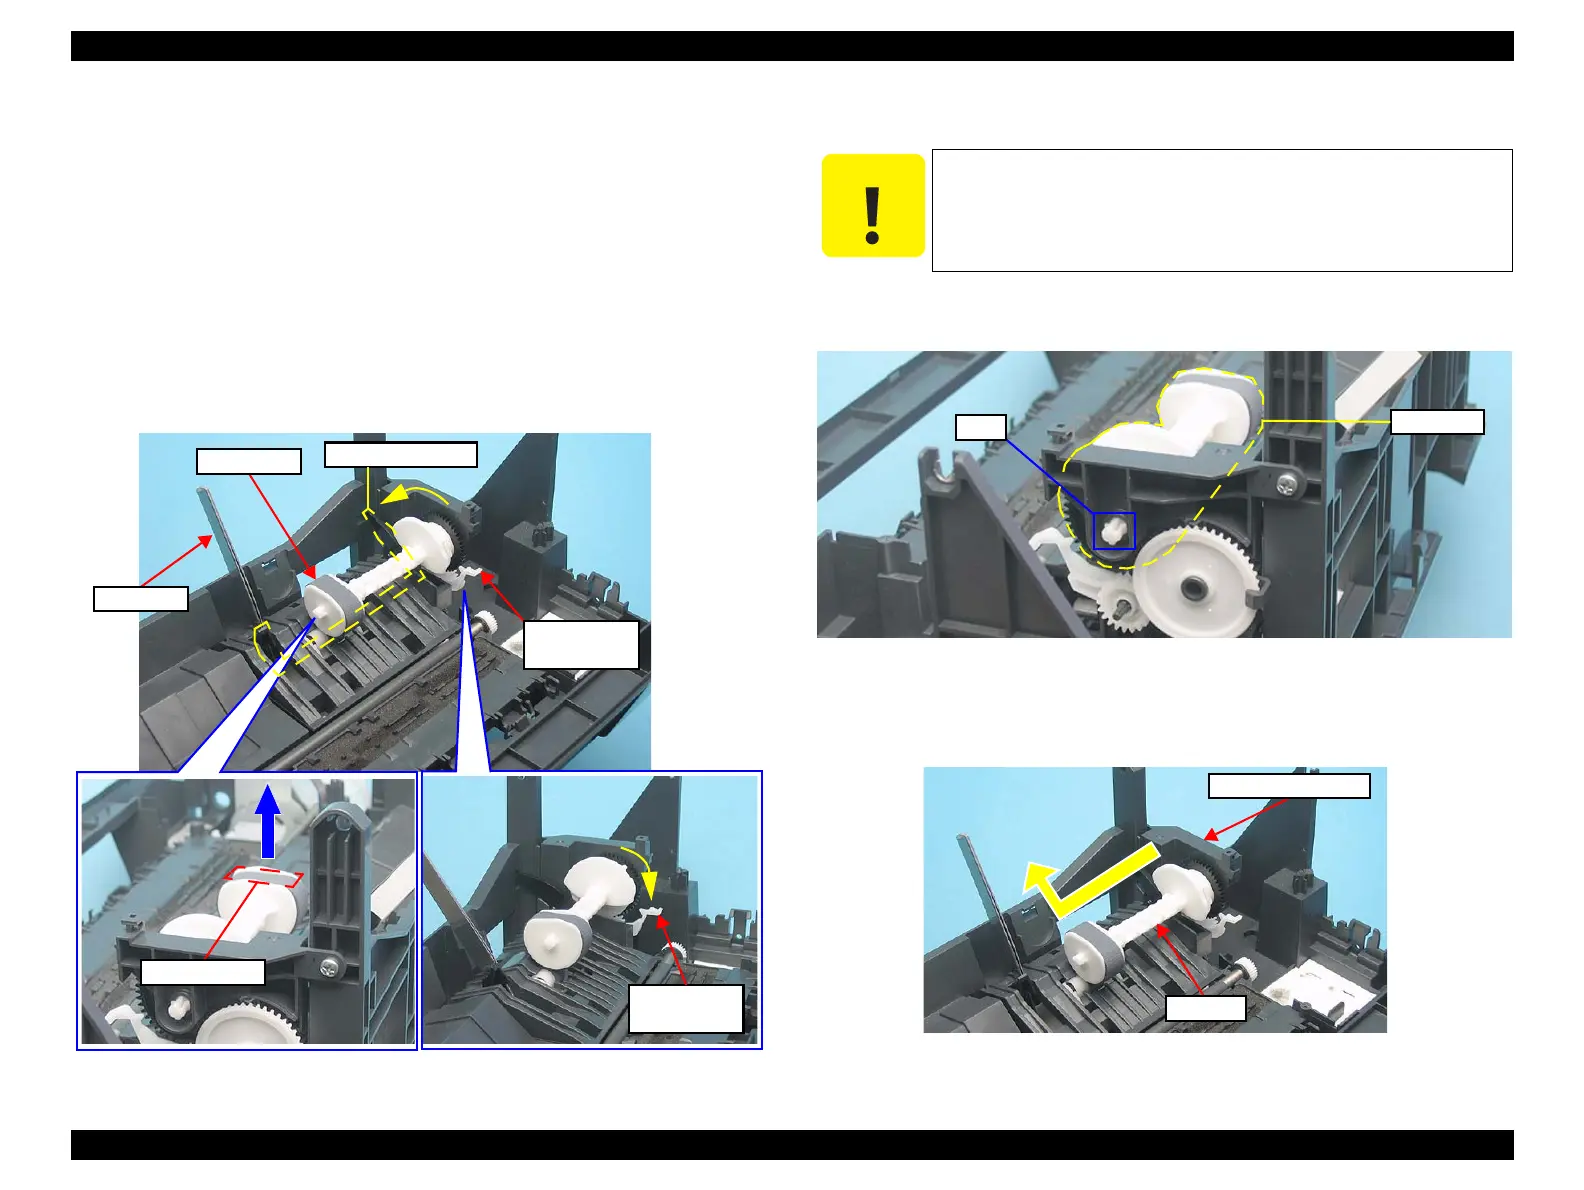
Preparation for LD Roller Removal
1. Rotate the LD Roller until the flat part faces upwards.
2. Insert a tweezer or a screwdriver into the slot as shown in the figure to hold
the Paper Back Lever outwards.
3. Move the Carriage Lock Lever outwards.
Figure 4-65. Preparation (1)
LD Roller Removal
4. Release the tabs (x2) of the LD Roller shaft from the bearing, and loosen the
shaft.
Figure 4-66. Removing LD Roller (1)
5. Pull out the LD Roller shaft from the frame of the ASF Unit and remove the
LD Roller.
Figure 4-67. Removing LD Roller (2)
LD Roller
Paper Back Lever
Carriage
Lock Lever
Be cautious of the following points.
Do not touch the LD Roller with bare hands.
Do not touch the roller of ASF Unit with bare hands.
Frame of ASF Unit
LD Roller