Epson Stylus C58/C59/ME 2/C79/D78/C90/C91/C92/D92/T20/T20E/T23/T26/S20/T10/T11/ME 30/T21/T24/T27/S21 Revision E
DISASSEMBLY/ASSEMBLY Disassembling Printer Mechanism 51
Confidential
4.5.6 Ink System removal
Part/Unit that should be removed before removing Ink System
Upper Housing
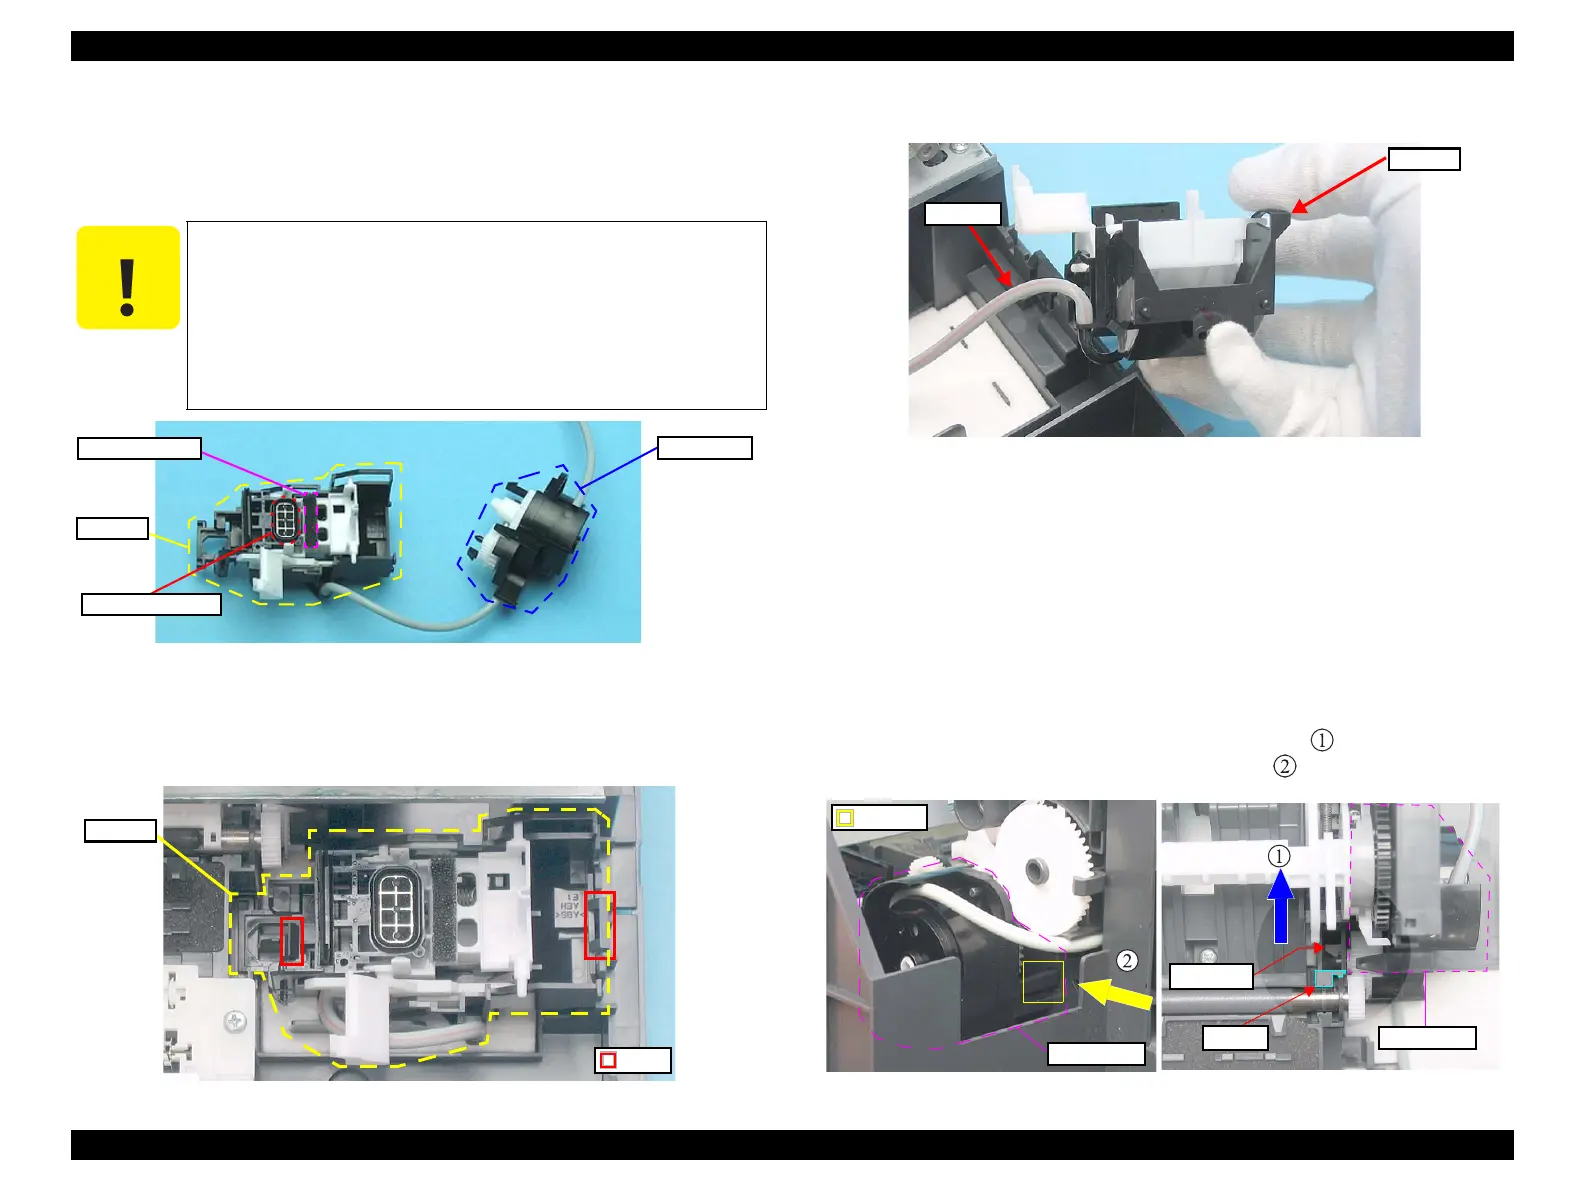
Figure 4-35. Component Formation of Ink System
Removal procedure
Ink System (Cap Assy)
1. Release the tabs (x2) that secure the Cap Assy, and detach the Cap Assy.
Figure 4-36. Removing Ink System (1)
2. Detach the Ink Tube from the Cap Assy, and remove the Cap Assy.
Figure 4-37. Removing Ink System (1)
Ink System (Pump Assy)
1. Remove the Main Board (p40)
2. Remove the Printhead (p43)
3. Remove the Ink System (Cap Assy) (p51)
4. Remove the CR Scale (p46)
5. Remove the CR Motor (p47)
6. Remove the CR Unit/Timing Belt (p48)
7. Remove the Main Frame (p56)
8. Insert a flathead screwdriver between the tab (1) and the rib, and release the
tab (1) while pushing it in the direction of the arrow
.
9. Release the tab (2) in the direction of the arrow .
Figure 4-38. Removing Ink System (2)
Do not touch or damage the Sealing Rubber or the Head
Cleaner when performing the following work.
Mark the connection location before removing the Ink Tube.
When removing the Ink System, follow the procedure below.
1. Detach the Cap Assy.
2. Detach the Dump Assy.
3. Remove the whole Ink System.
Head Cleaner
Cap Assy
Sealing Rubber
Pump Assy