EPSON Stylus COLOR 440, 640, and 740 Chapter 4 Disassembly and Assembly
94
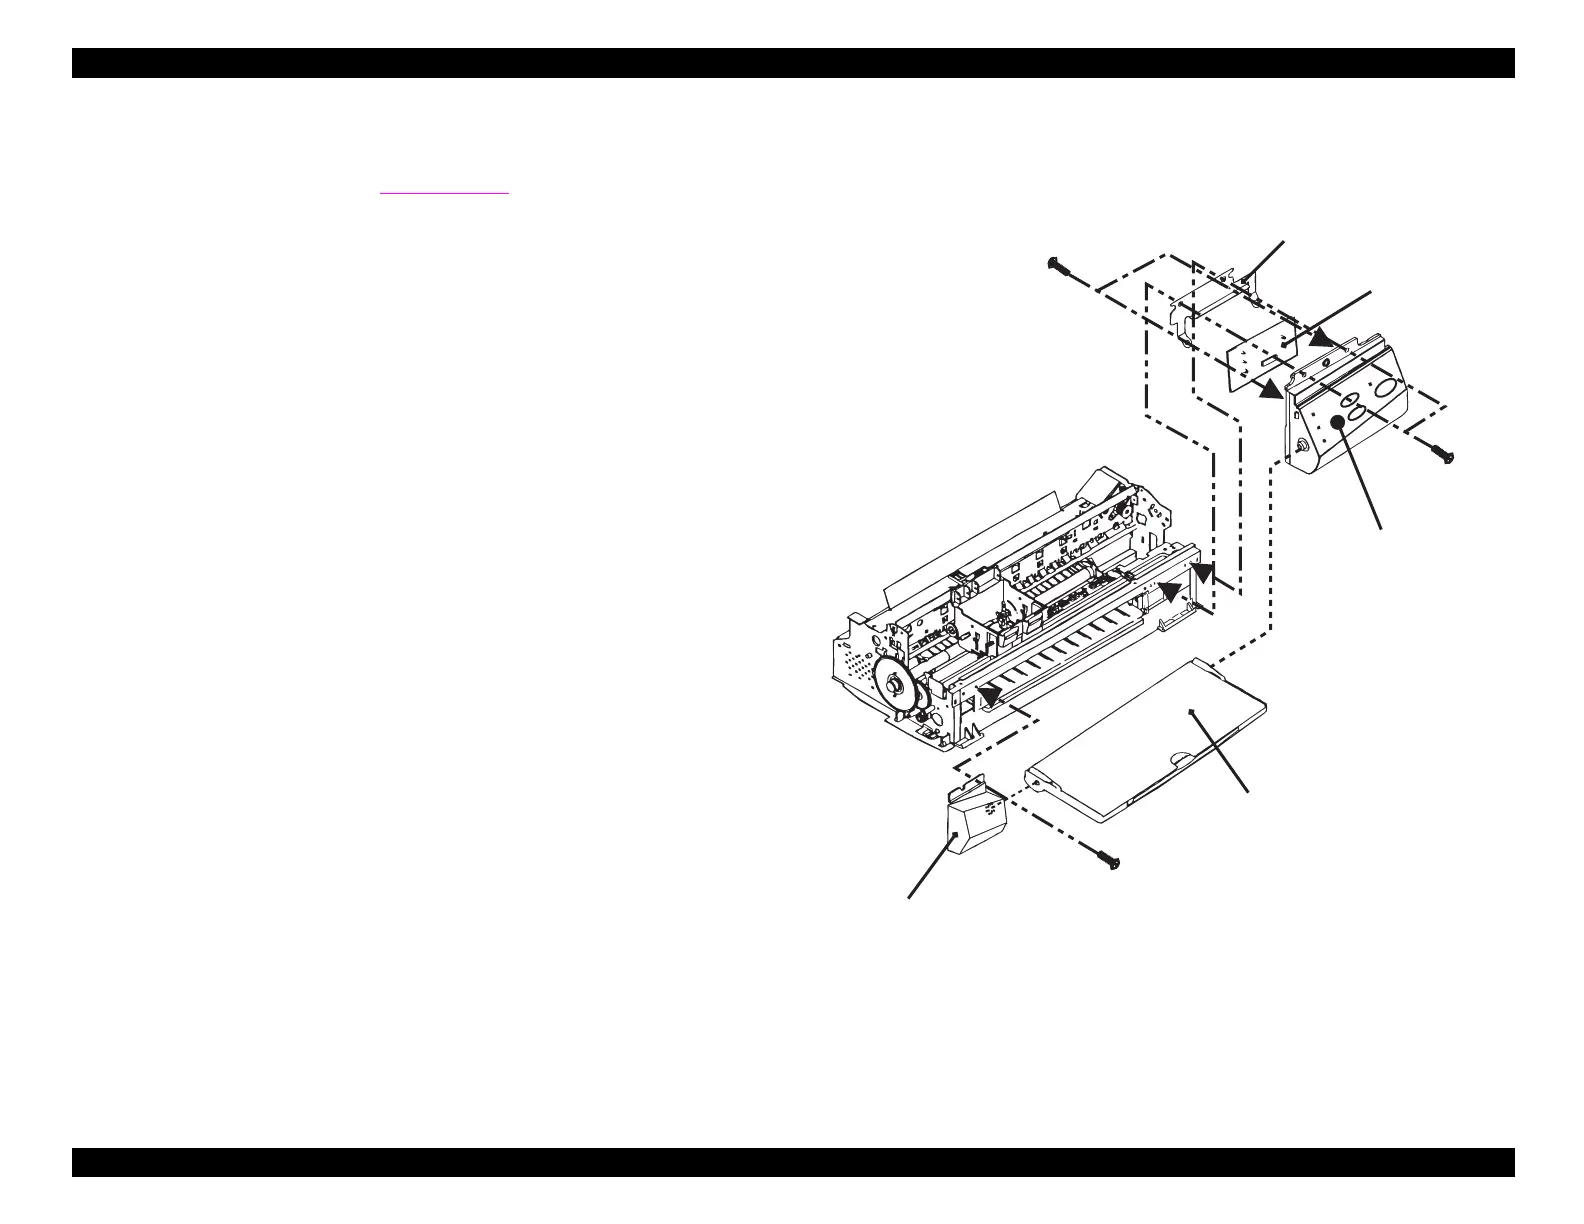
4.2.3 Removing the Front Panels
1. Remove the housin
.
See Section 4.2.1.
2. Remove 1 screw
No.1
to detach the left panel housin
. Note that
the paper output tra
will come loose with the panel housin
.
3. Take out the 2 screws
No.1
securin
the control panel and remove
the control panel from the printer mechanism.
4. Disconnect the FFC from the connector on the C206/209 PNL
board.
5. Remove the 2 screws
No.3
securin
the panel board assembl
and remove C206/209 PNL board from the panel assembl
.
Figure 4-5. Removing the Front Panels
Paper O utput Tray
Left Panel H ousing
P a n e l A s s e m b ly
Panel Shield Plate
Panel Board A ssem bly
(N o.1)
(N o.3)
(N o.1)

 Loading...


