EPSON Stylus CX3500/CX3600/CX3650/CX4500/CX4600 Revision A
DISASSEMBLY AND ASSEMBLY Disassembly 128
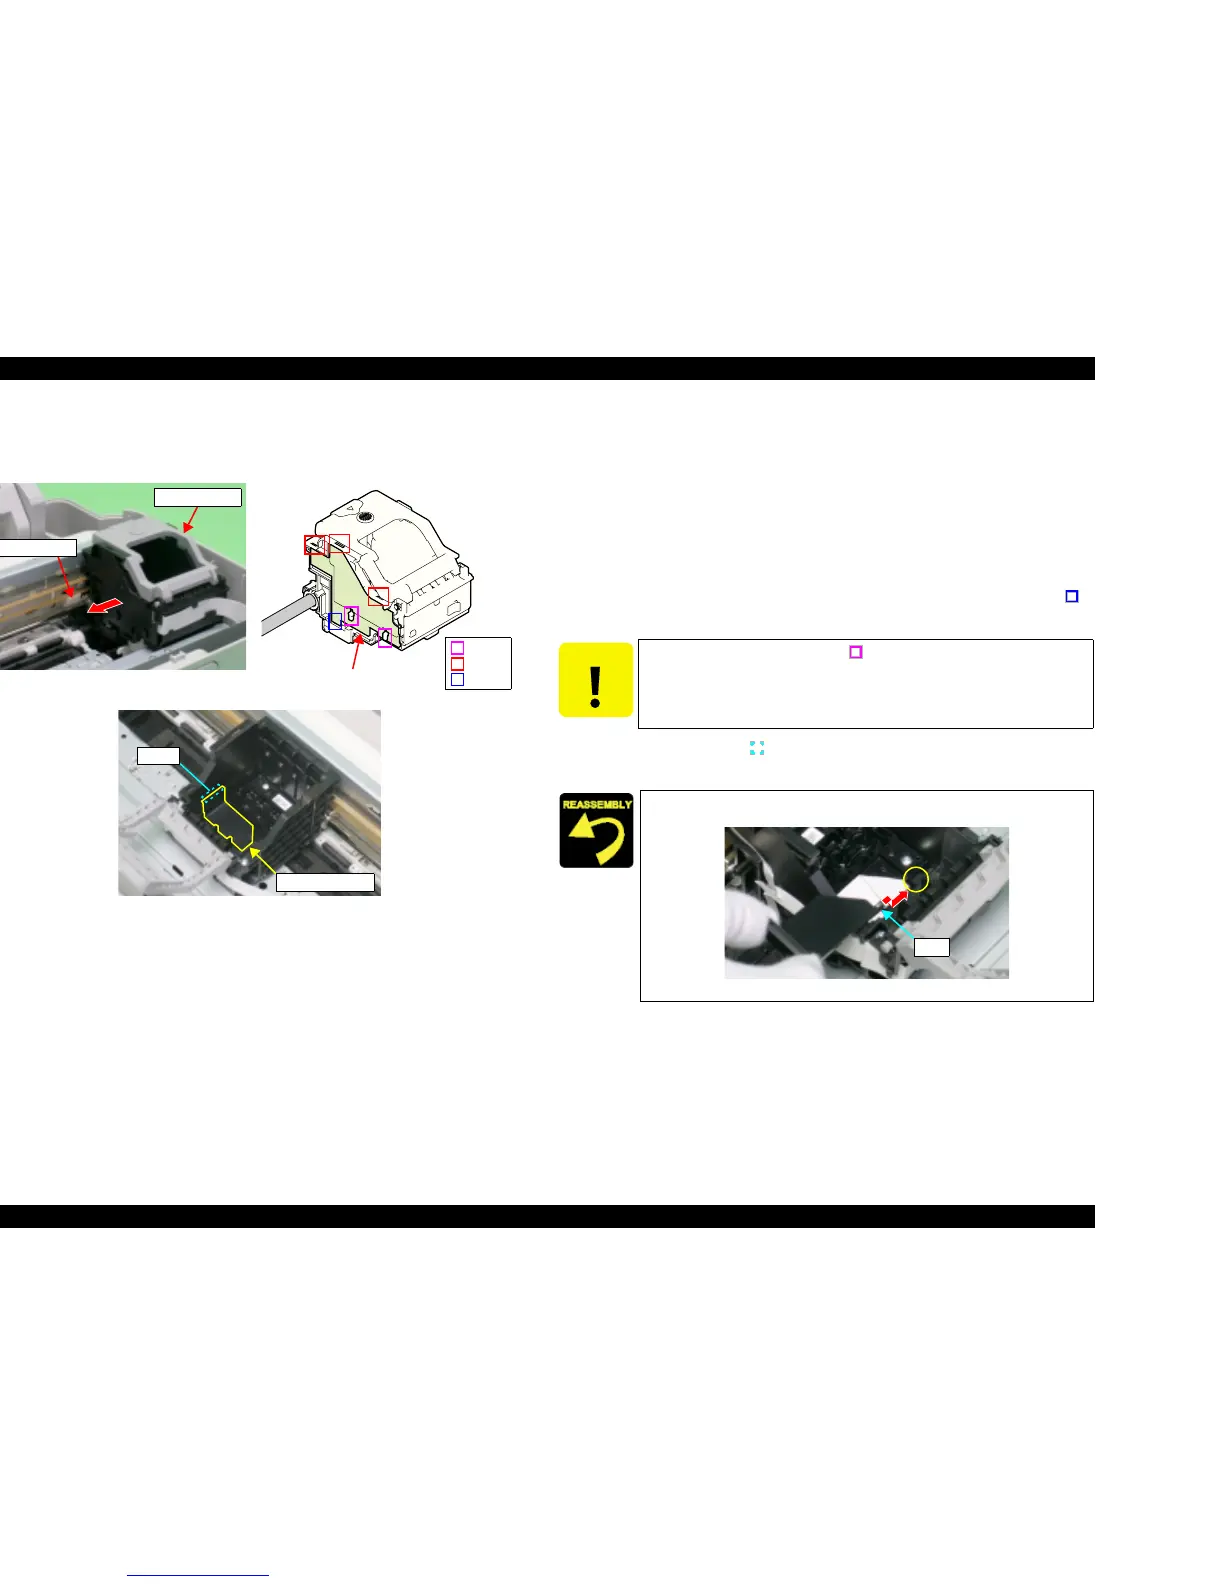
4.3.7 Print Head
V External View (1)
Figure 4-15. Print Head Removal (1)
V Part/Unit that should be removed before removing Print Head.
Document Cover / Paper Support Assy. / Scanner Unit / Panel Unit /
Housing Upper
V Removal procedure
1. Release Carriage Lock by using a common screwdriver, and then slide
Carriage Unit center of printer.
2. Remove all Ink Cartridges from Carriage Unit.
3. Remove Head Cable Cover downward while releasing the lower tab (x1, )
of Head Cable Cover by using a precision screwdriver (-).
4. Release the hook (x1, ) for securing Sub FFC Guide by using a precision
screwdriver (-), and then remove Sub FFC Guide.
Carriage Unit
Carriage Lock
Sub FFC Guide
Hook
Hooks
Ribs
Tab
Head Cable Cover
CAUTION
Use caution because the hooks( ) of Carriage Unit can break.
Insert the rib of Sub FFC Guide into the notch of Carriage Unit.
Figure 4-16. Installation of Sub FFC Guide
Rib
 Loading...


