Epson Stylus Pro 3800/3800C/3850/3880/3885/3890 Revision C
DISASSEMBLY & ASSEMBLY Disassembly/Assembly Procedure (Group 1) 179
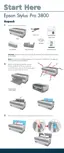
18. Fold the FFCs as shown in Figure 4-118 carefully taking up the slack.
19. Attach the HOLDER, FFC, TUBE, and secure it with the two screws.
Two C.B.P. 3 x 8 screws (6 ± 1 kgf.cm)
20. Peel off the temporarily attached acetate tape, and remove the “Space Making
Jig”.
Figure 4-118. Installing the HOLDER, FFC, TUBE
Figure 4-119. Removing the Space Making Jig
C A U T I O N
Be sure of the following when refolding the FFCs.
Keep the gap between the FFCs within 2 mm. See Figure 4-118.
Check the medially-located FFCs (shown in light blue in the
figure below). If you see too much slack in them, move the fold
line in the direction of red arrow, and if they are tightly routed,
move the fold line in the direction of the blue arrow.
Do not make a fold on the original lines. Doing so may damage
the FFCs.
Make sure to fold the five FFCs together.
To remove slack
To loose the FFCs
Original fold line
FFC
FFC
FFC
NG
C.B.P. 3x8
Within 2 mm
HOLDER, FFC, TUBE
Space Making Jig
Acetate tape

 Loading...