Epson Stylus Pro 4900/Epson Stylus Pro 4910 Revision A
DISASSEMBLY & ASSEMBLY Disassembly and Assembly Procedure 175
Confidential
3.4.4.5 CR Unit/CR Belt
1. Remove the Front Cover. (p142)
2. Remove the Right Upper Cover. (p138)
3. Remove the Control Panel Cover. (p136)
4. Remove the Right Cover. (p139)
5. Remove the Left Cover. (p137)
6. Unlock the CR Unit, and move the CR Unit to the left side. (p124)
7. Remove the CR Scale. (p171)
8. Remove the APG Motor Assy. (p179)
9. Remove the CR Cover. (p149)
10. Remove the Ink Selector Assy from the CR Unit.
(Step 9 to Step 14 in “3.4.9.1 Ink Selector Assy” (P. 229))
11. Remove the Printhead. (p232)
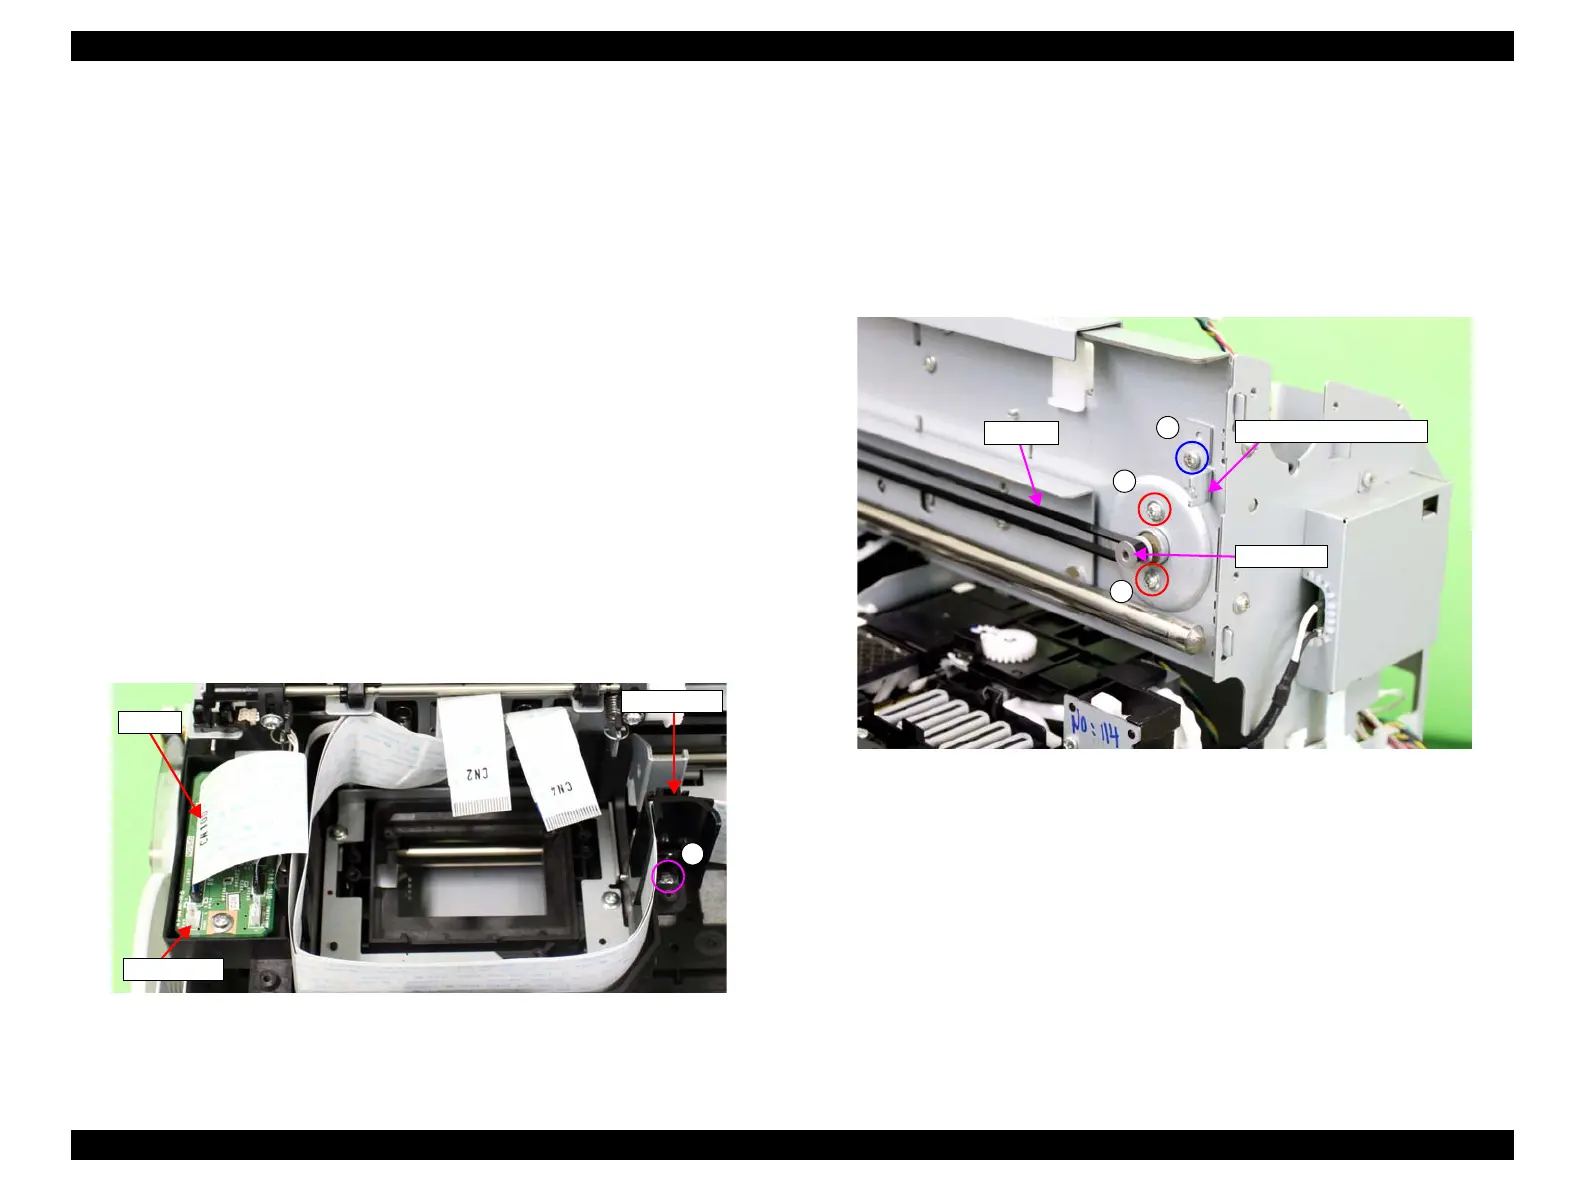
12. Disconnect the FFC (CN100) from the SUB Board.
13. Remove the screw that secures the FFC holder, and remove the FFC holder.
A) Silver, Phillips, Round Washer Head P-tite M3x8: one piece
Figure 3-84. Removing the FFC
14. Remove the screw that secures the CR scale mounting plate, and remove the CR
scale mounting plate.
B) Silver, Phillips, Bind P-tite with S.W & P.W. M4x12: one piece
15. Remove the two screws that secure the CR Motor.
C) Silver, Phillips, Round Washer Head S-tite M3x5: two pieces
16. Move the CR Motor to the rear, and release the CR Belt from the pinion gear.
Figure 3-85. Releasing the CR Belt (1)
CN100
A
FFC holder
SUB Board
CR scale mounting plate
B
C
C
Pinion gear
CR Belt

 Loading...


