Epson Stylus Pro 4900/Epson Stylus Pro 4910 Revision A
ADJUSTMENT Ink Supply Related Checks and Adjustments 363
Confidential
4.12.6 Tubes Cleaning (and Ink Charge per Two Rows)
4.12.6.1 Tubes Cleaning
THINGS TO PREPARE
Cleaning Cartridge, 200, J40C (Part Code: 1537913)
EXECUTION MODE
Normal Mode
PROCEDURE
1. Turn the printer ON.
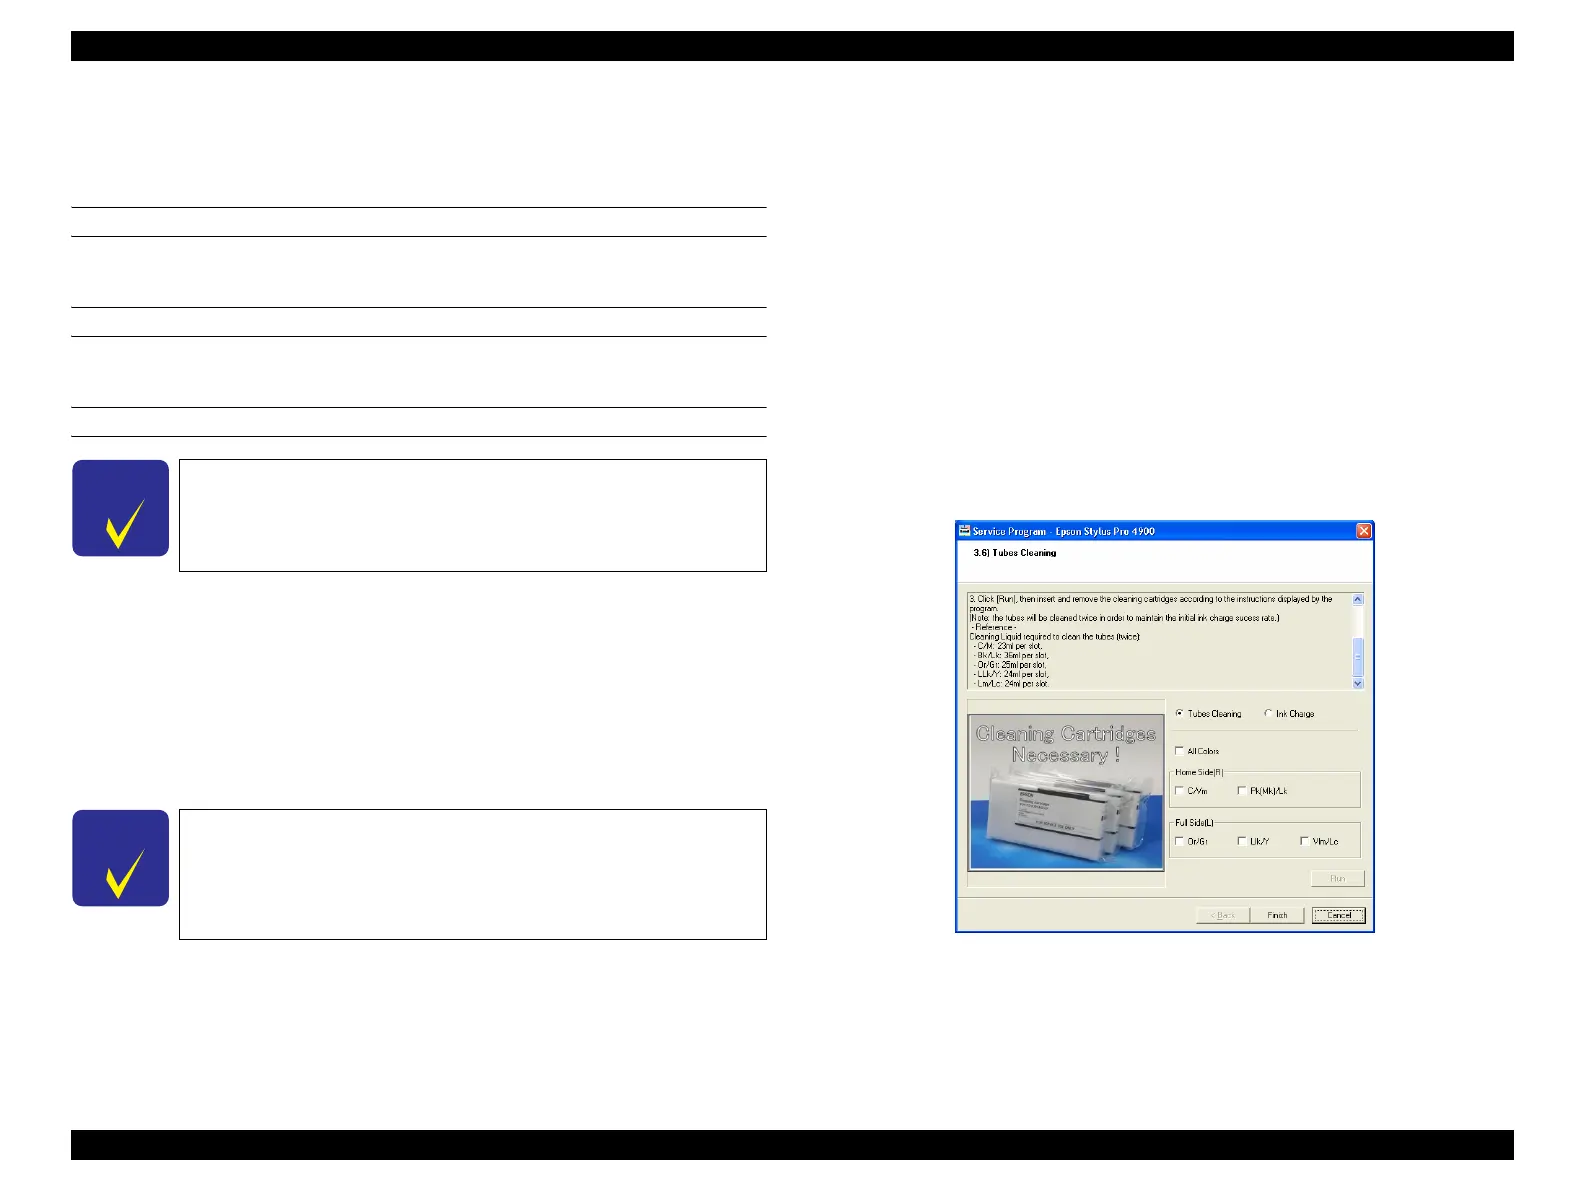
2. Start the Service Program and select Tubes Cleaning.
3. Select Tubes Cleaning on the Tubes Cleaning screen and select the color of the
tube to be cleaned. (Nozzle columns of all colors or two adjacent colors can be
selected.)
4. Remove the ink cartridge of the selected color and install the cleaning cartridge.
5. Click [Run].
(Indication of ink remaining 50% is displayed on the control panel.)
6. Click [OK].
The tube is cleaned.
7. Remove all the ink cartridges, and install the cleaning cartridge into the slot to
clean.
8. Click [Run] again.
The tube is cleaned.
9. Replace the cartridges according to the instructions of the Service Program.
NOTE: To clean the tube fully, the sequence of cleaning/ejection is executed
twice in a row per one cleaning automatically. During this operation, the
ink cartridge has to be inserted/removed each time.
10. Click [Finish].
11. Turn the printer OFF and finish the adjustment.
Figure 4-75. [Tubes Cleaning] Screen
C H E C K
P O I N T
Required time per Tubes Cleaning (all rows): 30 minutes
C H E C K
P O I N T
Two cleaning cartridges are used for cleaning tubes per two
colors. (11 cleaning cartridges are used for cleaning all colors at
once, and three cleaning cartridges are used for cleaning Bk/
Mk/GY.)
One cleaning cartridge can be used to clean at least five times.

 Loading...


