Epson Stylus Pro 4900/Epson Stylus Pro 4910 Revision A
DISASSEMBLY & ASSEMBLY Disassembly and Assembly Procedure 234
Confidential
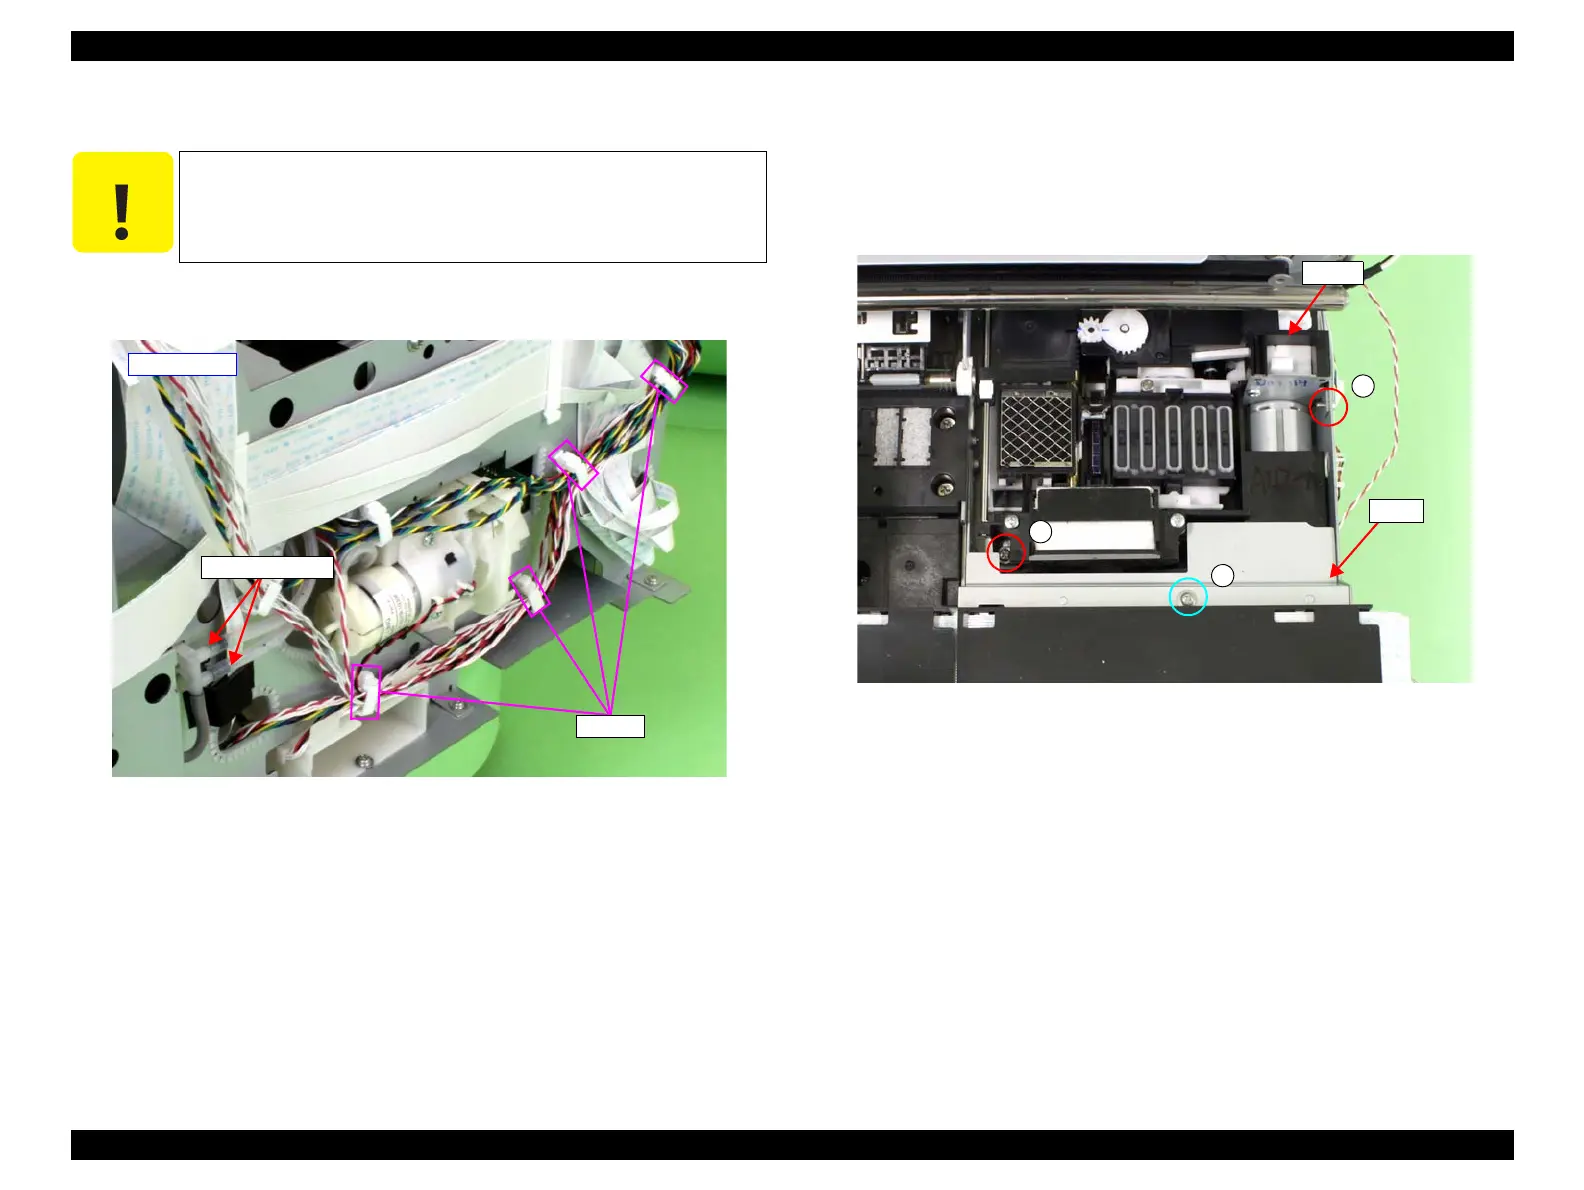
9. Release the harnesses from the four clamps.
10. Disconnect the two Waste Ink Tubes.
Figure 3-168. Releasing the harnesses
11. Remove the screw that secures the plate, and remove the plate.
D) Silver, Phillips, Round Washer Head P-tite M3x6: one piece
12. Remove the two screws that secure the IS Unit.
E) Silver, Phillips, Round Washer Head S-tite M3x6: two pieces
Figure 3-169. Removing the plate
C A U T I O N
Disconnecting the Waste Ink Tube in the next step may leak ink
from the tube. Therefore, prepare a waste cloth or the like in
advance and be careful not to contaminate the surroundings.
Clamps
Waste Ink Tubes
- Right side -
C
D
D
Plate
IS Unit

 Loading...


