Pro 7900 and 9900 Field Repair Guide 10/6/10
Board (Main) Installation Printer Component, Software Item, LCD Display, Printer Button Page 30.
5. Install the Rear Cover.
6. Plug in and turn on the Printer in Firmware Download Mode (depress the Up, Down, Left, and
Menu buttons, and turn on the power to the Printer).
7. Download the latest Firmware following the directions found in the Firmware Update Procedure
Using FWUpdate.exe chapter located in the Reference section of the Field Guide.
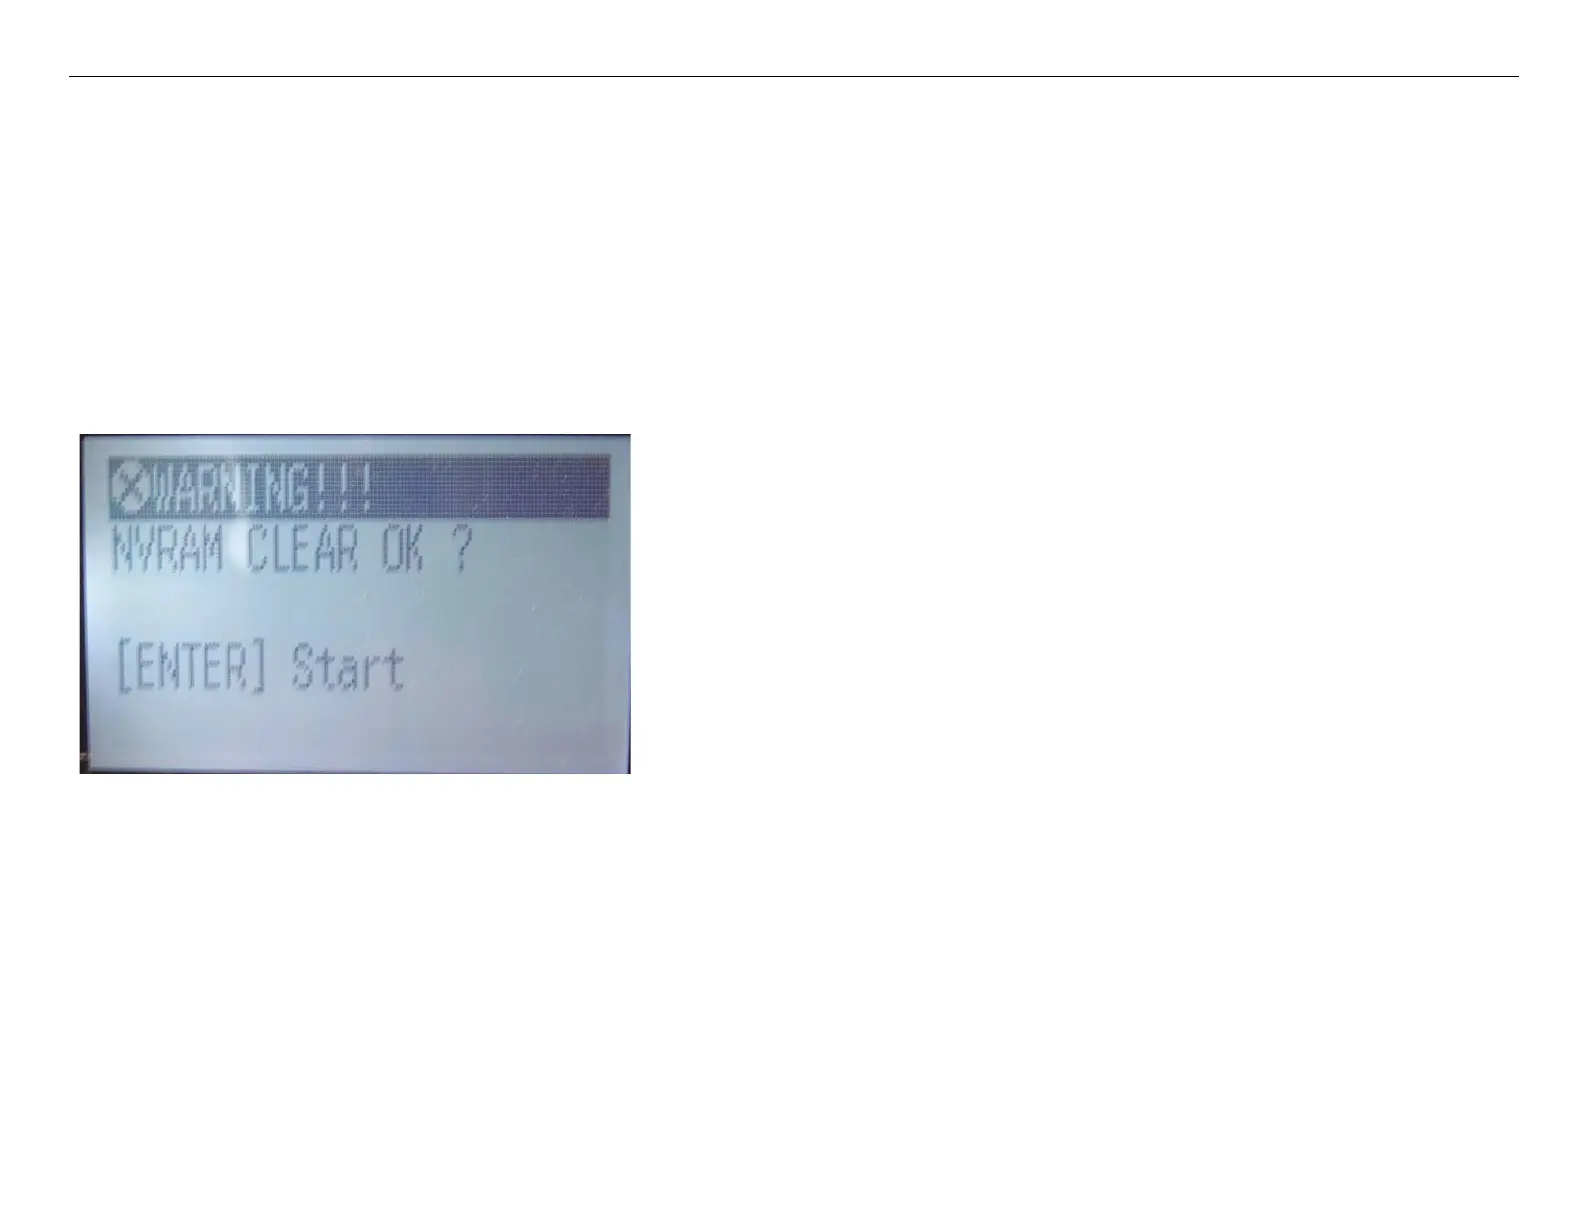
8. New Main Boards (never used Boards) will display this message. Follow the steps below.
Note: During the boot process after installing firmware,
the Printer may display this message. It indicates
that pressing the Enter Button will clear the
NVRAM area. This NVRAM area will be overwritten
when Parameters are installed in the following
steps.
8.1 Press the Enter Button.
8.2 Immediately turn off the Printer, and proceed to Step 11.
Note: If the Printer is allowed to fully boot after clearing the NVRAM, the
Printer will begin an “Initial Ink Charge”. If it does, open an Ink
Door to interrupt the “Initial Ink Charge”, and turn the Printer off.
Installing Parameters in the next step will cancel the “Initial Ink
Charge”.

 Loading...


