Settings/Maintenance
44
G
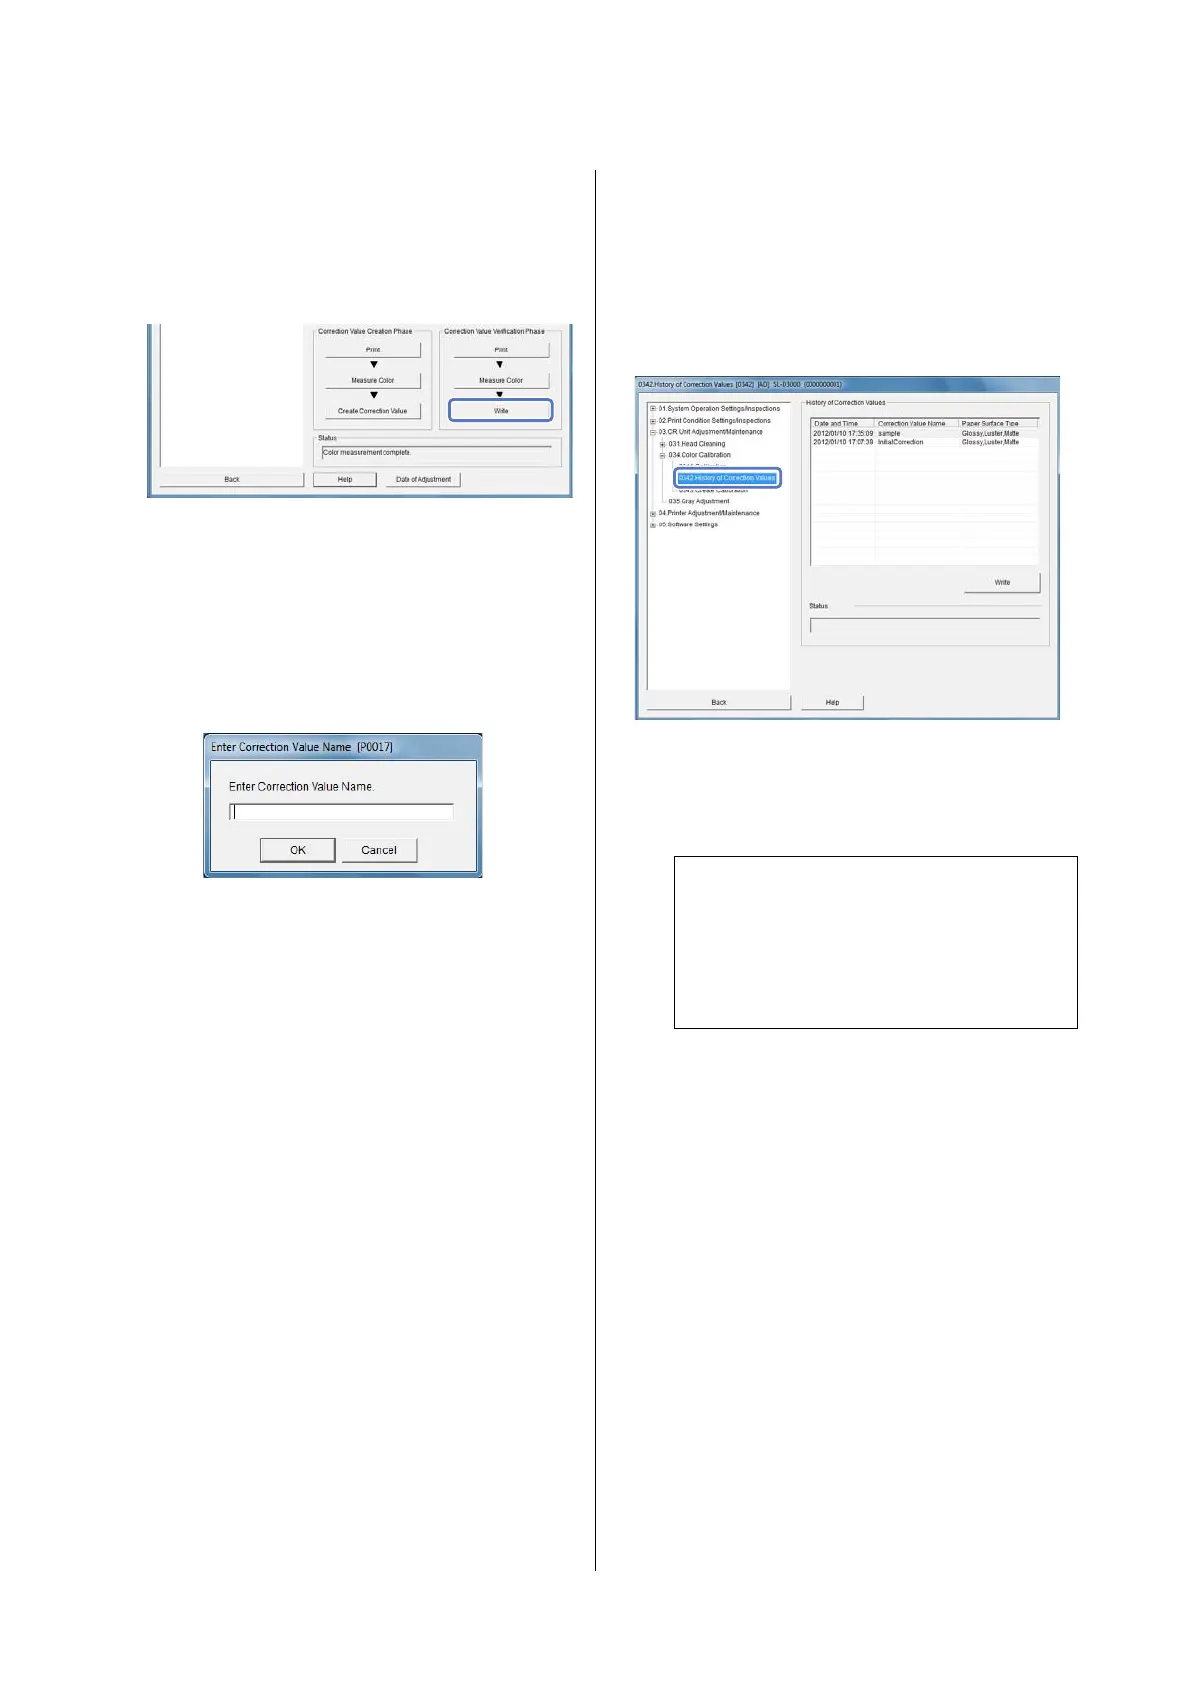
Click Write from Correction Value Verification
Phase.
The screen where you can enter the name of the
correction value is displayed.
H
Enter the name of the correction value, and then
click OK.
You cannot use the same name for more than
one correction value. If the same name already
exists, enter another name of the correction
value.
Verify correction accuracy.
If the verification results are "OK", write the
created correction value file to the Printer PC.
Subsequent prints are corrected using the
written correction value.
If the results are "NG", you need to create the
correction value again. Perform operations
from Print in the correction value creation
phase.
History of Correction Values
Click History of Correction Values (0342) from Color
Calibration (034) to display the screen.
Select the correction values created previously from the
list, and write to the Printer PC.
A
Select the correction values to write to the
Printer PC from the History of Correction
Values list.
B
Click Write.
The correction value is written to Printer PC.
Subsequent prints are corrected using the
selected correction value.
Tip:
All correction values created previously are
displayed in the History of Correction Values list.
If you select a correction value created
previously, you can return the correction value to
the previously selected value.
 Loading...