Rev.C Disassembly and Assembly 3-39
TM-L90 Service Manual
Confidential
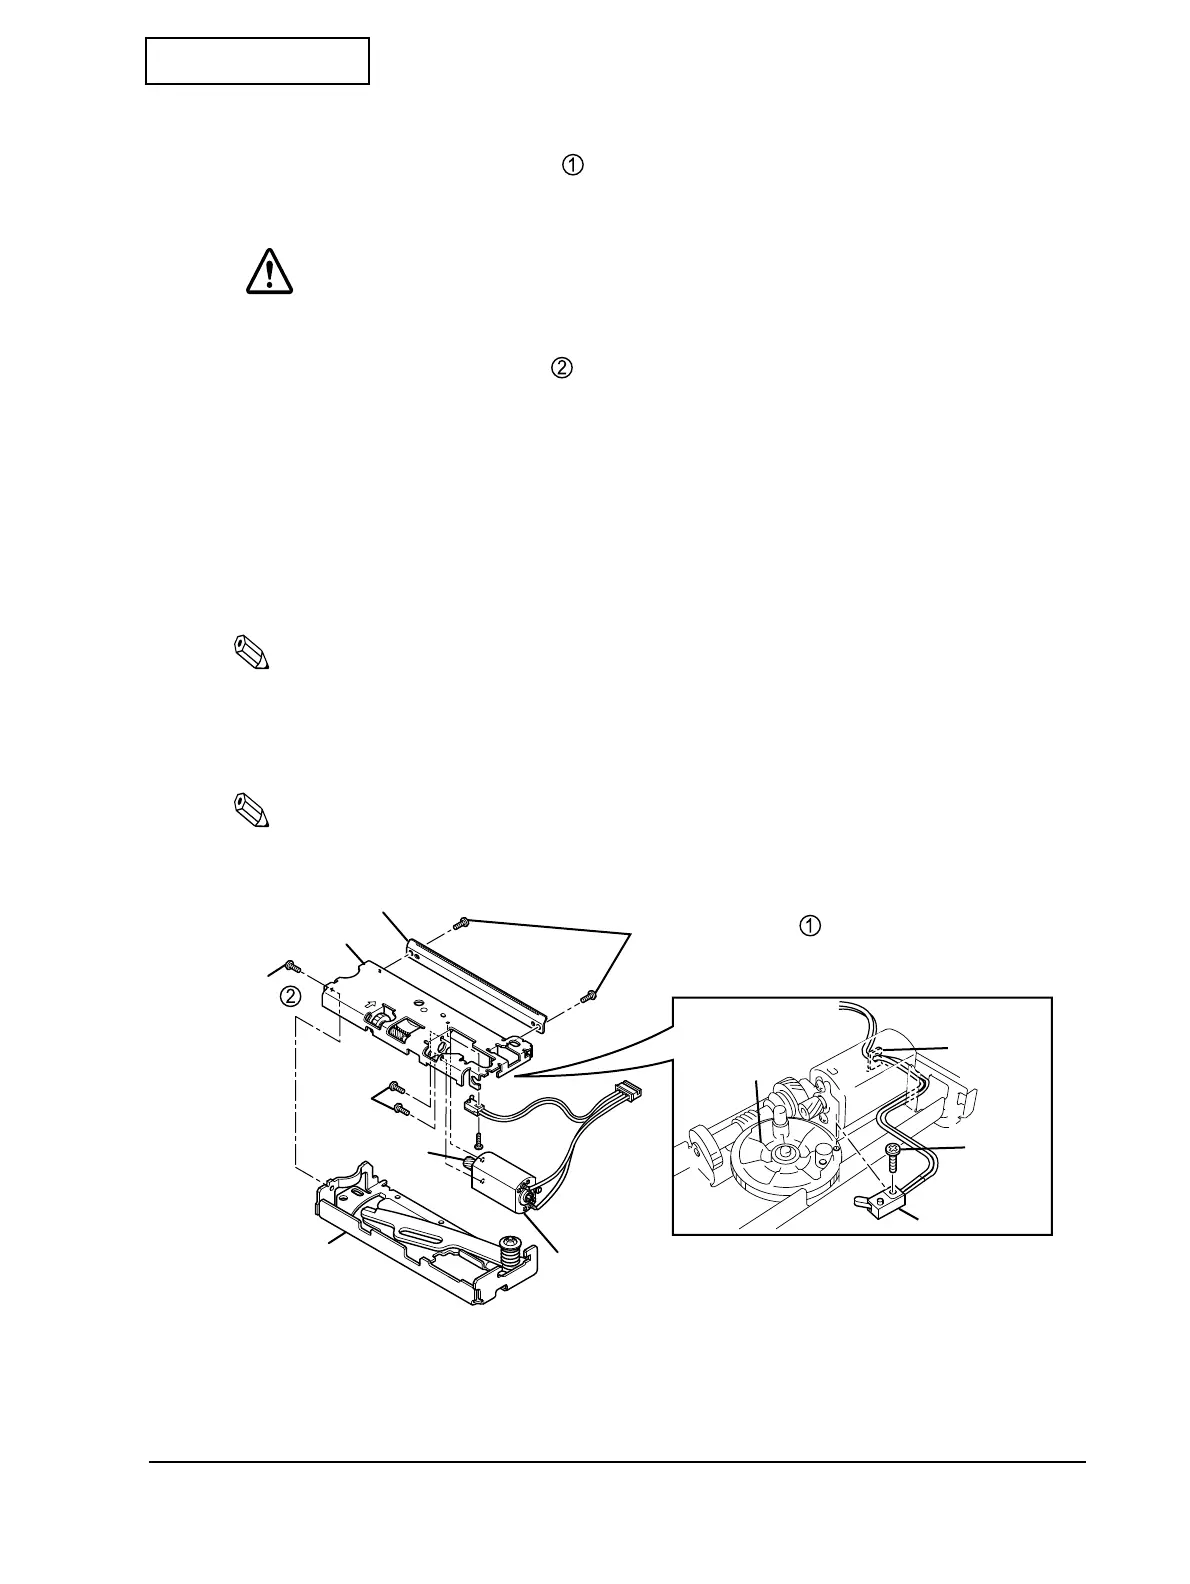
Autocutter Unit
1. Remove two manual cutter screws .
2. Remove the manual cutter.
CAUTION:
The manual cutter has a sharp blade. Handle it with care.
3. Remove one manual cutter screw .
4. Remove the paper cutter cover assembly.
5. Remove one switch screw.
6. Remove the micro switch.
7. Remove the lead wires of the micro switch and the cutter motor from the hooks.
8. Remove the two S9 screws.
Note:
When removing the screws near the paper cutter cover, insert a screwdriver into the gap between the
paper cutter cover and the cutter driving gear. Do not damage the gear.
9. Remove the cutter motor sub assembly.
Note:
When removing the cutter motor sub assembly, pull it out straight so not to catch the cutter motor
gear in the hole in the paper cutter assembly cover.
Manual cutter screw
Manual
Paper cutter cover
Manual cutter
S9
Cutter motor sub assembly
Switch
Micro switch
screw
cutter screw
Hook
Cutter driving
Cutter motor gear
Cutter frame assembly
<Inner side>
assembly
gear
 Loading...