3-44 Disassembly and Assembly Rev.C
Confidential
Install using the following steps:
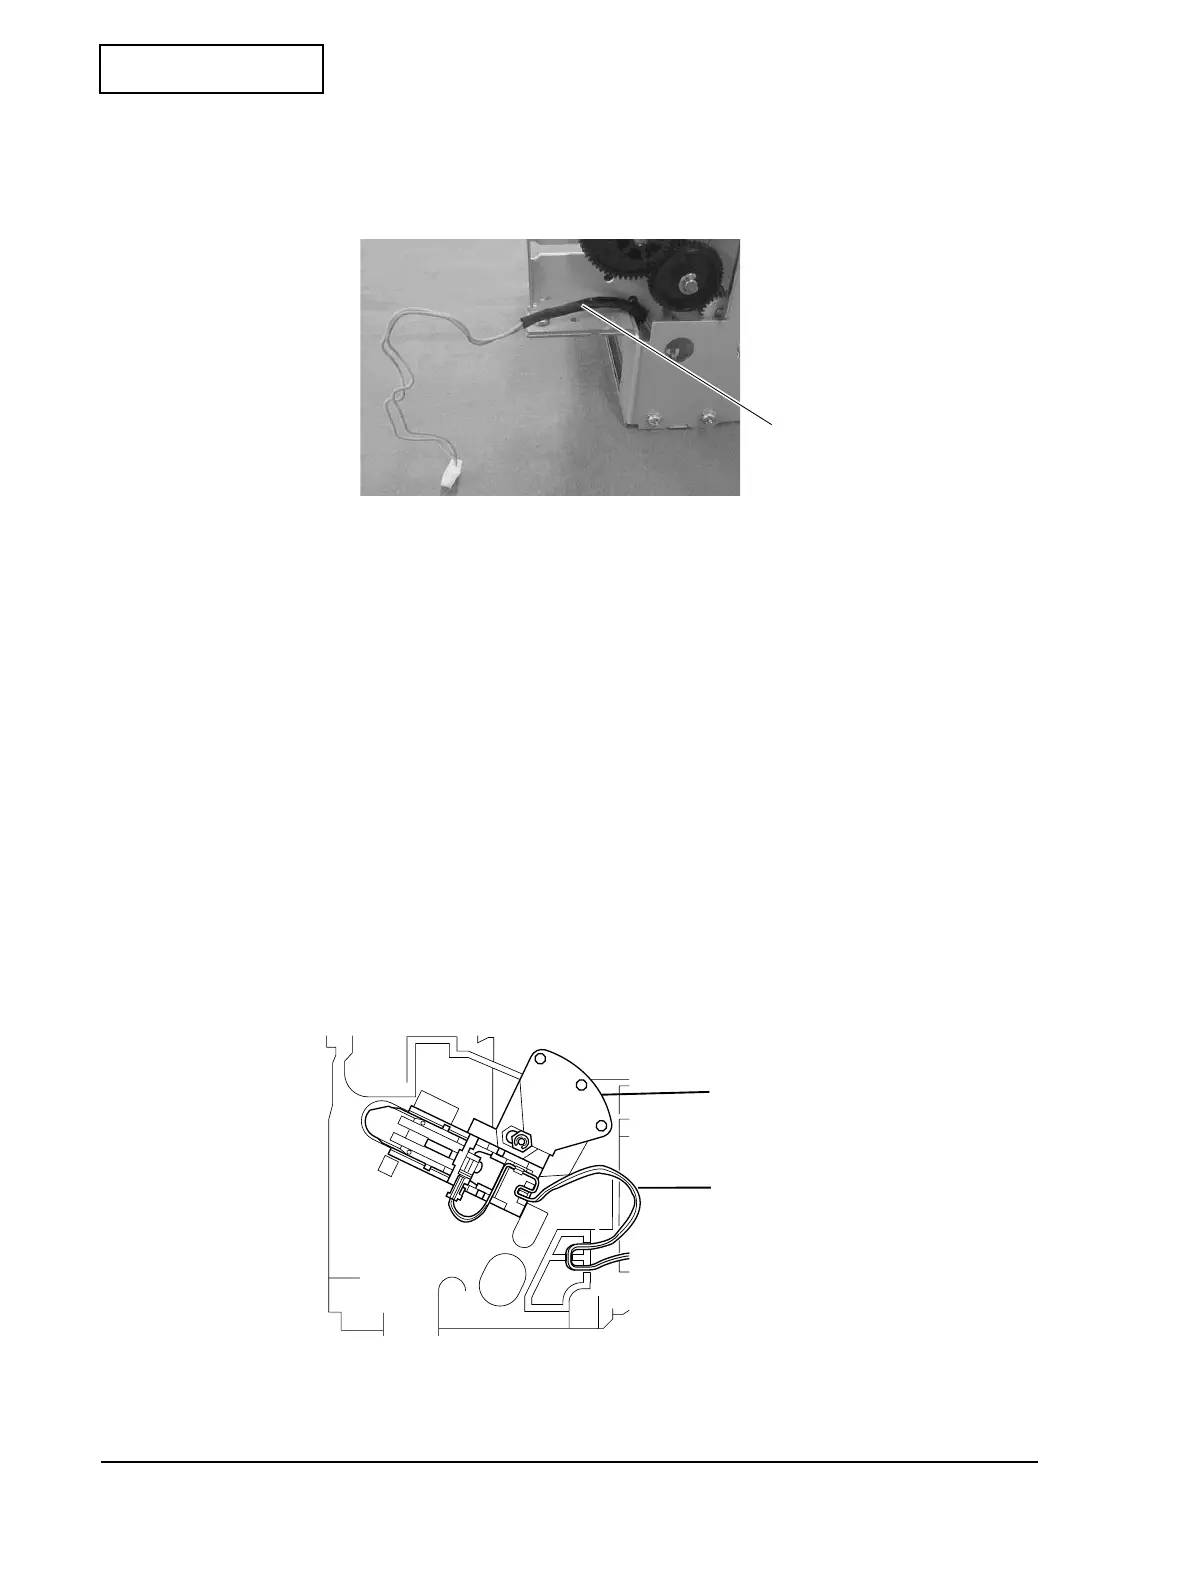
1. Affix insulating tape on the NE detector lead wire as shown in the photo below. (This
process is necessary only if the original NE detector lead wire has insulation tape affixed.)
2. Install the micro switch by aligning one key with the hole in the NE detector holder and
secure with one S7 screw.
3. Install the NE detector lever by pressing the two keys inside.
4. Connect the NE detector lead wire to the micro switch connector and hook it to the NE
detector holder.
5. Install the NE detector assembly by placing it temporarily, facing the left slanting
diagonally.
6. Fit the N1 hex nut and install the NE detector adjustment screw. Rotate the NE detector
adjustment screw with a coin, until the groove in it comes out of the N1 hex nut.
7. Install one E1 type E retaining ring into one groove in the NE detector adjustment screw.
8. Align the NE detector assembly straight, and further tighten the NE detector adjustment
screw.
9. Hook the NE detector lead wire to the label paper holder.
Insulating tape
NE detector assembly
NE detector lead wire
 Loading...