22ga.
18ga.
16ga.
14ga.
12ga.
10ga.
20ga.
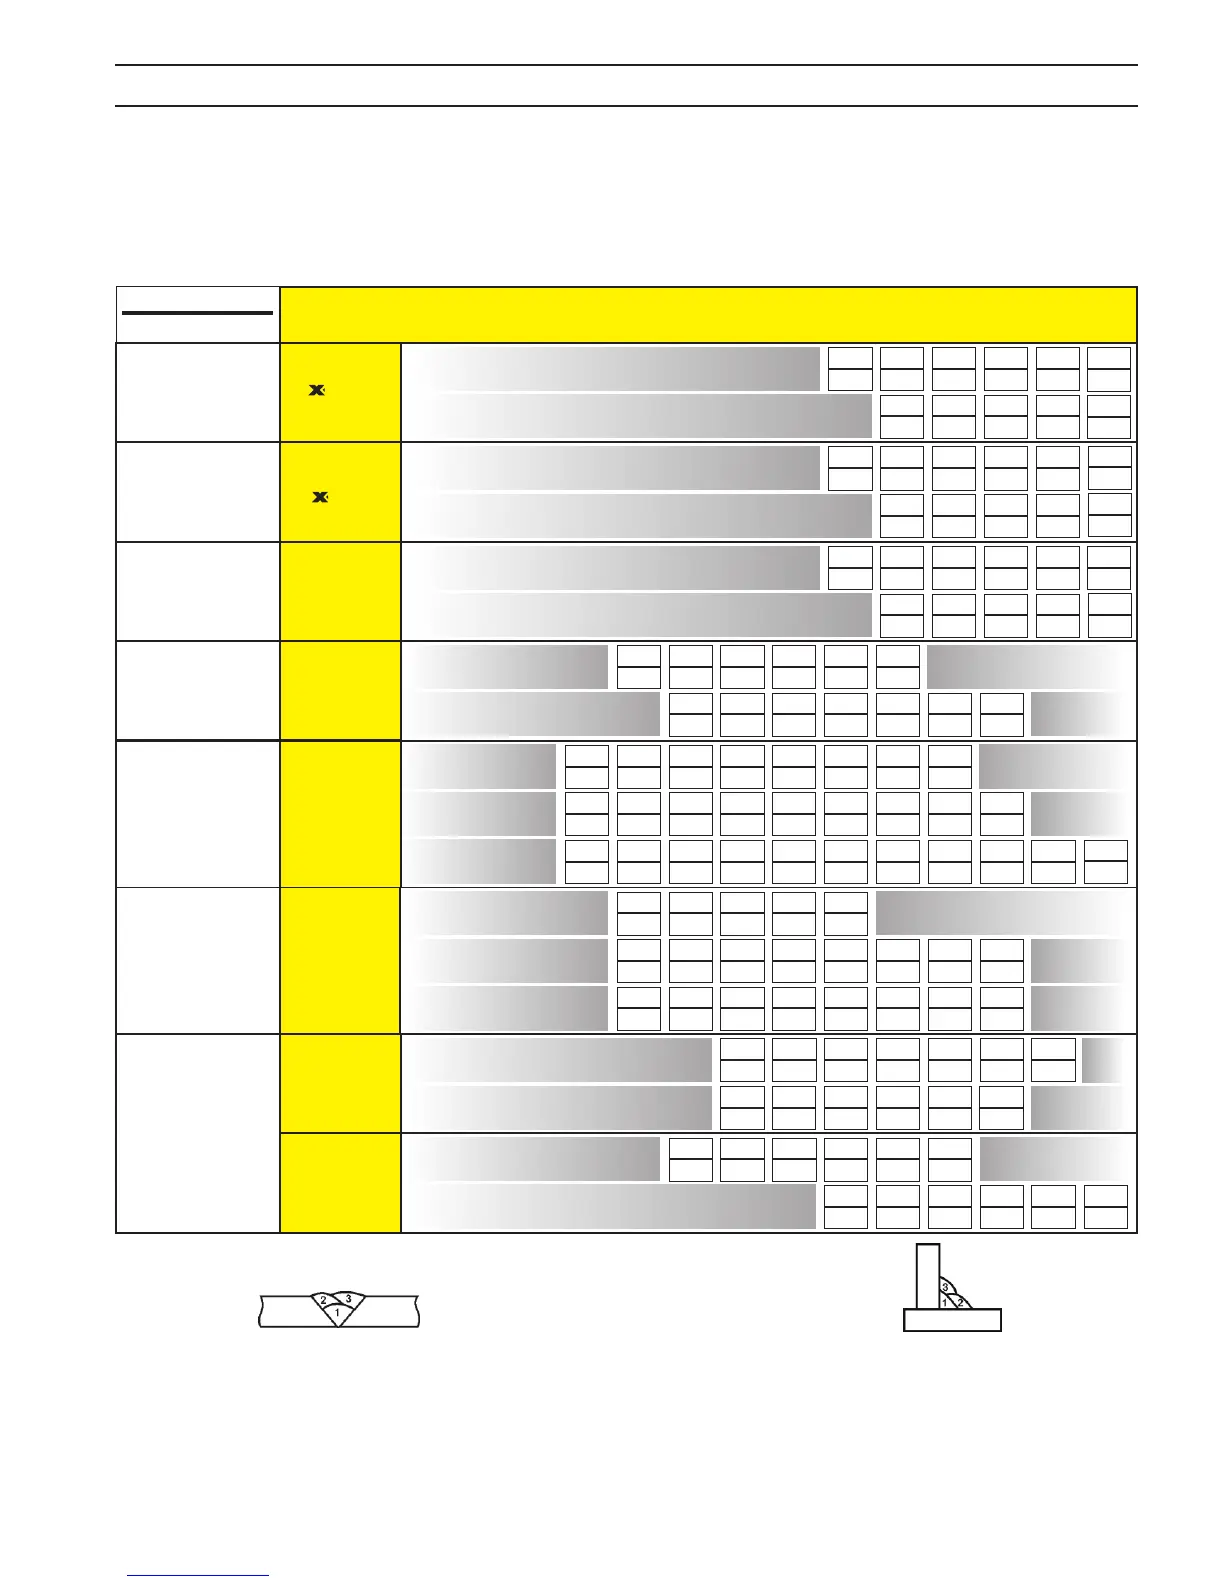
1. Determine initial settings from TIG Data Table based on material
thickness.
2. Place WELD PROCESS switch to the TIG (left) position.
3. While holding the PRESET button, adjust the CURRENT
knob to set desired weld current in the upper digital display window.
4. Touch the tungsten electrode to the workpiece momentarily to
establish the arc. Adjust the welding current as needed for the
desired puddle control.
Note: The WIRE SPEED knob has no effect in TIG mode.
1
2
3
4
TIG SET-UP
1. Determine initial settings from Stick Electrode Data Table based
on electrode type and diameter.
2. Place the WELD PROCESS switch to the STICK (right) position.
3. While holding the PRESET button, adjust the CURRENT
knob to set the desired weld current in the upper digital display
window.
4. Strike the electrode and start welding. Adjust the welding current as
needed for the desired puddle control.
Note: The WIRE SPEED knob has no effect in STICK mode.
1
2
3
4
STICK SET-UP
Welding Polarity - DCEP
(Electrode Positive)
Welding Polarity - DCEN
(Electrode Negative)
Shielding gas flow rate
15 - 25 cfh
When the WELD PROCESS switch is set to TIG or STICK position, the electrode will be electrically “HOT”.
When the WELD PROCESS is set to the MIG position, depressing the gun trigger will cause the wire
electrode to become electrically “HOT” and will start the feed motor to feed wire.
Do not allow the electrode to touch the work until you are ready to make a weld.
POLARITY CONNECTION GUIDE
1. Determine initial settings from MIG Data Table based on wire
type, diameter, material thickness and shielding gas.
2. Place WELD PROCESS switch to MIG (center) then press
PRESET button.
3. Turn the WIRE SPEED knob to set desired speed in the
upper digital display window.
4. Turn the VOLTAGE knob to set desired voltage in the lower
digital display.
5. Pull gun trigger and start welding. Fine tune wire speed and
volts as needed for desired arc characteristics.
MIG/FCAW SET-UP
Note 1: MIG 3/8" and above setting data indicates multi-pass weld sequence with proper joint preparation required.
Note 2: FCAW above 1/2" setting data indicates multi-pass weld sequence with proper joint preparation required.
 Loading...