Practice measurement by using the accessory test model eye before doing the actual measurement.
1 - Turn ON the power
Turn ON the power switch of the instrument.
2 - Attach the model eye
Remove the chinrest paper and align the holes on the base of the model eye with the holes on the chinrest.
And insert pins.
3 - Release stage lock
Turn the stage holding knob in counter clockwise direction to release the stage lock.
4 - Adjust height of test model eye
Adjust the height of the chinrest by pressing [Chinrest lever] so that the test model eye is aligned with the
“height adjustment mark” on the face rest.
5 - Enter [K/R] or [REF] mode
If neither [K/R] or [REF] is displayed on the monitor, press [Mode] button until either one is displayed.
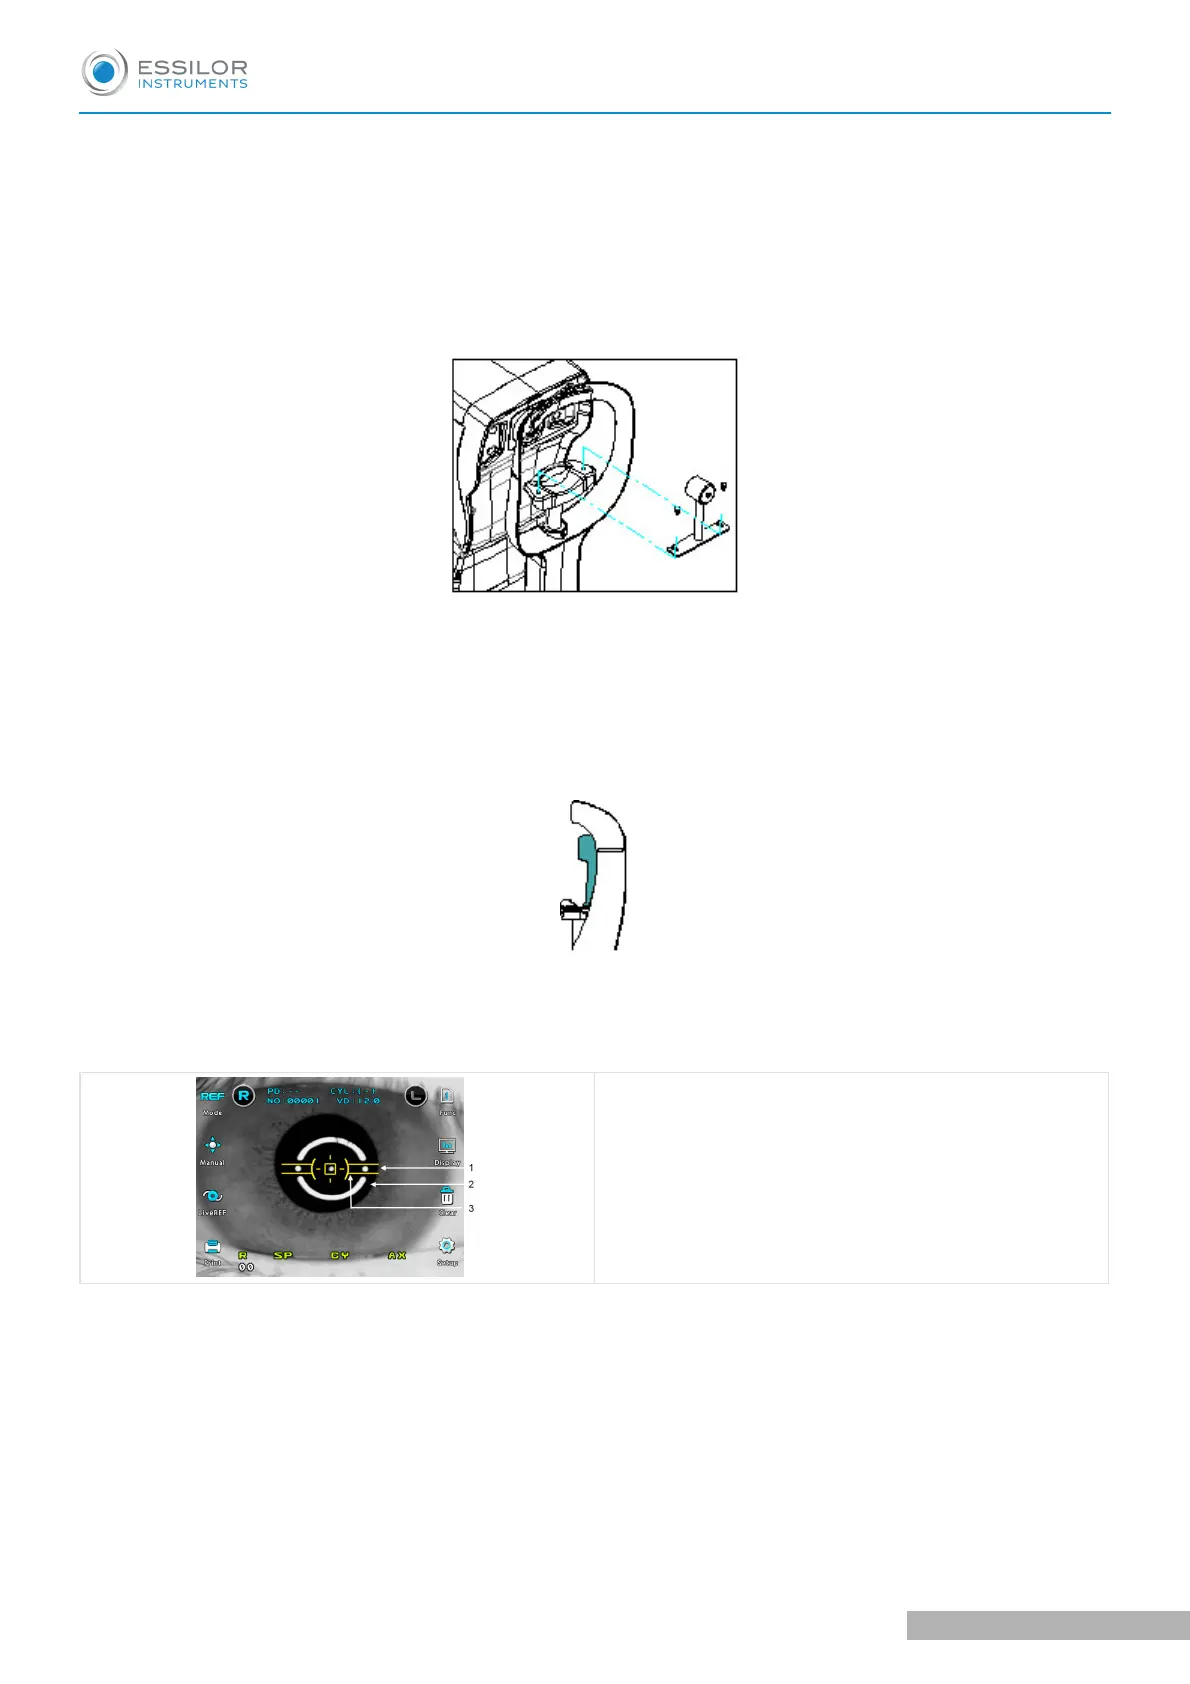
6 - Adjust the position and focus on the model eye
1. Outer alignment mark
2
. Mire image
3
. Inner alignment mark
L
ooking at
the monitor, incline the operation lever toward the model eye until a bright dot appears near the
inner alignment mark. Place the bright dot in the center of inner alignment mark. If position cannot be adjusted
just by inclining the operation lever, slide the lever in the direction required.
Focus on the model eye by inclining the operation lever forward and backward so that the mire ring image is
displayed clearly on the monitor.
7 - Manual measurement
(a)
Adjust the position and focus on the model eye like the procedure 6.
(b) Press the measuring button. At this point, if measurement is failed with messages like [Error], repeat the
procedure (a) and press the measuring button again.
USER MANUAL > PRACTICING THROUGH MODEL EYE
AKR300 - Auto Kerato Refractometer > V3 - 04-2020
18
 Loading...