NexLog Recorder User Manual v2.2.0 27
3. The Front Panel User Interface
The optional NexLog touch-screen LCD front panel provides direct control over
your NexLog digital logging recorder, enabling you to listen to recorded audio
and manage recorded calls, without using an external display, keyboard, and
mouse. If your NexLog recorder has a blank front panel (no LCD Touch-screen),
then connect an SVGA 800x600 display, keyboard and mouse to the unit. To
select a menu option on your front panel, use the touch screen directly (if
installed), or use an attached USB keyboard and mouse; the SVGA 800x600
display will appear as described below for the touch-screen.
There are three main screens: Info, Replay, and Setup. In addition, a login
button may be displayed in the main menu. This allows multiple users to access
the Front Panel with different permissions. By default the recorder comes
configured to auto login the “Eventide” user.
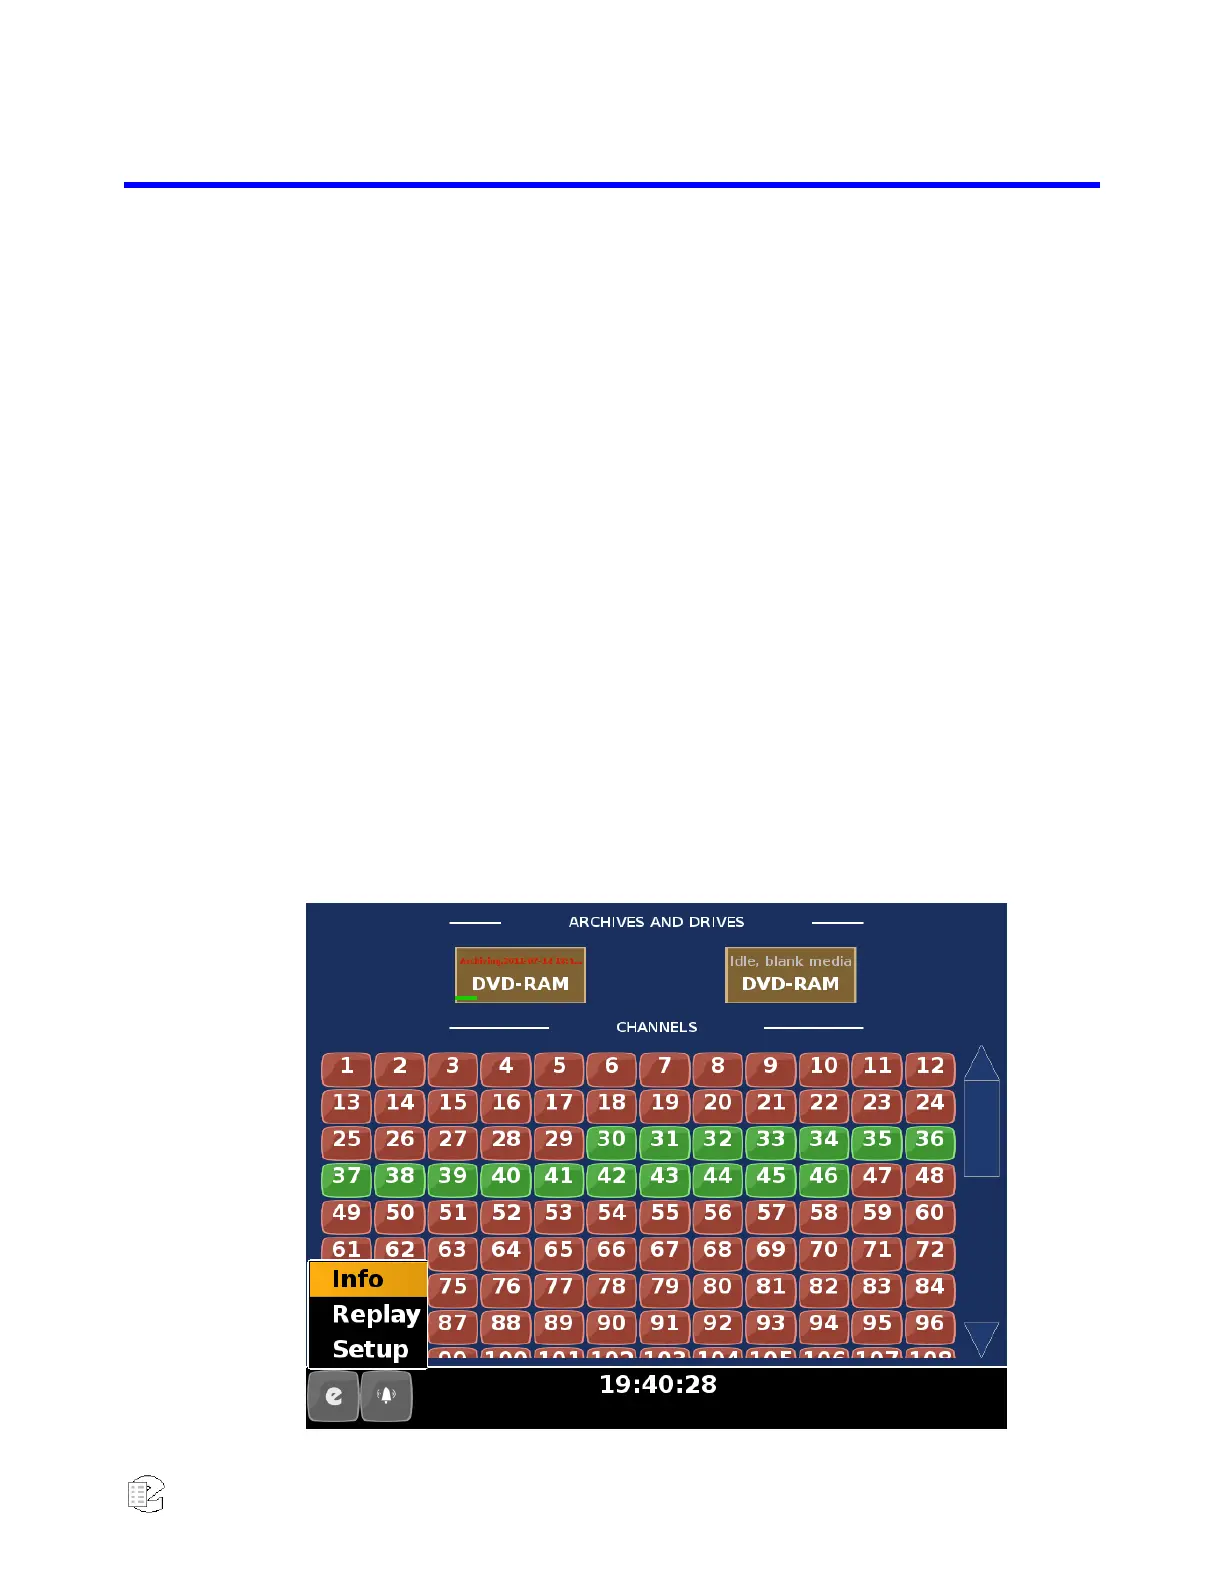
3.1 Front Panel Step by Step Quick Guide
To use the NexLog Front Panel to monitor the logger for recording activity, click
(touch the screen directly or use a connected USB mouse) the Main Menu “e”
button at the lower left corner of the screen, and select "Info". This opens the
Front Panel’s Info screen.
Figure 9—Front Panel Info Screen